Table of Contents
Advertisement
Quick Links
®
PORTFOLIO
and PORTFOLIO & Design
are trademarks or registered trademarks of
LF, LLC. All rights reserved.
Purchase Date
Questions, problems, missing parts? Before returning to your retailer, call our customer
service department at 1-800-643-0067, 8 a.m. - 6 p.m., EST, Monday - Thursday,
8 a.m. - 5 p.m., EST, Friday.
PH18716
TM
ATTACH YOUR RECEIPT HERE
1
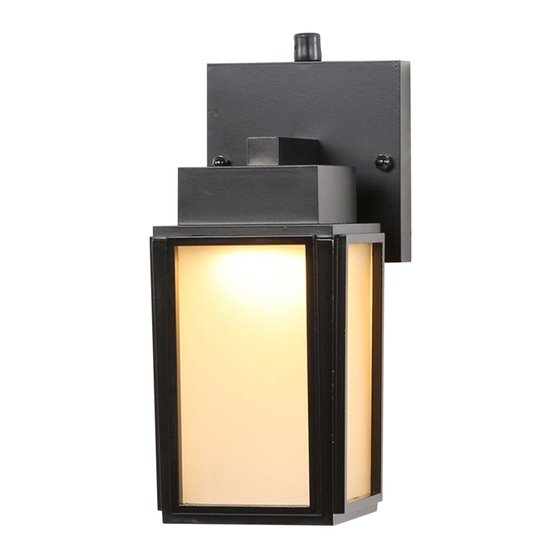
ITEM #1085711
WALL LANTERN
MODEL #WLL103BZ
Français p. 12
Español p. 23
APPROVED FOR USE
IN WET LOCATIONS
1085712
WLL104BZ
Advertisement
Table of Contents

Related Manuals for Portfolio WLL103BZ


Summary of Contents for Portfolio WLL103BZ
- Page 1 ITEM #1085711 1085712 WALL LANTERN ® PORTFOLIO and PORTFOLIO & Design are trademarks or registered trademarks of MODEL #WLL103BZ LF, LLC. All rights reserved. WLL104BZ Français p. 12 Español p. 23 APPROVED FOR USE Purchase Date ATTACH YOUR RECEIPT HERE...
-
Page 2: Table Of Contents
TABLE OF CONTENTS Package Contents .......................3 Hardware Contents .......................... Safety Information ....................... Preparation ......................... Assembly Instructions ......................Operating Instructions ......................Care and Maintenance ...................... Troubleshooting........................Warranty .......................... -
Page 3: Package Contents
PACKAGE CONTENTS PART DESCRIPTION QUANTITY Fixture Mounting Strap (preassembled to fixture (A)) Washer (preassembled to screw (F)) Decorative Nut (preassembled to screw (F)) (preassembled to screw (F)) Screw (preassembled to mounting strap (B)) Sensor (preassembled to fixture (A)) Sensor Cap (preassembled to sensor (G)) HARDWARE CONTENTS (shown actual size) Wire... -
Page 4: Safety Information
SAFETY INFORMATION READ AND SAVE THESE INSTRUCTIONS. DANGER • For your protection and safety, carefully read and understand the information provided in this manual completely before attempting to assemble, install or operate this product. Failure to do so could lead to electrical shock, fire or other injuries that could be hazardous or even fatal. -
Page 5: Preparation
SAFETY INFORMATION • NOTE: This equipment has been tested and found to comply with the limits for a Class B digital device, pursuant to Part 15 of the FCC Rules. These limits are designed to provide reasonable protection against harmful interference in a residential installation. This equipment generates, uses and can radiate radio frequency energy and, if not installed and used in accordance with the instructions, may cause harmful interference to radio communications. -
Page 6: Assembly Instructions
ASSEMBLY INSTRUCTIONS Turn off circuit breakers and wall switch to the fixture supply line leads. DANGER: Failure to disconnect power supply prior to installation may result in serious injury or death. Remove existing fixture and disconnect all electrical wiring. Outlet Box Remove decorative nuts (D) and washers (C) from front of fixture (A) and remove mounting strap (B) from back of fixture (A). - Page 7 ASSEMBLY INSTRUCTIONS Attach mounting strap (B) to outlet box (not included) using the existing washers and outlet box screws or the machine screws (BB). NOTE: If the outlet box screws required for your outlet box are of a different size than the machine screws (BB), consult with a licensed electrician before proceeding.
- Page 8 ASSEMBLY INSTRUCTIONS Unwrap BARE wire from BLACK and WHITE wires on fixture (A). Prepare wire by stripping 3/4 in. of insulation from wire ends using wire strippers (not included). 6b. Connect BARE/GREEN ground wire from outlet box to BARE wire from fixture (A) using wire connector (AA).
- Page 9 ASSEMBLY INSTRUCTIONS Align holes in fixture (A) with screws (F) on mounting strap (B) and push fixture (A) toward wall. Attach fixture (A) to mounting strap (B) using the washers (C) and decorative nuts (D) previously removed (Step 3, page 6). Restore power and test fixture (A).
-
Page 10: Operating Instructions
Do not use an abrasive cleaner on glass or fixture. • Total wattage for WLL103BZ is 7.8 watts. Do not attempt to replace the LED. • Total wattage for WLL104BZ is 10.5 watts. Do not attempt to replace the LED. -
Page 11: Warranty
WARRANTY The distributor warrants all of its lighting fixtures against defects in materials and workmanship for five (5) years from the date of purchase. If within this period the product is found to be defective, take a copy of the bill of sale as a proof of purchase and the product in its original carton to the place of purchase. The distributor will, at its option, repair, replace or refund the purchase price to the consumer.
Need help?
Do you have a question about the WLL103BZ and is the answer not in the manual?
Questions and answers