Table of Contents
Advertisement
Quick Links
Advertisement
Table of Contents

Subscribe to Our Youtube Channel
Related Manuals for EpiValley SEC-7089

Summary of Contents for EpiValley SEC-7089
- Page 1 SEC-7089 User Manual Rev 0.1 EpiValley January 17, 2008...
- Page 2 Revision History Rev 0.1 2008. 01. 16 First issue...
-
Page 3: Table Of Contents
Contents 1. Installation & Setup ........................... 4 2. Getting Started ........................... 6 3. Web ..............................7 4. Voice..............................9 1. Call placing/receiving buttons....................... 9 2. Call placing/receiving display ..................... 10 5. SMS ..............................11 1. Send ............................11 3. Sent ............................14 4. -
Page 4: Installation & Setup
1. Installation & Setup 1. SAM Installation 1.1 Insert the Installation CD to the CD-ROM Drive. If the installation process does not start automatically, run Setup.exe file in the CD-ROM Drive. Select a language and click “OK”. (Do not plug the USB modem in the USB port before you finish installing SAM.) 1.2 To continue installation, click “Next”. - Page 5 1.4 In order to use the modem for the first time, you need to install the device driver. If the device driver is installed, click “OK” and wait until installation process is completed. 1.6 If SAM is installed successfully, click “Finish”. After installation of SAM, plug the modem in the USB port.
-
Page 6: Getting Started
2. Getting Started Plug the modem in the USB port, and select “sam.exe”. Then the following initial window appears. If the modem is not properly plugged in, the following message appears. If UIM is not installed normally in the modem, the following message is displayed. If the system finds the modem, SAM is started as in the following figure. -
Page 7: Web
3. Web To access Internet, click “web”. Click “Add” to create a connection profile or Click “Edit” to edit existing profile. Set the profile for connection. - Page 8 Select a profile from the list, and click “Connect”. If Internet is accessed, “Hybrid Modem Connected” is displayed in the Status bar (bottom of the program window). Rx or Tx status appears, and the Internet connection icon appears in the top right of the program window.
-
Page 9: Voice
4. Voice 1. Call placing/receiving buttons ____________________________________________ 1.1 Enter the phone number with the number pad or the keyboard, and click “Send”. Click “End” to finish the call. 1.2 To receive a call, click “Send”, and to end a call, click “End”. 1.3 You can control the volume using the control button during a call. -
Page 10: Call Placing/Receiving Display
2. Call placing/receiving display _____________________________________________ 2.1 The caller ID of the incoming call is displayed. 2.2 The current call status is displayed. “Incoming call” is displayed if a call is incoming. After connected, the call time is displayed. -
Page 11: Sms
5. SMS 1. Send __________________________________________________________________ 1.1 To send a message, click “SMS”, and select “Send”. 1.2 Write a message, enter the numbers of the receivers one by one, and click “Add”. To delete a number from the list, select the number and click “Del”. - Page 12 1.3 Select “Normal”, “Urgent” or “Emergency” for the priority of the message, and click “Send”. 1.4 To send a message to numbers of users, the window shows the current number of receivers. 1.5 To send a message at the designated date and time, click “Reserved”. Select Year, Month, Day, Hour and Minute, and click “OK”.
- Page 13 2. Inbox 2.1 If a message is incoming, an auto popup message appears, or the tray icon blinks, or the alert is sounded depending on your selection in “Incoming SMS Alert”. The received message is automatically saved in Inbox. To set the “Incoming SMS Alert” option, press the “SMS” tab in the “Settings” menu, and set “Incoming SMS Alert”...
-
Page 14: Sent
3. Sent __________________________________________________________________ 3.1 In the “Sent” menu, the sent messages are sorted by Number, Name, Date and Content. You can identify the location of the messages (PC, UIM or Modem) with the icons. ▶ You can use the following functions with the buttons provided under the list or by right-clicking the mouse button on an entry in the list. -
Page 15: Draft
4. Draft __________________________________________________________________ 4.1 In the “Draft” menu, the failed messages or unsent messages are listed. ▶ You can use the following functions with the buttons provided under the list or by right-clicking the mouse button on an entry in the list. - Delete : The selected messages are deleted from the list. -
Page 16: Spam
5. Spam ________________________________________________________________ 5.1 In the “Spam” menu, the filtered messages containing specific numbers or words are listed. The messages are sorted by Date, Number, and Content. 5.2 You can select the numbers or words you wish to filter as spam message in the “SMS” tab of the “Settings”... -
Page 17: Voice
6. Voice ________________________________________________________________ 6.1 The voice mail messages from BTS are displayed in the “Voice” menu. You can sort the messages by Number, Data and Content. ▶ You can use the following functions by right-clicking the mouse or with the buttons at the bottom of the list. -
Page 18: Address
6. Address 1. List ___________________________________________________________________ 1.1 To save a phone number in the Address book, click “Add” under the phone numbers list. Select the location between “PC”, “Modem” and “UIM”, enter Name, Mobile, Group, Home, Office, FAX, Address, E-mail and Comment, and then, click “OK”. ▶... -
Page 19: Search
2. Search _______________________________________________________________ 2.1 To search an entry in the list, select a field (Name, All no, Mobile, Group, Address, Home, Office, FAX, Email, or Comments) in the top left of the list, enter a name or number, and then, click “Search”. Then, the entries containing the name or number are listed. -
Page 20: Log
7.Log 1. Call Log ______________________________________________________________ 1.1 You can see All Calls, Dialed Numbers, Received Calls and Missed Calls. The number of entries stored in the list is displayed in the right of the window. 1.2 “All Calls” shows Dialed Numbers, Received Calls and Missed Calls which can be identified by the icons. The entries can be sorted by Date, Time and Number. -
Page 21: Internet Log
2. Internet Log ___________________________________________________________ 2.1 If you click “Internet Log” in the Call Log List, you can check the internet logs. “Total” shows the total time used, and Kbytes of the sent data and received data. 2.2 The Internet Log list displays information on Internet usages such as dates, time, Tx and Rx. 2.3 On the top of the Internet Log list are the total log count available and the current log count. -
Page 22: Settings
8.Settings 1. General Settings _______________________________________________________ 4.1 If you select “Auto termination when windows go to power saving mode” in “Windows Settings”. the program is automatically exited when the PC is switched to the power saving mode. If you select “Auto execution when windows start”, the program is automatically started when the Windows is booted. -
Page 23: Sms Settings
2.1 You can select the incoming call alert method. If you select “Blinking Tray Icon”, the tray icon flickers. The notice pops up if you select “Auto Pop-up”, or an alert tone sounds if you select “Sound prompt”. Or, you can select all the options. 2.2 If “1 Min Alert”... -
Page 24: Uim Settings
6. UIM Settings ___________________________________________________________ 6.1 In “Current PIN Code”, enter the current UIM PIN Lock Code. 6.2 If “Pin Lock Option” is “On”, you need to enter the UIM PIN Code. If it is “Off”, you don’t need to enter the PIN Code to access UIM and reset the data. -
Page 25: Information
7.6 If “SMS Lock” is “On”, you need to enter the lock code every time you access the “SMS” menu. 7.7 With “New Lock Code”, you can change the lock code. First, you must enter the current lock code in “Current Lock Code”, enter the new lock code in “New Lock Code”, retype the new lock code in “Confirm Lock Code”, and then, click “Save”. -
Page 26: Internet
9. Internet If you click “Internet”, the Internet browser is started, moving to a specific URL. 10. Email The Email client or the web mail selected by the service provider is started. -
Page 27: Others
2.1 You can select any submenu from the “View” menu on the menu bar. 3. Help __________________________________________________________________ 3.1 You can view description on a function with “Quick Guide”. 3.2 If you select “About”, the SAM version and the Home address of Epivalley are displayed. -
Page 28: Internet Access Status Icon On The Top Right Of The Program Emulator
4. Internet access status icon on the top right of the program emulator ___________ 4.1 The Internet Access Icon is activated if the system is accessed to Internet. If you click the icon, the customer site is displayed. 5. Tray Icon _____________________________________________________________ 5.1 The tray icon indicates if the modem is plugged in. -
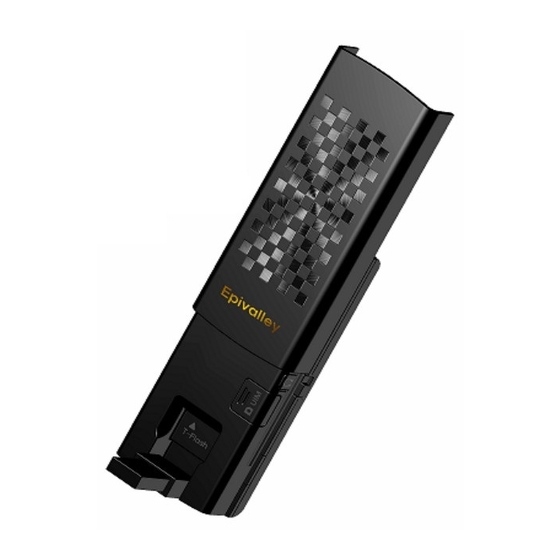
Page 29: Part Of The Usb Modem
12. Part of the USB Modem Move Up : First run to the Auto-installation after run to EVDO Modem. Move Down : Directly Run to EVDO mode. Slide Switch R-UIM Socket T-Flash Socket USB Connector... -
Page 30: Specification
13. Specification Main Operation Chip MSM6800A IS-856A(1xEVDO Rev.A), TIA/EIA/IS-2000, IS-98E, CDMA Standard Backwards compatibility with IS-95 A/B Band Designation 1X/EV-DO Rev.A : 800/1900 MHz Transmit Band 824 ~ 849 MHz / 1850 ~ 1910 MHz Receive Band 869 ~ 894 MHz / 1930 ~ 1990 MHz Data Rate Download: Max 3.1Mbps, Upload: Max 1.8Mbps Support MO &... - Page 31 14. RF EXPOSURE INFORMATION RF EXPOSURE INFORMATION THIS CDMA USB DONGLE MEETS THE GOVERNMENT ’S REQUIREMENTS FOR EXPOSURE TO RADIO WAVES. Your CDMA USB DONGLE is a radio transmitter and receiver. It is designed and manufactured not to exceed the emission limits for exposure to radio frequency (RF) energy set by the Federal Communications Commission of the U.S.Government.
- Page 32 WARNING! Read this information before use Caution Modifications not expressly approved by the party responsible for compliance could void the user’s authority to operate the equipment. FCC Compliance Information This device complies with Part 15 of FCC Rules. Operation is subject to the following two conditions: (1) This device may not cause harmful interference, and (2) This device must accept any interference received.
Need help?
Do you have a question about the SEC-7089 and is the answer not in the manual?
Questions and answers