Table of Contents
Advertisement
Quick Links
Advertisement
Table of Contents

Related Manuals for Raybar LINCE 150


Summary of Contents for Raybar LINCE 150
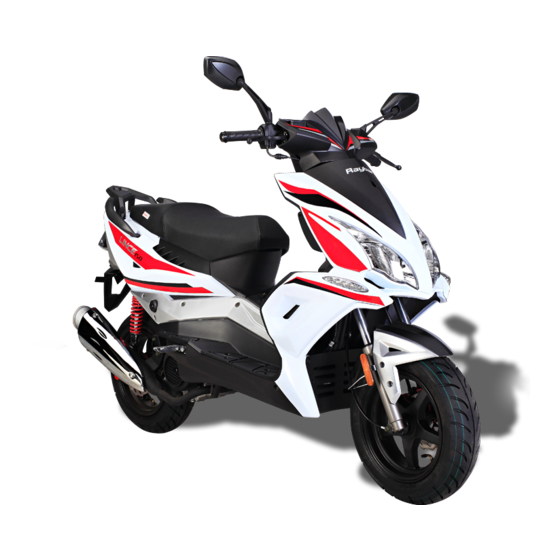
- Page 1 RY-150LC USER manual...
- Page 2 This user manual is guide for you to understand function of various parts, riding operation, maintenance schedule and basic maintenance of your new Raybar motorcycle. Please go through this manual to understand your motorcycle before using it. Please contact your dealer for detailed information about the product and for after sale services.
-
Page 3: Table Of Contents
CONTENTS Motorcycle identification................................01 View and part names Front top view..................................02 Right side view..................................03 Left side view..................................04 Parts function....................................05 Inspection before riding.................................. 10 Starting engine & riding operation..............................11 Maintenance schedule..................................12 General inspection & repair................................13 Technical specification..................................15 Electrical circuit diagram................................. 17... -
Page 4: Motorcycle Identification
MOTORCYCLE IDENTIFICATION Engine Number VIN number Frame number Engine serial number is engraved on Vehicle identification number (VIN) is Frame number is engraved on main crankcase assembly. stamped near main stand. tube of frame. Note - Frame number and engine number is usually required for vehicle registration and insurance purpose. -
Page 5: Front Top View
FRONT TOP VIEW 1. Rear view Mirror Speedometer 2. Left handle bar switches 4. Right handle bar switches 5. Ignition switch... -
Page 6: Right Side View
RIGHT SIDE VIEW 1. Rear grip 6. Head lamp 2. Tail lamp 7. Front fender 3. Rear fender 8. Front suspension 4. Muffler 9. Front tyre 5. Rear tyre... -
Page 7: Left Side View
LEFT SIDE VIEW 1. Indicator 4. Seat 2. Front disc brake 5. Rear wheel 3. Front wheel 6. Side stand 7. Main stand... -
Page 8: Parts Function
PARTS FUNCTION Meters and indicators 1. Odometer – Records accumulated riding distance. 2. Speedometer – Displays riding speed of motorcycle. 3. “ ” High beam indicator – Indicator turns ON when head lamp is in high beam. 4. Turn signal indicator left – Flashes when left turn signal switch is operated. 5. - Page 9 Left handlebar control switches 1. Headlamp dimmer switch- This switch is used to change headlamp position from low beam to high beam or vice versa. 2. Horn switch – Press the switch to operate the horn. 3. Turn signal switch – Operate the switch when turning right or left by pushing the switch towards right or left.
- Page 10 Right handlebar control switches 1. Headlamp switch – (a) “ “ position – The headlamp , front parking light and tail lamp are turned ON. (b) “ “ position – All lamps are turned OFF. (c) “ “ position – Front parking lamp and tail lamp are turned ON. 2.
- Page 11 Fuel filter A fuel filter is a filter in the fuel line that screens out dirt and rust particles from the fuel. From fuel tank, fuel goes to carburettor after passing through fuel filter. Throttle It controls the fuel air mixture flow from carburettor to engine. To increase the speed of the vehicle, rotate throttle in backward direction and to decrease the speed of the vehicle, rotate throttle in forward direction.
- Page 12 Starting lever or Kick This is used to start the engine manually. To start the engine by kick, you need to place your foot on the lever and push it downwards quickly. Front brake lever This is used to apply braking force on front wheels. When you want to stop the vehicle or reduce speed, you need to pull front brake lever towards yourself.
-
Page 13: Inspection Before Riding
Inspection before riding In order to ensure your safety, make a general inspection before riding according to the table given below – Item Inspection Remark Fuel system Check fuel capacity and fuel leakage For the vehicles with different riding miles Check carburettor for fuel leakage and idle speed for stability and proper and performance, please adopt different Carburetor... -
Page 14: Starting Engine & Riding Operation
Starting engine & riding operation Starting Engine - Follow below mentioned steps to start the vehicle: 1. U nlock steering, and turn ignition key to “ON”position. 2. G rip front brake lever or rear brake lever. 3. Press kick downwards powerfully with foot or press electric starter switch with right thumb. -
Page 15: Maintenance Schedule
Maintenance schedule Perform maintenance according to the odometer reading or time interval, whichever comes first. Interval Initial 1000 km Every 4000 km Every 8000 km Miles 2400 4800 Item Months Battery ( Specific gravity of electrolyte ) Cylinder head nuts & exhaust pipe bolts Camshaft drive chain Air cleaner Clean every 3,000km Replace every 12,000km... -
Page 16: General Inspection & Repair
General inspection & repair oil dipstick Check and replacement of engine oil Engine oil level check (1) Stop the engine and park the motorcycle with main stand vertically in flat surface. (2) Wait for one minute and then check the oil level through the engine oil level sight glass. Replacement of engine oil Following procedure needs to be followed to replace oil - (1) Park the motorcycle vertically with main stand in flat surface. - Page 17 General inspection & repair Spark plug Check and replace 1. Disconnect the spark plug cap from the spark plug. 0.6-0.7 mm 2. Clean any dirt from around the spark plug base. Remove the spark plug by using the plug wrench. 3.
-
Page 18: Technical Specification
Technical specification Engine Specification Cooling Air cooled No. of cylinders Type (CG or CB) Balanced or Non balanced Non balanced Displacement/Capacity 150 CC Max. Power 6. 7 kw/7500r/min Max. Torque 9.2N.m/6000r/min Bore x Stroke 57.4x57.8 Compression Ratio 9.5:1 Starting Electric/ Kick start Top speed 95 KM/H Mileage (Litres/100 kms) - Page 19 Technical specification Wheels & Tyres Wheel Size Front 3.5x12 Wheel Size Rear 3.5×12 120/70-12 Tyre Size Front Tyre Size Rear 120/70-12 Tyre Type (Tubeless or with Tube) Tubeless Electrical/Control System Battery MF-12V7AH 12V/35W Head Lamp Head Lamp Type (Normal/LED) Normal Tail/Stop Lamp 12V/3W Tail Lamp Type (Normal/LED)
- Page 20 www.raybarmotorcycles.com /raybarmoto...
-
Page 21: Electrical Circuit Diagram
Electrical circuit diagram (17)