
Related Manuals for Arduino Modular Rev3


Summary of Contents for Arduino Modular Rev3
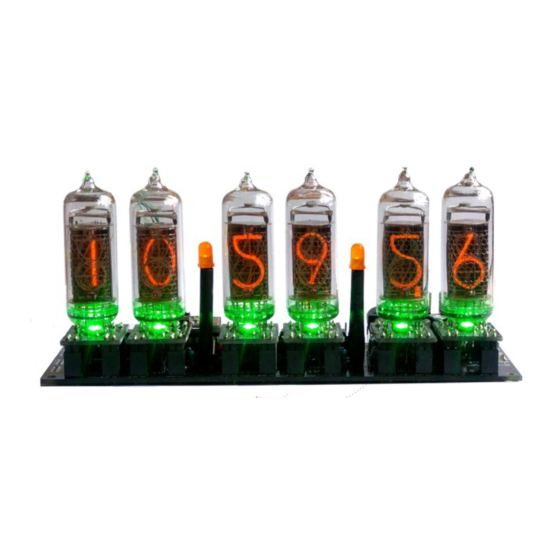
- Page 1 Arduino Nixie Clock “Modular Rev3” Operating Instructions Firmware V348 Supported Models: Modular Revision 3 NixieClockUserManualV348...
-
Page 2: About This Document
We also offer discounts for direct purchases, we save the Ebay fees, and share this with you. http://www.open-rate.com/Store.html There is also a forum for the clocks, where you can find many answers to questions and contact others who are also using the clocks at: https://goo.gl/dQUYWx Which should redirect you to the much longer: https://www.tubeclockdb.com/component/kunena/12-arduino-nixie-clock-kit-support- forum.html... - Page 3 Description The Arduino Nixie Clock is a beautiful mix of old and new, resulting in a high accuracy, low power clock which will be a talking point in your home. The clock has the following features: Latest technology, highly reliable and accurate.
- Page 4 Safety The voltages produced in the High Voltage circuit can reach peaks of 400V! Take precautions not to electrocute yourself! If you are not sure what this means, please do not use this clock and return it for a full refund. A shock from the clock high voltage circuit is at least a nasty bite.
-
Page 5: Time Providers
Time Providers The clocks can use either a battery backed RTC module or a WiFi module. If you install both, the RTC will be used and the WiFi unit will be ignored! WiFi Time Providers By default, the clock is designed to use a WiFi real time provider, which logs into your home WiFi network and periodically retrieves the time from Internet time sources. -
Page 6: Temporary Display Mode
Temporary Display Mode Normally, the clock will show the time. To show additional information press the button with a “short” press. Each press cycles through the following information. After 5 seconds, the display will revert to the normal time display. Mode Description Values... -
Page 7: Setting Mode
Setting Mode To enter setting mode, press the button for more than 1 second (“medium press”). The “RGB back light” LEDs will start to flash white. The number of consecutive flashes indicates the mode you are in. Each medium press of more than 1 second will move the setting mode onto the next. When you finish the setting modes, the clock returns to normal time display mode. - Page 8 Mode Description Values Basic Settings “00” 12 or 24 hour time. The hours are displayed in 12 or 24 “1” = 12 hour flashing hour mode. “0” = 24 hour default: 0 “01” Blank leading “0”. Blank out the leading “0” from single “1”...
- Page 9 Mode Description Values Special Effects Settings “09” Use LDR. If you disable the LDR, the tubes will always work “1” = enable flashing at maximum brightness. “0” = disable default: 1 “10” Blank Mode. You can set the tubes, the LEDs or both the “0”...
- Page 10 Mode Description Values “20” Green Channel Intensity. Sets the maximum intensity of Default: 15 flashing the green channel back light. This will be dimmed according Max: 15 to the display dimming. If you are in cycle mode, this Min: 0 setting will be skipped.
-
Page 12: Display Blanking Mode
Display Blanking Mode During display blanking mode the tubes will be off depending on the display blanking settings, but the LEDs will continue to work as usual, telling you that the clock is still running. You can configure the display to blank at weekends, during week days, always or never (the default). - Page 13 Revisions: V0348: 22Jun2017: Split user manual and construction manual...
Need help?
Do you have a question about the Modular Rev3 and is the answer not in the manual?
Questions and answers