Advertisement
Quick Links
OPERATOR'S MANUAL & PARTS LIST
MODEL – THLCHCM
H-FRAME ELECTRIC CEMENT MIXER
Spares & Support: 01793 333212
Please read & understand this manual, paying particular attention to the safety
instructions, before use.
The manufacturer reserves the right to change the product specification and
livery according to continued product improvements.
193821002
08/07/2015
Advertisement

Related Manuals for The Handy THLCHCM

Summary of Contents for The Handy THLCHCM
- Page 1 OPERATOR’S MANUAL & PARTS LIST MODEL – THLCHCM H-FRAME ELECTRIC CEMENT MIXER Spares & Support: 01793 333212 Please read & understand this manual, paying particular attention to the safety instructions, before use. The manufacturer reserves the right to change the product specification and livery according to continued product improvements.
- Page 3 CONTENTS SPECIFICATIONS SAFETY INSTRUCTIONS OPERATING INSTRUCTIONS MAINTENANCE & STORAGE ASSEMBLY PARTS DIAGRAM & LIST GUARANTEE NOTES...
- Page 4 SPECIFICATIONS Model THLCHCM Product Number 193821002 Motor Power 550 watt Drum Diameter 570mm Drum Opening 385mm Drum Capacity 125 litre Maximum Mixing Capacity 90 litre Drum Speed 26.6rpm Cable Length 1.7 metre Protective System IP45D Overall Dimensions (L)1200mm– (W)710mm – (H)1400mm...
- Page 5 GENERAL SAFETY INSTRUCTIONS Read and understand the owner’s manual and labels affixed to the machine. Learn its application and limitations as well as the specific potential hazards. Retain these instructions for future reference. The operator is responsible for following the warnings & instructions in this manual and on the product.
- Page 6 STAY ALERT Do not operate the mixer while under the influence of drugs, alcohol, or any medication that could affect your ability to use it properly. Do not use this mixer when you are tired or distracted from the job at hand. Be aware of what you are doing at all times.
- Page 7 AVOID INJURY FROM UNEXPECTED ACCIDENT Keep hands out of the way of all moving parts. Do not place any part of your body or any tool e.g. Shovel in the drum during operation. When operating, do not pass hands through the clearance between frame and support arm or between the drum and support arm.
- Page 8 ELECTRICAL CONNECTION Do not connect either core to the earth pin This mixer is double insulated to Class II protection and IP45D rated. The insulation will only remain effective if the original insulating parts are used for repairs and the spaces between the original insulation are maintained.
- Page 9 MAINTENANCE & STORAGE WARNING Improper maintenance & storage of the machine may void your warranty. Keep the machine clean for better and safer performance. MAINTENANCE Before each use, check all nuts & bolts to be sure they are sufficiently tightened. ...
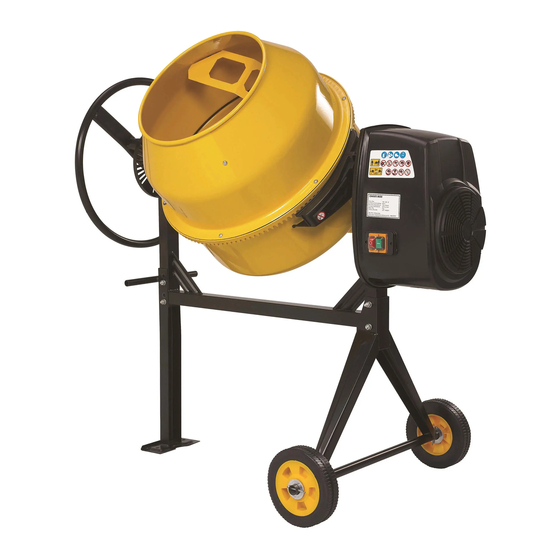
- Page 10 COMPONENTS...
- Page 11 ASSEMBLY It is recommended that The H-Frame Cement Mixer is assembled by two persons. Remove the Mixer and contents from the carton. Be sure the carton is empty before discarding. If you require any assistance with regards to the contents of the Mixer, please contact us: Tel: 01793 333212 - Mon –...
- Page 12 STEP 2 – THE BOTTOM DRUM D - Slide the bearing block on the shaft. Hold it in place with Ø42 spiral ring. Carefully, and with two people, set the bottom drum with support arm onto the side supports of the stand as shown, so that the bearing blocks slot into the channels provided by the side supports.
- Page 13 STEP 4 – THE UPPER DRUM F- Position the upper drum onto the bottom drum over the rim, making sure the mounting holes align in both as well as the labeled arrows. Screw a M8x16 hex bolt with lock and flat washers into each threaded hole in the rim/ring gear. Make sure the tightening process is carried out progressively.
- Page 14 STEP 6 – THE TRANSMISSION I - Lining up the keyways, slide the transmission case over the pinion shaft. Secure the case to the frame with washer & M8 nut.
- Page 15 OPERATION Before operating the machine, please ensure you are fully aware of the below instructions, failure to do so, could invalidate your manufacturer’s warranty. Completely unwind any extension cable. Connect it to the mixer first, before plugging into the power supply.
- Page 16 DRUM LOADING For best results, proceed as follows: Add the required amount of gravel into the drum. Add the required amount of cement into the drum. Add the required amount of sand into the drum. Pour the required amount of water into the drum. DRUM EMPTYING Empty the drum with the drum rotating Do not turn off the mixer with material in the drum.
- Page 17 PARTS DIAGRAM...
- Page 19 PARTS LIST Item Item No Handy Part No. Description Handy Part No. Description TH207-HCM450-1 Screw M8*20 TH207-HCM450-42 Circlip 62 TH207-HCM450-2 Waterproof Washer TH207-HCM450-43 Circlip 30 TH207-HCM450-3 Flat washer 8 TH207-HCM450-44 Bearing 6206 TH207-HCM450-4 Spring Washer 8 TH207-HCM450-45 Drive Pinion TH207-HCM450-5 Nut M8 TH207-HCM450-46 Lock Pin 6*45...
- Page 20 GJ HANDY & CO LTD USER WARRANTY POLICY 1. Users Statement of Warranty Each new machine is warranted against defective material or assembly of material under normal usage. The warranty applies to the original purchaser and covers faulty parts and the labour involved in replacing and repairing those parts, which are of original manufacture.
- Page 21 GJ HANDY & CO LTD USER WARRANTY POLICY 3. Not covered by this warranty The warranty policy does not cover any depreciation or damages caused by ordinary wear, rusting or corrosion, lack of correct maintenance or operation, misuse, abuse, lack of transportation or accident.
- Page 22 EC DECLARATION OF CONFORMITY We, Importer Handy Distribution, Murdock Road, Dorcan, Swindon, SN3 5HY Declare that the product Model: THLCHCM H-FRAME ELECTRIC CEMENT MIXER Complies with the following directives: The Machinery Directive 2006/42/EC The Low Voltage Directive 2006/95/EC Relevant Standard(s), Specification(s) referred to:...
- Page 23 NOTES ______________________________________________________ ______________________________________________________ ______________________________________________________ ______________________________________________________ ______________________________________________________ ______________________________________________________ ______________________________________________________ ______________________________________________________ ______________________________________________________ ______________________________________________________ ______________________________________________________ ______________________________________________________ ______________________________________________________ ______________________________________________________ ______________________________________________________ ______________________________________________________ ______________________________________________________ ______________________________________________________ ______________________________________________________ ______________________________________________________ ______________________________________________________ ______________________________________________________ ______________________________________________________...
- Page 25 To order spare parts and see the complete range of garden machinery and garden equipment from Handy, visit: www.thehandy.co.uk Support Tel: 01793 333212 Mon – Fri 8.00am – 5.30pm (excl. Bank Holidays) Email: customerservice@handydistribution.co.uk This symbol on the product or on its packaging indicates that this product may not be treated as household waste. Instead it shall be handed over to the applicable collection point for the recycling of electrical and electronic equipment.
Need help?
Do you have a question about the THLCHCM and is the answer not in the manual?
Questions and answers