
Related Manuals for ALDI OL 350-L-17


Summary of Contents for ALDI OL 350-L-17
- Page 1 User Manual Manual del usuario 13" ADVANCED THERMAL LAMINATOR PLASTIFICADORA TÉRMICA AVANZADA DE 13" English ..06 Español ..19 ID: #07177...
- Page 2 Try it out now Just scan the QR code with your smartphone and find out more about the ALDI product you have purchased. Your ALDI Service Portal All details mentioned above can also be found in the ALDI Service Portal at www.aldi.us.
-
Page 3: Table Of Contents
Contents Overview ................4 Use ..................5 Package contents/device parts ..........6 General information ............7 Reading and storing the user manual ........7 Explanation of symbols ............7 Safety ...................8 Proper use ................. 8 Safety notes ................8 First use ................12 Checking the laminator and product contents....12 Setting up the laminator ............ -
Page 6: Package Contents/Device Parts
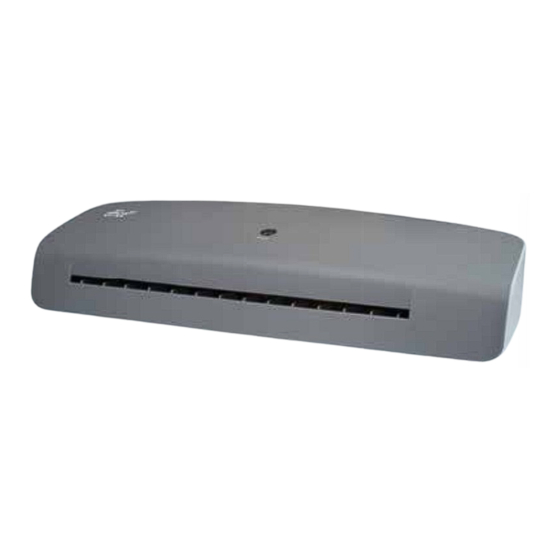
Package contents ⁄ device parts Ready indicator Laminating pouch infeed slot ON / OFF switch ABS switch (antiblocking system) Laminating pouch output slot Laminating pouch (12" × 12" (30.5 × 30.5 cm), 75 mic), 8×... -
Page 7: General Information
General information General information Reading and storing the user manual This user manual accompanies this 13" advanced thermal laminator (hereafter referred to as “laminator”), and contains important information on setup and handling. Before using the laminator, read the user manual carefully. This particularly applies to the safety instructions. -
Page 8: Safety
Safety Safety Proper use The laminator is only designed for laminating. It is only intended for private use and not suitable for commercial purposes. Only use the laminator as described in this user manual. Using it in any other way is deemed improper and may result in damage to property or even personal injury. - Page 9 Safety address indicated on the warranty card. Liability and warranty claims are waived in the event of repairs or conversions performed by the user, improper connection of the device or incorrect operation. − Only parts that comply with the original device data may be used for repairs.
- Page 10 Safety − Always switch the laminator off and pull the power plug out of the socket when you are not using the laminator, cleaning it or in the event of a fault. − Do not modify the plug in any way. The laminator has a polarized plug (one blade is wider than the other).
- Page 11 Safety NOTICE! Risk of damage! Improper handling of the laminator may damage the laminator. − Place the laminator on an easily accessible, level, dry, heat-resistant and sufficiently stable work surface. Do not place the laminator on the edge of the work surface. −...
-
Page 12: First Use
First use − The laminator has vents. Never cover them with other objects such as magazines, blankets or similar. − Never attempt to clean the laminator by immersing it in water and do not use a steam cleaner to clean it. Otherwise, you could damage the laminator. -
Page 13: Activating / Deactivating The Laminator
Operation Activating / deactivating the laminator 1. Move the ON / OFF switch to “ON” ( ) to switch the laminator on. The ready indicator will turn from black to red once the laminator has reached the correct temperature for lamination. The preheating time may vary depending on the ambient tempera ture and air humidity. -
Page 14: Laminating
Operation Laminating to “ON” ( ) (see fig. B). 1. Move the ON / OFF switch The ready indicator will turn from black to red within the next 1 ½–2 minutes. 2. Once the ready indicator is red, place the document between the two sides of the laminating pouch Make sure that the document is flush with and aligned as close as possible to the sealed edge of the laminating pouch. -
Page 15: Cleaning
Cleaning Cleaning WARNING! Burn hazard! The laminator will become hot during operation. You may burn yourself. − Always let the laminator cool off completely before you clean it. NOTICE! Risk of short circuit! Water that has penetrated the housing may cause a short circuit. -
Page 16: Cleaning The Heating Rollers
Storage Cleaning the heating rollers 1. Switch the laminator on by moving the ON / OFF switch to “ON” ( ). 2. Once the ready indicator turns red, fold a sheet of paper and insert it, folded-edge first, into the laminating pouch infeed slot 3. -
Page 17: Technical Data
Technical data Technical data Model: OL 350-L-17 Product code: 95019 Model color: white / grey mat Line voltage: AC 120 V~ / 60 Hz Power consumption: 600 W / 5 A Protection class: II Weight: approx. 3.1 lbs (1.4 kg) Dimensions (W ×... - Page 19 Contenido Contenido Conjunto ....................4 Uso ......................5 Volumen de suministro / piezas del equipo ........20 Códigos QR ................... 21 Generalidades ..................22 Leer y guardar este manual del usuario ........... 22 Descripción de símbolos ..............22 Seguridad .................... 23 Uso apropiado ..................23 Indicaciones de seguridad ..............
-
Page 20: Volumen De Suministro / Piezas Del Equipo
Volumen de suministro / piezas del equipo Volumen de suministro / piezas del equipo Indicador Ready Entrada de las fundas de plastificar Interruptor de encendido / apagado Interruptor ABS (sistema antibloqueo) Salida de las fundas de plastificar Funda de plastificar (12" × 12" (30.5 × 30.5 cm), 75 mic), 8×... -
Page 21: Códigos Qr
Escanee el código QR con su smartphone para averiguar más sobre el producto ALDI que ha comprado. Su portal de servicio de ALDI Todos los datos mencionados también se encuentran en el portal de servicio de ALDI en www.aldi.us. Según la tarifa contratada, se le puede cobrar por la conexión. -
Page 22: Generalidades
Generalidades Generalidades Leer y guardar este manual del usuario Este manual del usuario viene con la plastificadora térmica avanzada de 13" (en adelante, “plastificadora”). Contiene información importante relacionada con la puesta en marcha y el manejo. Lea detenidamente el manual del usuario antes de utilizar la plastificadora, en especial el apartado correspondiente a las indicaciones de seguridad. -
Page 23: Seguridad
Seguridad Utilice la plastificadora sólo en interiores. Seguridad Uso apropiado La plastificadora está ideada únicamente para plastificar. Solo está concebida para uso privado, no para el ámbito industrial. Utilice únicamente la plastificadora de la forma como se describe en el presente manual del usuario. - Page 24 Seguridad − No use la plastificadora si presenta daños visibles o si el cable o enchufe de red están defectuosos. − Si el cable de red de la plastificadora está dañado, debe ser sustituido por el fabricante, el servicio al cliente o una persona con cualificación técnica.
- Page 25 Seguridad − No guarde nunca la plastificadora de forma que pueda caerse en una bañera o en un lavabo. − Nunca agarre la plastificadora si se ha caído al agua. En tal caso, desconecte inmediatamente el enchufe de red. − Procure que los niños no inserten objetos en la plastificadora.
- Page 26 Seguridad − Mantenga alejados a niños menores de ocho años de la plastificadora y del cable de conexión. − Durante su funcionamiento, no deje desatendida la plastificadora ni efectúe otras actividades. − No permita que los niños jueguen con las láminas de embalaje.
- Page 27 Seguridad − Antes de plastificar, no recorte las fundas de plastificar ni corte los bordes sellados de las fundas de plastificar. − No utilice la plastificadora si sus componentes de plástico tienen grietas o fisuras, o se han deformado. Los componentes dañados solo deben sustituirse por piezas de repuesto originales y adecuadas.
-
Page 28: Primera Puesta En Servicio
Primera puesta en servicio Primera puesta en servicio Comprobar la plastificadora y el volumen de suministro ¡AVISO! ¡Riesgo de daños! Si abre el embalaje con un cuchillo afilado o con otros objetos puntiagudos sin tener cuidado, la plastificadora puede dañarse rápidamente. −... -
Page 29: Manejo
Manejo Manejo ¡ADVERTENCIA! ¡Riesgo de lesiones! La manipulación errónea de la plastificadora puede provocar lesiones. − En caso de que un objeto (manga, corbata, etc.) entre sin querer en la entrada de las fundas de plastificar, tire del enchufe de red de inmediato. ¡AVISO! ¡Riesgo de daños! El manejo inapropiado de la plastificadora puede provocar... -
Page 30: Plastificar
Manejo Plastificar 1. Sitúe el interruptor de encendido / apagado en “ON” ( ) (véase la fig. B). El indicador ready cambia de negro a rojo en 1 ½–2 minutos. 2. Cuando el indicador ready esté rojo, introduzca el documento dentro de la funda de plastificar Asegúrese de que el documento quede a ras y lo más cerca posible del borde sellado de la funda de plastificar. -
Page 31: Limpieza
Limpieza Limpieza ¡ADVERTENCIA! ¡Riesgo de quemaduras! La plastificadora se calienta durante su funcionamiento. Puede quemarse. − Antes de cada limpieza, deje que la plastificadora se enfríe por completo. ¡AVISO! ¡Riesgo de cortocircuito! El agua que haya entrado en la carcasa puede provocar un cortocircuito. -
Page 32: Limpiar Los Rodillos Térmicos
Almacenamiento Limpiar los rodillos térmicos 1. Encienda la plastificadora situando el interruptor de encendido / apagado en “ON” ( ). 2. Cuando el indicador ready pase a rojo, doble un folio y métalo con el pliegue por delante en la entrada de las fundas de plastificar 3. -
Page 33: Datos Técnicos
Datos técnicos Datos técnicos Modelo: OL 350-L-17 Número de artículo: 95019 Color del modelo: blanco / gris mate Tensión de red: 120 V~ CA / 60 Hz Consumo eléctrico: 600 W / 5 A Grado de protección: II Peso: approx. 3.1 lbs (1.4 kg) Dimensiones (ancho ×... - Page 34 DISTRIBUTED BY • DISTRIBUIDO POR: ALDI INC., BATAVIA, IL 60510 WWW.ALDI.US AFTER SALES SUPPORT • SERVICIO POSVENTA 95019 1-877-386-8264 (free / sin gastos) www.monolith-support.com YEAR WARRANTY AÑOS DE GARANTÍA MODEL / NO DEL MODELO: OL 350-L-17 10/2017...
Need help?
Do you have a question about the OL 350-L-17 and is the answer not in the manual?
Questions and answers