
Subscribe to Our Youtube Channel
Related Manuals for D-Link DIR-1360


Summary of Contents for D-Link DIR-1360
- Page 1 Version 1.00| 07/20/2018 User Manual AC1300 Mesh-Enabled Smart Wi-Fi Router DIR-1360...
- Page 2 Trademarks D-Link and the D-Link logo are trademarks or registered trademarks of D-Link Corporation or its subsidiaries in the United States or other countries. All other company or product names mentioned herein are trademarks or registered trademarks of their respective companies.
-
Page 3: Table Of Contents
System Admin ..............75 DIR-1360.................21 System ................76 Connected Clients ..............22 Upgrade .................77 Settings ..................23 Statistics .................78 Wizard ..................23 Internet ...................23 Connect a Wireless Client to your Router ......79 IPv6 ..................33 WPS Button ...................79 VLAN ...................53 Windows® 10 ................80 D-Link DIR-1360 User Manual... - Page 4 Wireless Basics ..............98 What is Wireless? .................99 Tips ....................101 Wireless Modes ................. 102 Networking Basics ............103 Check your IP address ............103 Wireless Security ............104 What is WPA? ..............104 Technical Specifications ..........105 Regulatory Statements ..........106 D-Link DIR-1360 User Manual...
-
Page 5: Product Overview
If any of the above items are missing or damaged, please contact your local reseller. Note: Using a power supply with a different voltage rating than the one included with the DIR-1360 will cause damage and void the warranty for this product. -
Page 6: System Requirements
• Chrome 28 or higher Windows Users: Make sure you have Javascript enabled. ® • iPhone®/iPad® Android™ smartphone or tablet. (Please refer Wi-Fi App Requirements to the mobile app's store page to check whether your device is compatible) D-Link DIR-1360 User Manual... -
Page 7: Introduction
Equipped with a Gigabit WAN/Internet port and four Gigabit LAN ports to provide wired speeds of up to 10 times faster than standard 10/100 ports, the DIR-1360 lets you experience networking at its best – no matter if you're using wireless or wired Ethernet. -
Page 8: Features
• IPv6 Support - The DIR-1360 fully supports IPv6 and includes support for a variety of IPv6 connection types including: SLAAC/DHCPv6, 6to4, 6rd, Static IPv6, IPv6 PPPoE, IPv6 in IPv4 tunneling, and local connectivity. -
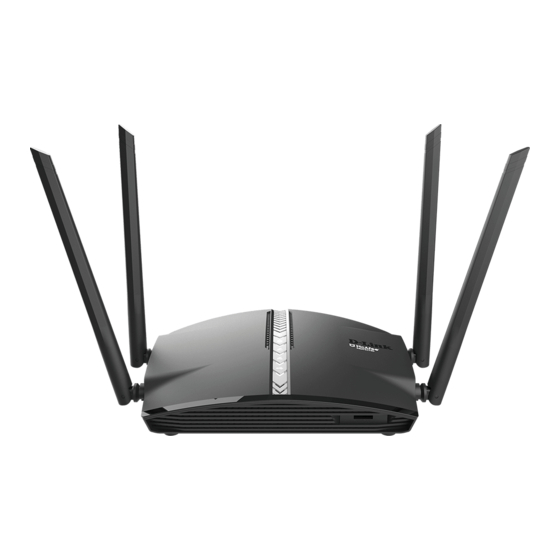
Page 9: Hardware Overview
A solid blue light indicates that the 2.4 GHz wireless band is enabled. Wireless (5 GHz LED) A solid blue light indicates that the 5 GHz wireless band is enabled. USB 3.0 Port Connect a USB storage device to share files over the network. D-Link DIR-1360 User Manual... -
Page 10: Back Panel
Press to start the WPS process and automatically create an encrypted connection to a WPS client. Power Connector Connect the supplied power adapter here. Power Button Press the power button to power the device on or off. D-Link DIR-1360 User Manual... -
Page 11: Installation
Section 3 - Installation Installation This section will walk you through the installation of the DIR-1360. Before you Begin • Placement of the router is very important. Do not place the router in an enclosed area such as a closet, cabinet, attic, or garage. -
Page 12: Wireless Installation Considerations
• Keep the number of walls and ceilings between the D-Link router and other network devices to a minimum - each wall or ceiling can reduce your adapter’s range from 3-90 feet (1-30 meters.) Position your devices so that the number of walls or ceilings is minimized. -
Page 13: Hardware Setup
Section 3 - Installation Hardware Setup 1. The DIR-1360 is designed to give you the fastest, most stable network connection possible. In order to maximize performance, fully extend the antennas into a 105-degree angle (middle notch) to provide optimal wireless coverage. - Page 14 6. Connect the supplied power adapter to the router and a power outlet, press the power button, and wait approximately one minute until the LED indicator on the front of the device changes from orange to solid blue. DIR-1360 Modem D-Link DIR-1360 User Manual...
- Page 15 Section 3 - Installation 7. If you are configuring the DIR-1360 wirelessly from a PC, connect to a Wi-Fi network printed on the included Wi-Fi Configuration Card. You can also find the Wi-Fi network names and passwords printed on the label attached to the bottom your router.
-
Page 16: Completing Setup
• D-Link Setup Wizard - This wizard will launch when you log into the router for the first time. Refer to Setup Wizard on page 13. • D-Link Wi-Fi App - Use your Android™ device, iPhone™ or IPad™ to configure your router. Refer to D-Link Wi-Fi App on page 17. -
Page 17: Setup Wizard
(default: http://192.168.0.1). The wizard is designed to guide you through a step-by-step process to configure your new D-Link router and connect to the Internet. Click Next to continue. Please wait while your router detects your Internet connection type. If the router detects your Internet connection, you may need to enter your ISP information such as username and password. - Page 18 Note: Make sure to remove your PPPoE software from your computer. The software is no longer needed and will not work through a router. If the router detected or you selected Static, enter the IP and DNS settings supplied by your ISP. Click Next to continue. D-Link DIR-1360 User Manual...
- Page 19 Click Next to continue. Note: The DIR-1360's Smart Connect feature presents a single wireless network. When connecting clients to an extension network, they will be automatically added to the best band, either 2.4 GHz or 5 GHz. To disable the Smart Connect feature and individually configure 2.4 GHz and 5 GHz networks, refer to Wireless on page 54.
- Page 20 Back to make changes. At the end of the wizard, you will be presented with a final summary of your settings. Click Finish to close the wizard. Congratulations, your device has been successfully configured! D-Link DIR-1360 User Manual...
-
Page 21: D-Link Wi-Fi App
Note: The screenshots may be different depending on your mobile device’s OS version. The following steps show the Android interface of the D-Link Wi-Fi app. If you are using an iOS device, the appearance may be different from that of the screenshots, but the process is the same. - Page 22 "Others" then tap NEXT. Step 5 You will now be guided through a step-by-step process for setting up your device. Simply follow the on-screen instructions to complete the installation and DIR-1360 configuration process. D-Link DIR-1360 User Manual...
-
Page 23: Configuration
The bar at the top of the page has quick access to Settings and Management functions. You may quickly jump back Home at any time. Note: The system will automatically log out after a period of inactivity. D-Link DIR-1360 User Manual... -
Page 24: Home
Internet icon. Click IPv4 or IPv6 to see details of the IPv4 connection and IPv6 connection respectively. Click Release IP Address to disconnect from the Internet. If you do this and wish to reconnect, click Renew. To reconfigure the Internet settings, refer to Internet on page 23. D-Link DIR-1360 User Manual... -
Page 25: Dir-1360
Section 4 - Configuration DIR-1360 Click on the DIR-1360 icon to view details about the router and its wireless settings. Here you can see the router’s current Wi-Fi network name and password, as well as the router's MAC address, IPv4 address, and IPv6 address. -
Page 26: Connected Clients
Displays the current IP address of this client. Reserve IP: Enable to reserve this IP address for this client. IP Address Specify an IP address for the DIR-1360's DHCP server to assign. (Reserved): Parental Control: Allow or Block access to the router. -
Page 27: Settings
For PPPoE refer to page 26. For PPTP refer to page 28. For L2TP refer to page 30. For DS-Lite refer to page 32. To configure an IPv6 connection, click the IPv6 link. Refer to page 33. D-Link DIR-1360 User Manual... - Page 28 The default MAC address is set to the Internet port’s physical interface Clone: MAC address on the router. You can use the drop-down menu to replace the Internet port’s MAC address with the MAC address of a connected client. Click Save when you are done. D-Link DIR-1360 User Manual...
- Page 29 The default MAC address is set to the Internet port’s physical interface Clone: MAC address on the router. You can use the drop-down menu to replace the Internet port’s MAC address with the MAC address of a connected client. Click Save when you are done. D-Link DIR-1360 User Manual...
- Page 30 Secondary DNS Enter the secondary DNS server IP address assigned by your ISP. Server: MTU: Maximum Transmission Unit - you may need to change the MTU for optimal performance with your ISP. The recommended setting is Auto. D-Link DIR-1360 User Manual...
- Page 31 The default MAC address is set to the Internet port’s physical interface Clone: MAC address on the router. You can use the drop-down menu to replace the Internet port’s MAC address with the MAC address of a connected client. Click Save when you are done. D-Link DIR-1360 User Manual...
- Page 32 Secondary DNS Enter the secondary DNS server IP address assigned by your ISP. Server: MTU: Maximum Transmission Unit - you may need to change the MTU for optimal performance with your ISP. The recommended setting is Auto. D-Link DIR-1360 User Manual...
- Page 33 Enter the secondary DNS server IP address assigned by your ISP. Server: MTU: Maximum Transmission Unit - you may need to change the MTU for optimal performance with your ISP. The recommended setting is Auto. Click Save when you are done. D-Link DIR-1360 User Manual...
- Page 34 Secondary DNS Enter the secondary DNS server IP address assigned by your ISP. Server: MTU: Maximum Transmission Unit - you may need to change the MTU for optimal performance with your ISP. The recommended setting is Auto. D-Link DIR-1360 User Manual...
- Page 35 Enter the secondary DNS server IP address assigned by your ISP. Server: MTU: Maximum Transmission Unit - you may need to change the MTU for optimal performance with your ISP. The recommended setting is Auto. Click Save when you are done. D-Link DIR-1360 User Manual...
- Page 36 Enter the B4 IPv4 address value used here. WAN IPv6 Once connected, the WAN IPv6 address will be displayed here. Address: IPv6 WAN Default Once connected, the IPv6 WAN default gateway address will be Gateway: displayed here. Click Save when you are done. D-Link DIR-1360 User Manual...
-
Page 37: Ipv6
For PPPoE refer to page 41. For IPv6 in IPv4 Tunnel refer to page 45. For 6 to 4 refer to page 48. For 6rd refer to page 50. For Local Connectivity Only refer to page 52. D-Link DIR-1360 User Manual... - Page 38 Displays the router’s LAN link-local address. Local Address: If Enable DHCP-PD is disabled, these additional parameters are available for configuration: LAN IPv6 Address: Enter a valid LAN IPv6 address. LAN IPv6 Link- Displays the router’s LAN link-local address. Local Address: D-Link DIR-1360 User Manual...
- Page 39 IPv6 Address Enter the starting IPv6 address for the DHCP server’s IPv6 assignment. Range (Start): IPv6 Address Enter the ending IPv6 address for the DHCP server’s IPv6 assignment. Range (End): Click Save when you are done. D-Link DIR-1360 User Manual...
- Page 40 Advanced Settings - Address Autoconfiguration Settings Enable Automatic Enable or disable the Automatic IPv6 Address Assignment feature. IPv6 Address Assignment: Autoconfiguration Select SLAAC+RDNSS, SLAAC+Stateless DHCP, or Stateful DHCPv6. Type: Router Enter the router advertisement lifetime (in minutes). Advertisement Lifetime: D-Link DIR-1360 User Manual...
- Page 41 IPv6 Address Enter the starting IPv6 address for the DHCP server’s IPv6 assignment. Range (Start): IPv6 Address Enter the ending IPv6 address for the DHCP server’s IPv6 assignment. Range (End): Click Save when you are done. D-Link DIR-1360 User Manual...
- Page 42 Displays the router’s LAN link-local address. Local Address: If Enable DHCP-PD is disabled, these additional parameters are available for configuration: LAN IPv6 Address: Enter a valid LAN IPv6 address. LAN IPv6 Link- Displays the router’s LAN link-local address. Local Address: D-Link DIR-1360 User Manual...
- Page 43 If you selected Stateful DHCPv6 as the Autoconfiguration Type: IPv6 Address Enter the starting IPv6 address for the DHCP server’s IPv6 assignment. Range (Start): IPv6 Address Enter the ending IPv6 address for the DHCP server’s IPv6 assignment. Range (End): D-Link DIR-1360 User Manual...
- Page 44 Enter the starting IPv6 address for the DHCP server’s IPv6 assignment. Range (Start): IPv6 Address Enter the ending IPv6 address for the DHCP server’s IPv6 assignment. Range (End): IPv6 Address Enter the IPv6 address lifetime (in minutes). Lifetime: Click Save when you are done. D-Link DIR-1360 User Manual...
- Page 45 Address Mode: Service Name: Enter the ISP service name (optional). Select either Always On or Manual. Reconnect Mode: MTU: Maximum Transmission Unit - you may need to change the MTU for optimal performance with your ISP. D-Link DIR-1360 User Manual...
- Page 46 LAN IPv6 Address Settings Enable DHCP-PD: Enable or disable prefix delegation services. This option is only available if you selected Dynamic IP for address mode. LAN IPv6 Link- Displays the router’s LAN link-local address. Local Address: D-Link DIR-1360 User Manual...
- Page 47 /63. Contact your ISP for more information. Autoconfiguration Select SLAAC+RDNSS, SLAAC+Stateless DHCP, or Stateful DHCPv6. Type: If you selected SLAAC+RDNSS or SLAAC+Stateless DHCP as the Autoconfiguration Type: Router Enter the router advertisement lifetime (in minutes). Advertisement Lifetime: D-Link DIR-1360 User Manual...
- Page 48 Enter the starting IPv6 address for the DHCP server’s IPv6 assignment. Range (Start): IPv6 Address Enter the ending IPv6 address for the DHCP server’s IPv6 assignment. Range (End): IPv6 Address Enter the IPv6 address lifetime (in minutes). Lifetime: Click Save when you are done. D-Link DIR-1360 User Manual...
- Page 49 Select either Obtain DNS server address automatically or Use the DNS Type: following DNS address. If Use the following DNS address is selected: Primary DNS Enter the primary DNS server address. Server: Secondary DNS Enter the secondary DNS server address. Server: D-Link DIR-1360 User Manual...
- Page 50 LAN interface. Note: This feature requires a smaller subnet prefix than /64 (i.e. allowing for a larger address allocation), such as /63. Contact your ISP for more information. Autoconfiguration Select SLAAC+RDNSS, SLAAC+Stateless DHCP, or Stateful DHCPv6. Type: D-Link DIR-1360 User Manual...
- Page 51 Enter the starting IPv6 address for the DHCP server’s IPv6 assignment. Range (Start): IPv6 Address Enter the ending IPv6 address for the DHCP server’s IPv6 assignment. Range (End): IPv6 Address Enter the IPv6 address lifetime (in minutes). Lifetime: Click Save when you are done. D-Link DIR-1360 User Manual...
- Page 52 Secondary DNS Enter the secondary DNS server address. Server: LAN IPv6 Address Settings LAN IPv6 Address: Enter the LAN (local) IPv6 address for the router. LAN IPv6 Link- Displays the router’s LAN link-local address. Local Address: D-Link DIR-1360 User Manual...
- Page 53 Enter the starting IPv6 address for the DHCP server’s IPv6 assignment. Range (Start): IPv6 Address Enter the ending IPv6 address for the DHCP server’s IPv6 assignment. Range (End): IPv6 Address Enter the IPv6 address lifetime (in minutes). Lifetime: Click Save when you are done. D-Link DIR-1360 User Manual...
- Page 54 Enter the 6rd border relay IPv4 address settings supplied by your ISP. IPv4 Address: LAN IPv6 Address Settings LAN IPv6 Address: Displays the router’s LAN IPv6 Address link-local address. LAN IPv6 Link- Displays the router’s LAN link-local address. Local Address: D-Link DIR-1360 User Manual...
- Page 55 Enter the starting IPv6 address for the DHCP server’s IPv6 assignment. Range (Start): IPv6 Address Enter the ending IPv6 address for the DHCP server’s IPv6 assignment. Range (End): IPv6 Address Enter the IPv6 address lifetime (in minutes). Lifetime: Click Save when you are done. D-Link DIR-1360 User Manual...
- Page 56 If you selected Enable ULA and disabled Default ULA Prefix: ULA Prefix: Enter your own ULA prefix. Current IPv6 ULA Settings Current ULA Displays the current ULA prefix. Prefix: LAN IPv6 ULA: Displays the LAN's IPv6 ULA. Click Save when you are done. D-Link DIR-1360 User Manual...
-
Page 57: Vlan
From the drop-down menu, you can select the type of connection Guest Zone: (Internet, IPTV, or Voice over IP) coming from the WAN connection to each interface on the DIR-1360. Click Save when you are done. D-Link DIR-1360 User Manual... -
Page 58: Wireless
WPS-PBC Status: Enable or disable WPS-PBC (Push Button Configuration) fuctionality. WPS-PIN Status: Enable or disable WPS-PIN fuctionality. Refer to the next page if you wish to disable Smart Connect or click Save when you are done. D-Link DIR-1360 User Manual... - Page 59 Select Auto 20/40/80 if you are using 802.11ac, 802.11n, and 802.11a (5 GHz): devices, select Auto 20/40 if you are using 802.11n and 802.11a devices, or select 20 MHz if you are only using 802.11a devices. D-Link DIR-1360 User Manual...
- Page 60 The easiest way to connect your wireless devices to the router is with Wi-Fi Protected Setup (WPS). Using WPS-PIN disabled by default due to security vulnerabilities. WPS-PBC Status: Enable or disable WPS-PBC (Push Button Configuration) functionality. WPS-PIN Status: Enable or disable WPS-PIN functionality. Click Save when you are done. D-Link DIR-1360 User Manual...
-
Page 61: Guest Zone
Create a password to use for wireless security. Home Network Access Internet Access Enabling this option will confine connectivity to the Internet, Only: preventing guests from accessing other local network devices. Click Save when you are done. D-Link DIR-1360 User Manual... -
Page 62: Network
Local Domain Enter the domain name (optional). Name: Enable DNS Relay: Disable to transfer the DNS server information from your ISP to your computers. If enabled, your computers will use the router for a DNS server. D-Link DIR-1360 User Manual... - Page 63 Enable to allow IPv4 multicast traffic to pass through the router from Stream: the Internet. IPv6 Multicast Enable to allow IPv6 multicast traffic to pass through the router from Stream: the Internet. Click Save when you are done. D-Link DIR-1360 User Manual...
-
Page 64: Features
If you want to remove a priority assignment from a device and return it to the All Devices list, click the cross icon in the top right of the device card. Click Save when you are done. D-Link DIR-1360 User Manual... -
Page 65: Firewall
Enable Anti-Spoof Enable this feature to help protect your network from certain kinds Checking: of “spoofing” attacks. IPv6 Simple Enable or disable IPv6 simple security. Security: IPv6 Ingress Enable or disable IPv6 ingress filtering. Filtering: D-Link DIR-1360 User Manual... - Page 66 NAT devices and work around them. This ALG may interfere with the operation of such devices. If you are having trouble making VoIP calls, try turning this ALG off. Click Save when you are done. D-Link DIR-1360 User Manual...
-
Page 67: Ipv4/Ipv6 Rules
The schedule may be set to Always Enable, or you can create your own schedules in the Schedules section. Refer to Refer to Schedule on page 72 for more information. Click Save when you are done. D-Link DIR-1360 User Manual... -
Page 68: Port Forwarding
The schedule may be set to Always Enable, or you can create your own schedules in the Schedules section. Refer to Schedule on page 72 for more information. Click Save when you are done. D-Link DIR-1360 User Manual... -
Page 69: Virtual Server
The schedule may be set to Always Enable, or you can create your own schedules in the Schedules section. Refer to Schedule on page 72 for more information. Click Save when you are done. D-Link DIR-1360 User Manual... -
Page 70: Website Filter
If you wish to remove a rule, click on the corresponding trash can icon in the Delete column. If you wish to edit a rule, simply replace the URL or domain. Click Save when you are done. D-Link DIR-1360 User Manual... -
Page 71: Static Routes
Enter a route metric value ranging from 0 to 15. This value indicates the cost of using this route. Interface: Select the interface that the IP packet must use to transit out of the router when this route is used. Click Save when you are done. D-Link DIR-1360 User Manual... -
Page 72: Ipv6
Enter a route metric value ranging from 0 to 15. This value indicates the cost of using this route. Interface: Select the interface that the IP packet must use to transit out of the router when this route is used. Click Save when you are done. D-Link DIR-1360 User Manual... -
Page 73: Dynamic Dns
Enter a time out time (in hours). Click Save when you are done. At the bottom of the page are the IPv6 host settings. To configure an IPv6 dynamic DNS host, refer to IPv6 Host on page 70. D-Link DIR-1360 User Manual... -
Page 74: Ipv6 Host
Enter the host name that you registered with your dynamic DNS service provider. IPv6 Address: Enter the IPv6 address of the dynamic DNS server. Alternatively, select the server device in the drop-down menu. Click Save when you are done. D-Link DIR-1360 User Manual... -
Page 75: Management
Click Save when you are done. To configure and manage your schedules, click Schedule and refer to Schedule on page 72. D-Link DIR-1360 User Manual... -
Page 76: Schedule
You can add multiple days to the schedule. To remove a time period from the schedule, click on the X icon. Click Save when you are done. D-Link DIR-1360 User Manual... -
Page 77: System Log
From E-mail Enter the email address your SysLog messages will be sent from. Address: To E-mail Address: Enter the email address your SysLog messages will be sent to. SMTP Server Enter your SMTP server address. Address: D-Link DIR-1360 User Manual... - Page 78 The schedule may be set to Always Enable, or you can create your own schedules in the Schedules section. Refer to Schedule on page 72 for more information. Click Save when you are done. D-Link DIR-1360 User Manual...
-
Page 79: System Admin
Internet by a web browser. A password is still required to access the web management interface. Remote Admin The port number used to access the DIR-1360 is used in the URL. Example: Port: http://x.x.x.x:8080 where x.x.x.x is the WAN IP address of the DIR-1360 and 8080 is the port used for the web management interface. -
Page 80: System
Device: Auto Reboot: You may set the DIR-1360 to automatically reboot at a set time. The options are Never, Daily, Weekly. You may set the hour using a 24 hour format, the minute, and the day you wish to have the DIR-1360 automatically reboot. -
Page 81: Upgrade
If you wish to upgrade manually, first download the firmware file you wish to upgrade to. Next, click the Upgrade Firmware button and browse to Firmware: the file to install the new firmware. You can also browse to a language pack file to install a new language pack. D-Link DIR-1360 User Manual... -
Page 82: Statistics
You can view the Internet, LAN, Wi-Fi 2.4 GHz, or Wi-Fi 5 GHz by clicking on the respective tabs at the top. The graph will update in real time. To clear the information on the graph, click Clear. The traffic counter will reset if the device is rebooted. D-Link DIR-1360 User Manual... -
Page 83: Connect A Wireless Client To Your Router
Blu-ray DVD players, wireless printers and cameras will have a WPS button (or a software utility with WPS) that you can press to connect to the DIR-1360 router. Please refer to your user manual for the wireless device you want to connect to make sure you understand how to enable WPS. -
Page 84: Windows® 10
Windows® 10 When connecting to the DIR-1360 wirelessly for the first time, you will need to input the wireless network name (SSID) and Wi-Fi password (security key) of the device you are connecting to. If your product has a Wi-Fi configuration card, you can find the default network name and Wi-Fi password here. - Page 85 Your computer will now automatically connect to this wireless network when it is detected. You can also use Wi-Fi Protected Setup (WPS) to connect to the router. Press the WPS button on your D-Link device and you will be automatically connected. D-Link DIR-1360 User Manual...
-
Page 86: Windows® 8
Wireless Icon Clicking on this icon will display a list of wireless networks that are within connecting proximity of your computer. Select the desired network by clicking on the network name. D-Link DIR-1360 User Manual... - Page 87 WPS button on your router during this step to enable the WPS function. When you have established a successful connection to a wireless network, the word Connected will appear next to the name of the network to which you are connected to. D-Link DIR-1360 User Manual...
-
Page 88: Windows® 7
If you are joining an existing network, you will need to know the security key or passphrase being used. Click on the wireless icon in your system tray (lower-right corner). Wireless Icon The utility will display any available wireless networks in your area. D-Link DIR-1360 User Manual... - Page 89 If you get a good signal but cannot access the Internet, check your TCP/IP settings for your wireless adapter. Refer to the Networking Basics section in this manual for more information. The following window appears while your computer tries to connect to the router. D-Link DIR-1360 User Manual...
- Page 90 It may take 20-30 seconds to connect to the wireless network. If the connection fails, please verify that the security settings are correct. The key or passphrase must be exactly the same as the one on the wireless router. D-Link DIR-1360 User Manual...
-
Page 91: Wps
Section 6- Connecting a Wireless Client The WPS feature of the DIR-1360 can be configured using Windows® 7. Carry out the following steps to use Windows® 7 to configure the WPS feature: Click the Start button and select Computer from the Start menu. - Page 92 Section 6- Connecting a Wireless Client Double-click the DIR-1360. DIR-1360 Input the WPS PIN number (on the router label) in the Setup > Wireless Setup menu in the Router’s Web UI) and click Next. D-Link DIR-1360 User Manual...
- Page 93 Section 6- Connecting a Wireless Client Type a name to identify the network. To configure advanced settings, click the icon. Click Next to continue. D-Link DIR-1360 User Manual...
- Page 94 The following window appears while the DIR-1360 is being configured. Wait for the configuration to complete. The following window informs you that WPS on the DIR-1360 has been set up successfully. Make a note of the security key as you may need to provide this security key if adding an older wireless device to the network in the future.
-
Page 95: Windows Vista
(displayed using the SSID) and click the Connect button. If you get a good signal but cannot access the Internet, check you TCP/IP settings for your wireless adapter. Refer to the Networking Basics section in this manual for more information. D-Link DIR-1360 User Manual... -
Page 96: Wpa/Wpa2
Open the Windows Vista® Wireless Utility by right-clicking on the wireless computer icon in your system tray (lower right corner of screen). Select Connect to a network. Highlight the Wi-Fi name (SSID) you would like to connect to and click Connect. D-Link DIR-1360 User Manual... - Page 97 It may take 20-30 seconds to connect to the wireless network. If the connection fails, please verify that the security settings are correct. The key or passphrase must be exactly the same as the one on the wireless router. D-Link DIR-1360 User Manual...
-
Page 98: Troubleshooting
1. Why can’t I access the web-based configuration utility? When entering the IP address of the D-Link router (192.168.0.1 for example), you are not connecting to a website, nor do you have to be connected to the Internet. The device has the utility built-in to a ROM chip in the device itself. Your computer must be on the same IP subnet to connect to the web-based utility. - Page 99 • Close your web browser (if open) and open it. • Access the web management. Open your web browser and enter the IP address of your D-Link router in the address bar. This should open the login page for your web management.
- Page 100 • Windows® 95, 98, and Me users type in command (Windows® NT, 2000, XP, Vista®, and 7 users type in cmd) and press Enter (or click OK). • Once the window opens, you’ll need to do a special ping. Use the following syntax: ping [url] [-f] [-l] [MTU value] Example: ping yahoo.com -f -l 1472 D-Link DIR-1360 User Manual...
- Page 101 • To change the MTU, enter the number in the MTU field and click Save Settings to save your settings. • Test your email. If changing the MTU does not resolve the problem, continue changing the MTU in increments of ten. D-Link DIR-1360 User Manual...
-
Page 102: Wireless Basics
D-Link wireless products are based on industry standards to provide easy-to-use and compatible high-speed wireless connectivity within your home, business, or public access wireless networks. Strictly adhering to the IEEE standard, the D-Link wireless family of products will allow you to securely access the data you want, when, and where you want it. You will be able to enjoy the freedom that wireless networking delivers. -
Page 103: What Is Wireless
Why D-Link Wireless? D-Link is the worldwide leader and award winning designer, developer, and manufacturer of networking products. D-Link delivers the performance you need at a price you can afford. D-Link has all the products you need to build your network. - Page 104 Who uses wireless? Wireless technology as become so popular in recent years that almost everyone is using it, whether it’s for home, office, business, D-Link has a wireless solution for it. Home Uses/Benefits • Gives everyone at home broadband access •...
-
Page 105: Tips
The wireless connection in public places is usually called “hotspots”. Using a D-Link USB adapter with your laptop, you can access the hotspot to connect to the Internet from remote locations like: airports, hotels, coffee shops, libraries, restaurants, and convention centers. -
Page 106: Wireless Modes
• Ad-hoc – Directly connecting to another computer for peer-to-peer communication using wireless network adapters on each computer, such as two or more DIR-1360 wireless network USB adapters. An Infrastructure network contains an access point or wireless router. All the wireless devices, or clients, will connect to the wireless router or access point. -
Page 107: Networking Basics
Check your IP address After you install your new D-Link adapter, by default, the TCP/IP settings should be set to obtain an IP address from a DHCP server (i.e. wireless router) automatically. To verify your IP address, please follow the steps below. -
Page 108: Wireless Security
Appendix B - Networking Basics Wireless Security This section will show you the different levels of security you can use to protect your data from intruders. The DIR-1360 offers the following types of security: • WPA2 (Wi-Fi Protected Access 2) •... -
Page 109: Technical Specifications
Environmental factors will adversely affect wireless signal range. 2 Frequency Range varies depending on country’s regulation. 3 The DIR-1360 does not include 5.25-5.35 GHz & 5.47-5.725 GHz in some regions. D-Link DIR-1360 User Manual... -
Page 110: Regulatory Statements
Appendix D - Regulatory Information Regulatory Statements NCC 警語 : 以下警語適用台灣地區 依據 低功率電波輻射性電機管理辦法 第十二條: 經型式認證合格之低功率射頻電機,非經許可,公司、商號或使用者均不得擅自變更頻率、加大功率或變 更原設計之特性及功能。 第十四條: 低功率射頻電機之使用不得影響飛航安全及干擾合法通信;經發現有干擾現象時,應立即停用,並改善至 無干擾時方得繼續使用。前項合法通信,指依電信法規定作業之無線電通信。低功率射頻電機須忍受合法通信或工 業、科學及醫療用電波輻射性電機設備之干擾。 無線傳輸設備 (UNII) 在 5.25-5.35 秭赫頻帶內操作之無線資訊傳輸設備,限於室內使用。無線資訊傳輸設備忍受合法通信之干擾且不得干 擾合法通信;如造成干擾,應立即停用,俟無干擾之虞,始得繼續使用。無線資訊傳設備的製造廠商應確保頻率穩定 性,如依製造廠商使用手冊上所述正常操作,發射的信號應維持於操作頻帶中。 電磁波曝露量MPE標準值(MPE) 1 mW/cm ,送測產品實值為 0 mW/cm D-Link DIR-1360 User Manual...
Need help?
Do you have a question about the DIR-1360 and is the answer not in the manual?
Questions and answers