Advertisement
Quick Links
Advertisement

Subscribe to Our Youtube Channel
Related Manuals for Profoon PM-778


Summary of Contents for Profoon PM-778
- Page 1 PM-778 User’s Manual...
- Page 3 To be able to make full use of this phone, a SIM card must be inserted (not includ- ed). Without this SIM card, most functions of this phone are unavailable or settings are not saved. This manual assumes you’ve already installed the SIM card according to the installation guide.
- Page 4 1 CONCEPTS Provider: ‘Provider’ is another name for ‘Telephone Company’. The documentation accompanying the SIM card and/or the SIM card itself will show through which provider you’re calling. SIM card: A SIM (‘Subscriber Identity Module’) is a small card containing a chip. The phone number is programmed in this chip and it also allows you to store several numbers and messages, so you can take this infor-...
- Page 5 SIM-LOCK-free: This phone is SIM-LOCK-FREE. This means the phone is not bound to SIM cards of a certain provider, allowing you to choose any desired telephone company. PIN code / PUK code: Each SIM can be secured using a PIN. This PIN code helps you to prevent unau- thorised persons from using your phone.
- Page 6 Prepaid or subscription: Prepaid or subscription determines how you pay for your phone bill. In short: using the prepaid option, you’re paying before- hand, in the case of a subscription, you’re paying afterwards. This payment method is linked to your SIM. Ask the help desk of your provider about all of your options.
-
Page 7: Important Safety Information
2 IMPORTANT SAFETY INFORMATION 2.1 Important Not complying with this manual can lead to serious personal injury and damage to the device. Carefully read all instructions, especially the safety information, before using the product and keep the user’s manual in a safe place. When passing this product over to a third party, please also include this manual. - Page 8 2.2 Warnings The following warnings must be complied with to reduce the risk of injury to the user and others. • Different countries can have different regulations regarding the use of mobile phones (e.g. while driving, in hospi- tals, near fuel stations or in airplanes). Always comply with your national laws regarding the use of mobile phones.
- Page 9 Only use the original adaptor and bat- tery supplied by the manufacturer. Us- ing an unsuitable or incorrectly installed battery causes a risk of explosion. • Never disassemble the battery nor ex- pose it to open fire. • The functioning of medical equipment can be affected.
- Page 10 • This phone is not a toy; keep it out of reach of (small) children. • The battery contains poisonous sub- stances. Make sure children do not remove the battery from the phone and put it into their mouth. • A SIM card is a small item. Make sure children do not remove it from the phone and swallow it.
- Page 11 • Avoid extremely high and low tempera- tures. For example, do not leave the phone in a car exposed to direct sun- light. • The phone may only be opened to change the battery or SIM card. Modifi- cation of this device is forbidden. In any case, this will cause you to lose your user licence and warranty.
- Page 12 2.3 Contents of the packaging • Mobile phone • Battery • Power adaptor • User’s manual • Starting guide 2.4 Instructions regarding discarding: • Packaging can be reused or recycled for raw materials. Discard of packaging you no longer use according to local regulations.
- Page 13 ment-friendly processing, regardless of the device containing hazardous substances or not. • Remove the battery before you discard this device (see para- graph 4.3). Do not discard of batteries with normal household waste, but bring them to a collection point for small chemical waste or to a shop selling batteries.
-
Page 14: Description Of Functions
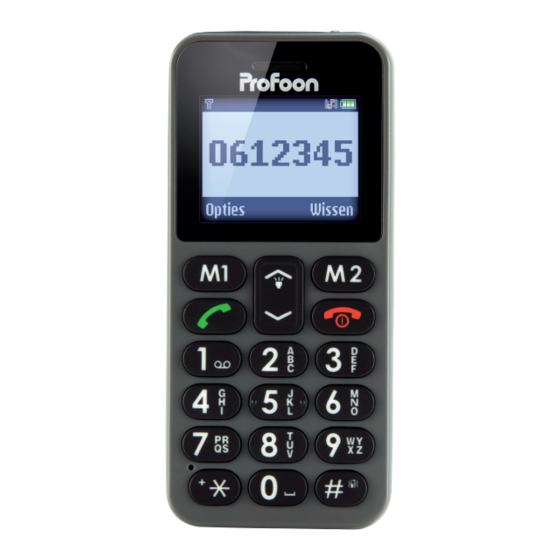
3 DESCRIPTION OF FUNCTIONS 3.1 Phone PQRS WXYZ 1. Speaker for conversations 2. Display (see chapter 3.3) 3. Microphone 4. SOS button 5 Rear cover 112.5mm * 52.4mm * 13.7mm ECT: G96 6. Recharge input for the power adaptor (Micro USB) - Page 15 PQRS WXYZ SIZE: 112.5mm * 52.4mm * 13.7mm PROJECT: G96...
- Page 16 3.2 Touch-buttons Call button: To accept incoming calls or call numbers. In standby mode: Opens the call log. Left soft-button / M1 button: This button performs the function shown above the button in the dis- PQRS WXYZ play. In stand-by: dials the number programmed as M1 (press and hold) Power/end button:...
- Page 17 Right soft-button / M2 button: This button performs the func- tion shown above the button in the display. In stand-by: dials the number programmed as M2 (press and hold) SOS button: Press and hold this button at any moment for 3 seconds to start WXYZ the alarm mode (if enabled).
- Page 18 PQRS WXYZ * button (asterisk): During a call: ‘Asterisk’ button for teleservices. During number input: Press twice for the international code (+) to call numbers abroad. Press three times for a short call pause. WXYZ # button (pound sign): During a call: ‘pound’ button for teleservices.
- Page 19 3.3 Display symbols Signal strength indication. Indicates you’re connected to a network other than your provider’s network. Battery indication. The alarm function is enabled. Indicates that the melody function for incoming calls is enabled. Indicates that the vibration function for incoming calls is enabled. Indicates that the melody and vibra- tion functions for incoming calls are enabled.
- Page 20 4 BATTERY 4.1 Charging Attention! Only use the included battery. Using other models could cause damage to the phone which is not covered by the war- ranty conditions. Never charge the phone with the back cover of the phone removed. Always connect the adaptor with the phone before putting the adaptor into a 230V wall socket.
- Page 21 4.2 Operating time A fully charged battery kept in a good state offers a standby time of up to 350 hours and a call time of up to 3 hours. When this time shortens considerably, it’s time to re- place the battery. The operating time depends on the provid- er (when far away from the radio tower, the phone consumes more transmission pow-...
- Page 22 4.3 Battery replacement If your battery needs replacing, please turn off the phone and remove the back cover. You can use your nail to lift up the battery and take it out of the phone. Discard the old battery in an environ- ment-friendly way by bringing it to a collec- tion point for small chemical waste.
-
Page 23: Operation
5 OPERATION 5.1 Turning the phone on/off: Turning on: Press and hold the power/end button for 3 seconds to turn on the phone. If required, enter the PIN code of your SIM card and press the button or [OK] soft-but- ton. - Page 24 5.3 Speed-dial memories Press and hold the soft-buttons (M1, M2) to dial the programmed number directly, see chapter 11.3 on how to program these numbers. 5.4 Calling from the phonebook In standby mode, press the right soft-but- ton (Contacts). Select the desired number using the direc- tion buttons.
- Page 25 Press the call button to call the number. 5.7 Call volume During a conversation, use the direction buttons to adjust the volume; the display will indicate the set volume level. 5.8 Functions during calls During a conversation, you can use the soft-buttons for the following functions: Right button: Hands-free: During a conversation, press the right...
- Page 26 Left button: Options: Hold / Retrieve: During a conversation, select this option to put the call on hold. You can resume the call again via the same menu. Phonebook: Opens the phonebook with contact names and numbers during a call. Call log: Opens an overview of dialled and received calls during a conversation.
- Page 27 DTMF: Use this option to turn the key tones on or off, where services are managed using option menus. End call: Use the power/end button to end a call at any time and return to the home screen. 5.9 Open menu In standby mode, press the [Menu] soft-button to open the menu.
-
Page 28: Phonebook Menu Structure
6 PHONEBOOK You can store names and phone numbers in the internal memory of the phone or in your SIM card. The phonebook memory of this phone has a capacity for 300 names with numbers. The capacity of your SIM card depends on the card itself. - Page 29 6.2 Add contact Use the [Add new contact] option to add a new contact. First, choose a save location [To SIM or To Phone]. You can then use the direction buttons to edit the name or number. Use the keypad to enter the number and a name.
- Page 30 additional medical information. It’s important for these numbers to be eas- ily located and to be put at the top of the phonebook. For this reason, the following applies to the contact name corresponding to these numbers: 0 + X + Name Where X is a number between 1 and 9.
- Page 31 6.3 Settings The Settings menu allows you to adjust various settings. Memory status: Shows how much memory is in use and how much is left. Speed-dialling: This option allows you to program speed-dial numbers for the 2-9 buttons. When this function is enabled, you can press and hold the corresponding numeric button to call this number directly.
- Page 32 6.4 Contact Choose a contact that’s already been saved for the following options: Tone: View the information entered for this contact. Call: Call this contact. Add to M1-M2: Here you can program numbers for the M1 and M2 buttons. When programmed, this number will be dialled di- rectly when you press and hold one of these buttons for at least 3 seconds.
-
Page 33: Messages Menu Structure
7 MESSAGES SMS stands for Short Message Service. This phone is provided with an internal memory for 100 standard SMS messages. 7.1 Messages menu structure Messages Write message Send to Save Advanced Inbox Reply Call sender Forward Delete Delete all Advanced Save to Phonebook Details... - Page 34 Delete all Advanced Details Broadcast messages Receive mode Channel settings Languages Read messages Settings Save sent messages Pref. storage Voicemail 7.2 Write message Use the keypad to compose your message. While composing the message, you can press the # button to switch between capital letters, lower-case letters, capital starting let- ters and numbers;...
- Page 35 7.3 Read message (Inbox) As soon as you receive a new SMS mes- sage, the SMS ringtone will sound while the SMS icon appears. Press the [View] soft-button to read the new SMS message directly or press the [Stop] soft-button to go back to the home screen. You’ll find all received messages in the In- box.
- Page 36 • Delete all: Delete all messages • Advanced: Use the number of the sender. • Save to phonebook: Choose to save the message on the SIM card or in the phone. • Details: More information about the message. 7.4 Outgoing messages (Outbox, Drafts and Sent Messages) In Outbox, all messages are saved that could not be sent or were delayed.
- Page 37 You can use this phone to enable or disable the reception of CM messages using the option ‘reception mode’ . You can also setup different subjects and choose different recep- tion languages. 7.6 Settings • Save sent:This option allows you to en- able or disable the saving of successfully sent messages.
- Page 38 8 CALLS Information about recent calls is automatically saved in the phone (received, dialled and missed calls). 8.1 Call history menu structure Call history Missed View Dialled Call Received Send SMS All calls Save to Phonebook Add to M1-M2 Add to blacklist Edit before call Delete Clear all...
- Page 39 calls, under ‘Received’ all received calls are saved and under ‘All calls’ all different call types are saved together (Missed, Outgo- ing and Received). Use the [Options] soft-button to perfom var- ious actions for the items mentioned above: • View: View the details of the call •...
- Page 40 9 RADIO Use this function to listen to FM radio stations. Use the # and buttons to increase or decrease the radio volume. Use the up and down buttons to change the reception frequency. When channels are already set, you can select these directly using the correspond- ing numeric button.
-
Page 41: Alarm Clock
Auto search: This allows you to have the phone save all frequencies receiving a radio signal in the channel list. 10 ALARM CLOCK You can use this function to set up to five alarm times. You can choose to have the alarm sound once or daily and you can also setup the snooze mode and set the alarm. -
Page 42: Settings Menu Structure
11 SETTINGS In this menu, you can customize the entire phone according to your preferences: 11.1 Settings menu structure Settings Time and date Time & Date Format M1-M2 Number Settings Numbers Siren Call delay Send SMS Sound Activate Customize Reset Language Display Wallpaper... - Page 43 11.2 Time and date Use this menu to set the current time and date and to determine in which format these must be displayed. 11.3 M1-M2 Here you can program the M1 and M2 buttons. 11.4 SOS button In the menu ‘SOS key’, you can customize the SOS function, to adjust the SOS text message and to program up to 5 numbers that must be dialled when the SOS function...
- Page 44 again to adjust this number. Siren: Use this option to enable or disable the alarm tone. This alarm sound can alert people around you in case of an emergency. Call delay: Determine how long it must take before the first SOS number is dialled. Send SMS: Use this option to enable or disable sending SMS messages to the SOS call list.
- Page 45 SOS operation: In case of an emergency, press and hold the SOS button for 3 sec- onds. Pay attention not to press this button by accident. Press the Power/End button to cancel the SOS mode. SOS operating principle: When you activate the alarm mode, the following will happen: 1.
- Page 46 4. The second (up to the fifth) number will be dialled, provided these numbers are preset. 5. The entire process will be repeated start- ing with step 3. Keep in mind that you can cancel the SOS mode at any time be pushing the power/ end button.
- Page 47 must be emitted for incoming calls. • Ringtone volume: Determine how loud the call tone must be. • Message: Determine which notification tone must be emitted for incoming text messages. • Keypad: Use this option to determine whether a click sound or a key tone must be emitted when pressing buttons.
- Page 48 11.8 Security Determine whether the phone must request codes to prevent unauthorised use. You can also customize these codes. SIM lock / PIN: The SIM lock (or PIN) is a code protecting your SIM card against unauthorised use. When asked for the PIN code and you don’t know it, you can find it in the docu- mentation accompanying your SIM card.
- Page 49 Phone code / password: In addition to securing the SIM card, you can also lock the phone itself with a code, preventing anybody from viewing your phone’s information by using a different SIM card. The default phone password is ‘1122’ 11.9 Call Call waiting: Determine whether you allow a second call to be received while...
- Page 50 Call barring: Determine in which situations both outgoing and incoming calls must not be allowed. Answer mode: Determine whether incoming calls can be answered using only the call button or any random button. 11.10 Network Determine whether the network must be searched for automatically or the network you want to log into must be chosen manually.
- Page 51 12 TOOLS Here you’ll find various useful functions in- cluding a calculator, calendar, alarm clock, to-do-list, unit converter, currency converter and stopwatch. 12.1 Tools menu structure Tools Calendar View View all Add event Delete event Jump to date Go to today Go to weekly/monthly view Calculator 12.2 Calendar...
- Page 52 • Add event: Add a new task to the list. • Delete event: To delete the selected task. • Go to date: Use the keypad or the up/ down button to enter which date must be displayed. • Go to today: Shows the date of today. •...
-
Page 53: Remote Setting
13 REMOTE SETTING You can also use SMS messages from a different phone to program memories for the SOS or M1/M2 in this phone. Setsos1:<number> Use this to set the first SOS number and the number called with the small button on the left. -
Page 54: Specifications
14 SPECIFICATIONS Network: GSM900 / DSC1800 SAR: 0,617W/kg / <0,147W/kg Dimensions: 112 x 52 x 14 mm Accu: Li-Ion, 3.7V 900mAh Standby time: up to 350 hours (depending on network) Call time: up to 3 hours (depending on how the phone is setup and used) Weight: 75g (incl. - Page 56 Service Help WWW.PROFOON.COM SERVICE@PROFOON.NL Hesdo, Australiëlaan 1 5232 BB, ‘s-Hertogenbosch The Netherlands Service WWW.PROFOON.COM SERVICE@PROFOON.NL Help Hesdo, Australiëlaan 1, 5232 BB, The Netherlands ‘s-Hertogenbosch, 0700 V1.0...
Need help?
Do you have a question about the PM-778 and is the answer not in the manual?
Questions and answers