
Related Manuals for Keystone KSTAD706PB


Summary of Contents for Keystone KSTAD706PB
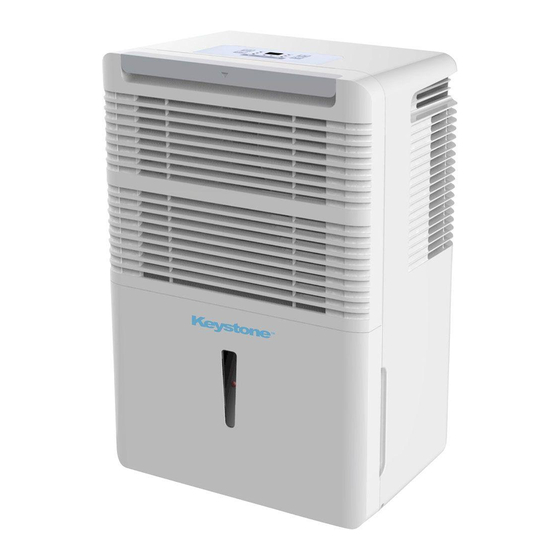
- Page 1 Model: KSTAD706PB Before operating this product, please read the instructions carefully and save this manual for future use.
- Page 3 Producto...
- Page 4 1 866 646 4332 1 866 646 4332...
- Page 5 SOCIABLE REMARK When using this dehumidifier in the European countries, the following information must be followed: DISPOSAL: Do not dispose this product as unsorted municipal waste. Collection of such waste separately for special treatment is necessary. It is prohibited to dispose of this appliance in domestic household waste. For disposal, there are several possibilities: A) The municipality has established collection systems, where electronic waste can be disposed of at least free of charge to the user.
-
Page 6: Table Of Contents
CONTENTS SAFETY PRECAUTIONS Warning ............................2 Caution ............................2 Electrical information ........................3 CONTROL PADS ON THE DEHUMIDIFIER Control pads............................4 Other features..........................5 IDENTIFICATION OF PARTS Identification of parts ........................6 Positioning the unit .........................7 OPERATING THE UNIT When using the unit ........................7 Removing the collected water ......................8 CARE AND MAINTENANCE Care and cleaning of the dehumidifier ...................10 TROUBLESHOOTING TIPS... -
Page 7: Safety Precautions
SAFETY PRECAUTIONS To prevent injury to the user or other people and property damage, the following instructions must be followed. Incorrect operation due to ignoring of instructions may cause harm or damage. The seriousness is classified by the following indications. WARNING This symbol indicates the possibility of death or serious injury. -
Page 8: Electrical Information
SAFETY PRECAUTIONS CAUTION Do not cover the intake or Care should be taken when Do not use in areas using the unit in a room with exhaust openings with where chemicals are the following persons: handled. cloths or towels. This will cause the unit A lack of air flow can lead Infants, children, elderly people, deterioration due to... -
Page 9: Control Pads On The Dehumidifier
CONTROL PADS ON THE DEHUMIDIFIER NOTE: The control panel of the unit you purchased may be slightly different according to the models. Clean filter High fan indicator light indicator light Filter Turbo Filter Continuous operation on Bucket full Full Cont. indicator light indicator light Auto defrost... -
Page 10: Other Features
CONTROL PADS ON THE DEHUMIDIFIER Timer Pad E3- Unit malfunction-- Unplug the unit and plug it back in. If Press to initiate the Auto start and Auto stop feature, error repeats, call for service. in conjuction with the pads. Eb- Bucket is removed or not in right position-- Replace the bucket in the right position. -
Page 11: Identification Of Parts
IDENTIFICATION OF PARTS Identification of parts Front Control panel Air intake grille Air outlet grille Air filter (behind the grille) Water bucket Handle (both sides) Fig.2 Rear Continuous drain hose outlet Caster Power Cord and plug Band(Used only when storing the unit.) Pump drain hose outlet NOTE: All the pictures in the manual are Fig.3... -
Page 12: Positioning The Unit
OPERATING THE UNIT Positioning the unit A dehumidifier operating in a basement will have little or no effect in drying an adjacent enclosed storage area, such as a closet, unless there is adequate circulation of air in and out of the area. Do not use outdoors. -
Page 13: Removing The Collected Water
OPERATING THE UNIT Removing the collected water 1. Pull out the bucket a little. There are three ways to remove collected water. 1. Use the bucket When the unit is off,if the bucket is full, the Full indicator light will light. When the unit is on,if the bucket is full, the compressor and the fan turn off, and the Full indicator light will light, Fig.5... - Page 14 OPERATING THE UNIT Removing the collected water Place the end of the hose into the drain and make sure the end of the hose is level or down to let the water flow smoothly. Water hose Do never let it up. Place the bucket back in the unit and make sure that it is located correctly.
-
Page 15: Care And Maintenance
CARE AND MAINTENANCE Care and cleaning of the dehumidifier Turn the dehumidifier off and remove the plug from the wall outlet before cleaning. 1. Clean the Grille and Case Use water and a mild detergent. Do not use bleach or abrasives. Do not splash water directly onto the main unit. -
Page 16: Troubleshooting Tips
TROUBLESHOOTING TIPS Before calling for service, review the chart below first yourself. Problem What to check Make sure the dehumidifier s plug is pushed completely into the outlet. Unit does not start Check the house fuse/circuit breaker box. Dehumidifier has reached its preset level or bucket is full. Water bucket is not in the proper position. - Page 18 DESHUMEDECEDOR MANUAL DE INSTRUCCIÓN Modelo: KSTAD706PB Para un funcionamiento eficaz, por favor lea las instrucciones cuidadosamente y guárdelas en un lugar seguro para referencia futura.
- Page 19 OBSERVACIÓN SOCIABLE Al usar este deshumidificador en los países europeos, hay que observar la siguiente información: ELIMINACIÓN DE DESECHOS: No deseche este producto como un residuo urbano no seleccionado. Se necesita recoger dichos residuos por separado para un tratamiento especial. Se prohíbe desechar este aparato en la basura doméstica interna.
- Page 20 CONTENIDOS INSTRUCCIONES DE SEGURIDAD Advertencia ............................2 Precaución .............................2 Información eléctrica ........................3 TECLAS DE CONTROL DEL DESHUMIDIFICADOR Teclas de control ..........................4 Otras características ........................5 IDENTIFICACIÓN DE PIEZAS Identificación de las partes ......................6 Posicionamiento de la unidad ......................7 PUESTA EN FUNCIONEMIENTO DE LA UNIDAD Unidad en uso..........................7 Eliminación del agua recolectada ....................8 CUIDADO Y MANTENIMIENTO...
-
Page 21: Advertencia
INSTRUCCIONES DE SEGURIDAD Para prevenir lesiones al usuario u otras personas y daños a la propiedad, siga las siguientes instrucciones. El uso incorrecto debido al incumplimiento de las instrucciones puede causar lesiones o daños. En las siguientes indicaciones se clasifica la gravedad. ADVERTENCIA Este símbolo indica la posibilidad de muerte o lesión grave. -
Page 22: Información Eléctrica
INSTRUCCIONES DE SEGURIDAD PRECAUCIÓN No cubra las aperturas de Se debe tener cuidado cuando No lo utilice en áreas se utilice la unidad en una entrada o salida con donde se manipulen habitación con las siguientes trapos o toallas. químicos. personas: Esto deteriorará... -
Page 23: Teclas De Control Del Deshumidificador
TECLAS DE CONTROL DEL DESHUMIDIFICADOR NOTA: El panel de control de la unidad que adquirió puede ser sutilmente diferente de acuerdo con los modelos. Limpie la luz del Luz indicadora de indicador del filtro ventilador alto Filtr Turb Filtr Ventilador Luz indicadora de funcionamiento Luz indicadora de... -
Page 24: Otras Características
TECLAS DE CONTROL DEL DESHUMIDIFICADOR Tecla TEMP P2- El recipiente está lleno -- Vacíe el recipiente. Presione para iniciar la característica Encendido E3- Funcionamiento defectuoso de la unidad—Desenchufe la automática y Apagado automático,en conjunto con unidad y vuelva a enchufarla. Si el error se repite, llame a las teclas un especialista. -
Page 25: Identificación De Piezas
IDENTIFICACIÓN DE PIEZAS Identificación de piezas Parte delantera Panel de control Rejilla para entrada de aire Rejilla para salida de aire Filtro de aire (detrás de la rejilla) Recipiente para agua Manija (ambos lados) Fig.2 Parte trasera Salida de manguera de drenaje continuo Yeso Cable y enchufe Banda (solo cuando se... - Page 26 OPERACIÓN DE LA UNIDAD Ubicación de la unidad Un deshumificador que funciona en un sótano no tendrá efecto o será pequeño en secar un área de almacenamiento adyacente continua, tal como un armario, a menos que exista una circulación de aire adecuada dentro y fuera del área. No utilice exteriores.
- Page 27 OPERACIÓN DE LA UNIDAD Retirar el agua recolectada 1. Retire el recipiente un poco. Existen tres maneras para retirar el agua recolectada. 1. Utilice el recipiente Cuando la unidad está apagada, si el recipiente está lleno, se iluminará la luz del indicador lleno. Cuando la unidad está...
- Page 28 OPERACIÓN DE LA UNIDAD Retirar el agua recolectada Posicione el extremo de la manguera en el drenaje y asegúrese que esté al mismo nivel o por debajo para permitir que el agua Manguera para gua fluya. Nunca permita que suba. Posicione el recipiente de nuevo en la unidad y asegúrese que la ubicación sea la correcta.
- Page 29 CUIDADO Y MANTENIMIENTO Con cuidado limpie el deshumificador Apague el deshumificador y desenchúfelo antes de la limpieza. 1. Limpie la rejilla y la carcasa Utilice agua y detergente suave. No utilice cloro o abrasivos. No salpique agua directamente dentro de la unidad principal. Hacerlo puede causar descarga eléctrica, deterioro en el aislante u óxido en la unidad.
- Page 30 CONSEJOS PARA SOLUCIONAR PROBLEMAS Antes de llamar al servicio técnico, revise la siguiente tabla. Problema A revisar Asegúrese de que el enchufe del deshumificador se encuentre por completo dentro de La unidad no arranca en la salida. Revise la caja de fusibles/caja de interruptores. El deshumificador ha alcanzo el nivel presente o el recipiente está...
- Page 33 El diseño y las especificaciones están sujetas a cambio sin previo aviso por mejoras en el producto. Consulte a la agencia de ventas o fabricante para obtener más detalles. CD023IU-K(SB) 16120100000054 20150916...
Need help?
Do you have a question about the KSTAD706PB and is the answer not in the manual?
Questions and answers
How can I get a replacement drain hose adapter for KSTAD706PB Dehumidifier.