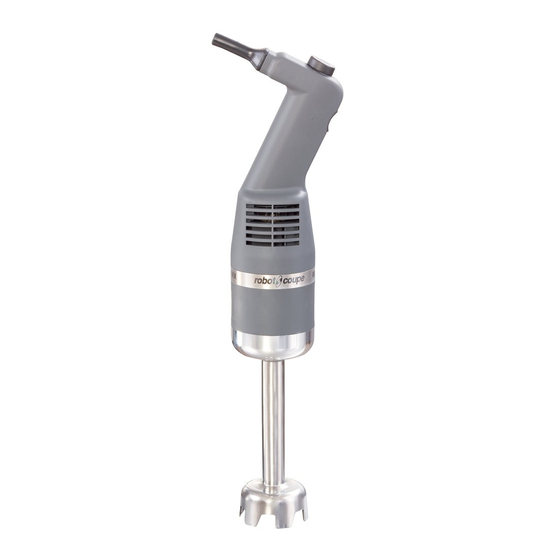
Robot Coupe Mini MP 160 V.V. Operating Instructions Manual
Hide thumbs
Also See for Mini MP 160 V.V.:
- Operating instructions manual (25 pages) ,
- Manual (25 pages) ,
- Quick start manual (15 pages)
Table of Contents
Advertisement
Available languages
Available languages
Advertisement
Chapters
Table of Contents

Related Manuals for Robot Coupe Mini MP 160 V.V.


Summary of Contents for Robot Coupe Mini MP 160 V.V.
- Page 1 Mini MP 160 V.V. Mini MP 190 V.V. Mini MP 240 V.V. Mini MP 190 ombi Mini MP 240 ombi P.O. Box 16625, Jackson, MS 39236-6625 264 South Perkins St., Ridgeland, MS 39157 e-mail: robocoup@misnet.com - website: www.robotcoupeusa.com - Phone : 1-800-824-1646...
- Page 2 IMPORTANT WARNING W A R N I N G KEEP THESE INSTRUCTIONS IN A SAFE PLACE In order to prevent accidents such as electrical shock, personal injury, fire, and in order to limit property/product damage when using your power mixer, follow the instructions hereafter very carefully and strictly adhere to them. This manual should be kept nearby for reference and should be read by all first time users of the power mixer.
- Page 3 OPERATING INSTRUCTIONS MANUAL DE INSTRUCCIÓN We reserve the right to alter at any time without notice the technical specifications of this appliance. None of the informa- tion contained in this document is of a contractual nature. Modifications may be made at any time. ©...
-
Page 4: Table Of Contents
CONTENTS WARRANTY ASSEMBLY / DISASSEMBLY SPLASH GUARD ASSEMBLY IMPORTANT WARNING • Unpacking CLEANING • Storage • Motor housing • Power supply • Shaft and bell • Specifications • Blade and emulsifying disc • Whisk • Dimensions • Aluminum • Safety •... - Page 5 BEFORE Materials or labor to replace or repair scrat- WARRANTY REPAIRS ARE BEGUN. Neither ROBOT COUPE U.S.A., INC. nor its ched, stained, chipped, pitted, dented or disco- Replacement parts and accessories are affiliated companies or any of its distributors,...
-
Page 6: Important Warning
IMPORTANT WARNING W A R N I N G KEEP THESE INSTRUCTIONS IN A SAFE PLACE In order to prevent accidents such as electrical shock, personal injury, fire, and in order to limit property/product damage when using your power mixer, follow the instructions hereafter very carefully and strictly adhere to them. This manual should be kept nearby for reference and should be read by all first time users of the power mixer. -
Page 7: Introduction
INTRODUCTION These instructions contain important information that 1. Plug your ap - pliance into will enable you to extract the greatest return on your power outlet, ma king The new Mini MP 160 V.V., Mini MP 190 V.V., Mini investment. sure you do not press MP 240 V.V., Mini MP 190 Combi and Mini MP 240 We therefore strongly advise you to read these... -
Page 8: Working Position
WORKING POSITION order to ensure that the mixture is completely Removing the shaft from the motor unit homogeneous. Avoid touching the whisk to the side - Unplug the power mixer. For a more ergonomic of the bowl. For maximum efficiency, at least - Turn the shaft counterclockwise until it is removed. - Page 9 Removing the blade Installing the emulsifying disc • WHISK FUNCTION (Mini MP 190 Combi and Mini MP 240 Combi ) - In order to install it safely, introduce the disc into - Unplug the power mixer then, hold the blades with the bell, then hold it in place using the locking tool.
-
Page 10: Splash Guard Assembly
- To check that the whisk is properly fixed inside the specified on it’s packaging container. Use a cloth lightly dampened (not dripping) with the cleaning shaft , gently tug the metal wires. solution. Do not allow liquid to come into contact - Repeat this procedure with the second whisk. -
Page 11: Blade And Emulsifying Disc
- Check outlet for current (breaker or fuse). Use soft-metal-safe cleaning agents! Unplug the power mixer whenever it is not being used. - Call local Robot Coupe authorized service agency. Plug the power mixer only into a GFI type outlet. Never • PLASTIC use extension cords. - Page 12 INDICE GARANTÍA MONTAJE/DESMONTAJE PROTECCIÓN CONTRA SALPIGADURAS MEDIDAS DE SEGURIDAD IMPORTANTES • Desembalaje LIMPIEZA • Instalación • Bloque motor • tubo y campana • Conexión • Cuchilla y disco de emulsionado • Características eléctricas • Mezcladora • Dimensiones • Aluminio • Seguridad •...
- Page 13 LA GARANTÍA LIMITADA DE ROBOT-COUPE LA GARANTIA ROBOT-COUPE Los costes de mano de obra para instalar o NO CUBRE LOS SIGUIENTES probar nuevas piezas o accesorios (por ejemplo, Su aparato ROBOT-COUPE tiene cubas, discos, hojas, fijaciones) sustituidos arbi- PUNTOS: una garantía de un año a partir trariamente.
- Page 14 PRECAUCIONES IMPORTANTES A T E N C I Ó N CONSERVE ESTAS INSTRUCCIONES ATENCIÓN: A fin de limitar el número de accidentes (cortocircuitos, heridas o incendios, etc.) y de reducir los daños materiales debidos a la utilización inadecuada del aparato, le aconsejamos que lea atentamente las instrucciones siguientes y que las siga en todo momento. Este manual le permitirá conocer mejor su aparato y utilizarlo correctamente.
- Page 15 INTRODUCCÌON limpieza. 1. Conecte el aparato a la red eléctrica Estas instrucciones contienen informaciones teniendo cuidado de Los nuevos modelos de Mini MP 160 V.V., Mini MP importantes elaboradas para que el usuario saque no accionar el botón 190 V.V., Mini MP 240 V.V., Mini MP 190 Combi el máximo provecho de su inversión.
- Page 16 mezcladoras dentro del recipiente para garantizar Desmontaje del tubo del bloque motor POSICIÓN DE TRABAJO la perfecta homogeneidad de la preparación. - Asegúrese de que el aparato no está enchufado. Para una mayor ergonomía - Gire el tubo en el sentido contrario al de montaje Le recomendamos encarecidamente que no toque de trabajo, se recomienda hasta destornillarlo por completo.
- Page 17 Desmontaje de la cuchilla Montaje del disco de emulsionado • FUNCION MEZCLADORA - Para montar el disco con toda seguridad, intro- - Para desmontar la cuchilla de manera segura, (Mini MP 190 Combi y Mini MP 240 Combi) duzca el disco en la campana, manteniéndola con sujétela protegiendo su mano con el instrumento de Montaje de la caja en el bloque motor el útil de bloqueo.
- Page 18 • BLOQUE MOTOR - Para asegurarse de que la mezcladora está bien fijada en el eje , tire ligeramente de los ramales. La máquina deberá limpiarse en cada fase de la - Proceder del mismo modo con el segundo batidor. preparación.
- Page 19 - Después de haber desenchufado el aparato, lave • PLÁSTICO - Desenchufe el aparato e intente utilizar otra toma la campana con el tubo. de corriente. Verifique que su detergente se puede utilizar con piezas de plástico. En efecto, algunos detergentes - Controle la alimentación de la red eléctrica.
- Page 20 : PH : 1-800-824-1646 Robot Coupe U.S.A. Inc. Service Department 264 South Perkins St., Ridgeland, MS 39157 Para el servicio de postventa en el Canada, contacta la fabrica de Robot-Coupe en Estados Unidos.
- Page 21 SOMMAIRE GARANTIE MONTAGE/DÉMONTAGE PROTECTION ANTI-ÉCLABOUSSURES PRÉCAUTIONS IMPORTANTES • Déballage NETTOYAGE • Bloc moteur • Installation • Tube et cloche • Branchement • Couteau et disque émulsionneur • Spécifications • Fouet • Dimensions • Aluminium • Sécurité • Plastique • Important ENTRETIEN •...
- Page 22 GARANTIE LIMITEE DE ROBOT-COUPE U.S.A., INC. LES POINTS SUIVANTS NE SONT VOTRE NOUVELLE MACHINE ROBOT- Les coûts liés au changement du sens de COUPE EST GARANTIE UN AN A rotation des moteurs électriques triphasés PAS COUVERTS PAR LA GARANTIE : PARTIR DE LA DATE D’ACHAT : CETTE (L’INSTALLATEUR EST RESPONSABLE).
-
Page 23: Précautions Importantes
PRÉCAUTIONS IMPORTANTES A T T E N T I O N CONSERVER CES INSTRUCTIONS ATTENTION Afin de limiter le nombre d’accidents (chocs électriques, blessures...) et afin de réduire les dégâts matériels liés à une mauvaise utilisation de votre machine, lisez attentivement les instructions suivantes et respectez-les impérativement. La lecture de cette notice vous apportera une meilleure connaissance de votre appareil et vous permettra une utilisation correcte de votre machine. -
Page 24: Introduction
INTRODUCTION Cette notice contient des informations importantes 1. Connecter l'appareil au secteur en prenant élaborées pour que l’utilisateur tire le plus grand garde de ne pas action- Les nouveaux modèles Mini MP 160 V.V. • Mini MP profit de son investissement. ner le bouton (BC). -
Page 25: Position De Travail
POSITION DE TRAVAIL le récipient afin d’assurer une parfaite homogénéité Démontage du tube du bloc moteur de la préparation travaillée. - S’assurer que l’appareil n’est pas branché. Pour une meilleure ergono- Il est vivement recommandé d’éviter de toucher les - Tourner le tube dans le sens inverse à celui du mie de travail, il est parois du récipient avec les fouets. - Page 26 Démontage du couteau Montage du disque émulsionneur • FONCTION FOUET - Pour un démontage du couteau en toute sécurité, - Pour un montage du disque en toute sécurité, (Mini MP 190 Combi et Mini MP 240 Combi ) introduire le disque dans la cloche puis le mainte- tenir le couteau en se protégeant la main avec nir à...
-
Page 27: Protection Anti-Éclaboussures
PROTECTION Utiliser un chiffon légèrement humide avec le produit - En enfonçant le fouet dans l’axe de la boîte, ANTI-ÉCLABOUSSURES nettoyant. Le liquide ne doit pas entrer en contact lui appliquer un mouvement de rotation pour avec les composants électriques se trouvant à engager les doigts d’entraînement dans les - Couvrir la bague en utilisant le disque de protection l'intérieur du bloc moteur. -
Page 28: Tube Et Cloche
La nettoyer à l’aide d’un chiffon légérement humide DIFFICULTÉS DE • TUBE ET CLOCHE ou une éponge. FONCTIONNEMENT Il est possible de procéder selon deux modalités : • ALUMINIUM Procédure simplifiée de nettoyage L'APPAREIL NE SE MET PAS EN MARCHE - Plonger le tube muni de sa cloche dans un récipient Utilisez des agents lessiviels adaptés au métal. -
Page 29: Dépannage
(RMA), et dès réception, l’expédier en port payé et assuré à l’adresse de l’usine. PH : 1-800-824-1646 Robot Coupe U.S.A. Inc. Service Department 264 South Perkins St., Ridgeland, MS 39157 Pour le service après-vente sur le Canada,... -
Page 30: Données Techniques
WIRING DIAGRAM DATOS TÉCNICOS DONNÉES TECHNIQUES... - Page 42 P.O. Box 16625, Jackson, MS 39236-6625 264 South Perkins St., Ridgeland, MS 39157 e-mail: robocoup@misnet.com website: www.robotcoupeusa.com Phone : 1-800-824-1646...
Need help?
Do you have a question about the Mini MP 160 V.V. and is the answer not in the manual?
Questions and answers