
Related Manuals for Bush Power G2000X

Summary of Contents for Bush Power G2000X
- Page 1 Digital Inverter Generator G2000X Operating Instructions Please read this manual carefully before use...
- Page 2 Thank you for purchasing our generator. This manual covers operation and maintenance of the G2000X. All information in this publication is based on the latest product information available at the time of approval for printing. We reserve the right to make changes at any time without notice and without incurring any obligation.
- Page 3 WARNING The generator is designed to give safe and dependable service if operated according to instructions. Read and understand this manual carefully before operating the generator, or it may cause serious injury and equipment damage. WARNING Exhaust contains poisonous carbon monoxide. Do not operate generator in confined environment or with an aerator.
- Page 4 WARNING Gasoline is extremely flammable and is explosive under certain conditions. Refuel in a ventilated area with engine stopped. Keep away from cigarettes, smoke and sparks when refuelling the generator. Always refuel in a well-ventilated location. WARNING Connection for standby power to a building electrical system must be made by a qualified electrician.
-
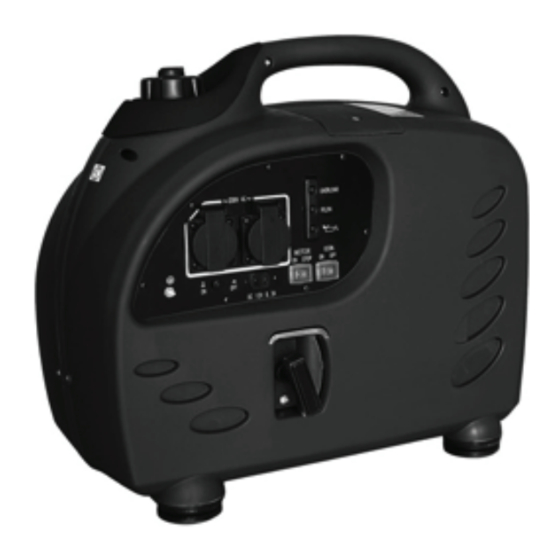
Page 5: Component Identification
WARNING Read this manual carefully before using the machine, for your own safety. You should only use the generator according to these instructions. COMPONENT IDENTIFICATION 1. Fuel cap 9. Overload indicator light 2. Air vent knob 10. Output indicator light 3. -
Page 6: Control Panel
CONTROL PANEL SMART THROTTLE Engine speed is kept at idle automatically when the electrical appliance is disconnected and it returns to the required speed to power the electrical load when the electrical appliance is connected. This position is recommended to minimize the fuel consumption while in operation. CAUTION Smart throttle system does not operate effectively if the electrical appliance requires instant or momentary power. -
Page 7: Safety Instructions
SAFETY INSTRUCTIONS • The generator is designed to give safe and dependable service if operated according to instructions.. • Read and understand the Owner’s Manual before operating the generator. Failure to do so could result in personal injury or equipment damage. -
Page 8: Safety Label Locations
SAFETY LABEL LOCATIONS These labels warn you of potential hazards that can cause serious injury. Read the labels, safety notes and precautions described in the manual carefully. If a label comes off or becomes hard to read, contact your dealer for a replacement. -
Page 9: Pre-Operation Check
PRE-OPERATION CHECK Be sure to check the generator on a level surface with the engine stopped. Check the engine oil level Using non-detergent oil or 2-stroke engine oil could shorten the engine’s service life. Use high-detergent, premium quality 4 –stroke engine oil, certified to meet or exceed .SF.(15W40) Select the appropriate viscosity for the average temperature in your area. -
Page 10: Check The Fuel Level
Check the fuel level Turn the fuel cap lever to “OFF” position before transporting. Use automotive fuel (Unleaded or low leaded is preferred to minimize combustion chamber deposits). !! Don’t use fuel containing ethanol or alcohol: Fuel system damage or engine performance problems resulting from the use of fuels that contain ethanol or alcohol are not covered under the warranty. -
Page 11: Check The Air Cleaner
Gasoline is extremely flammable and is explosive under certain conditions. Refuel in a well-ventilated area with the engine stopped. Do not smoke or allow flames or sparks in the area where the engine is refuelled or where gasoline is stored. Do not overfill the fuel tank. -
Page 12: Generator Use
GENERATOR USE Starting the engine Before starting the engine, disconnect any load from the DC receptacle. 1. Turn the fuel cap lever fully clockwise to the ON position. 2. Set the fuel valve in the “ON” position 3. Choke(Type 1) To start a cold motor shove the choke lever all the way to the left. - Page 13 Choosing the right choke position is the key to starting the motor. You may have to practise a few times to use the choke correctly Shove the choke completely to the right to restart a hot motor. Shove the choke to about halfway to restart a warm motor. A hot motor will not start if there is too much fuel in the cylinder.
- Page 14 6. After the engine starts, allow the engine to run continuously and warm 7. Press the choke in completely after the engine is started. If the engine stops and will not restart, check the engine oil level before troubleshooting in other areas. ...
-
Page 15: Remote Control
Remote Control Stop Start Button - Press twice to begin operation Starting Key The generator can be started by either the remote control or the starting key. • When starting the generator with the starting key, do not use the remote to stop the generator. -
Page 16: High Altitude Operation
High Altitude Operation At high altitude, the standard carburettor air –fuel mixture will be excessively rich. Performance will decrease, and fuel consumption will increase. High altitude performance can be improved by installing a smaller diameter main fuel jet in the carburettor and readjusting the slow tempo screws. - Page 17 • Limit length of extension cables 60m for cables of 1.5mm2 and 100m for cables of 2.5mm2. • Keep the generator away from other electric cables or wires such as distribution network. • The DC receptacle can be used while the AC power is in use. If you use both at the same time, be sure not to exceed the total power for AC and DC.
-
Page 18: Output And Overload Indicators
Output and Overload Indicators The output indicator light (green) will remain lit during normal operating conditions. If the generator is overloaded or if there is a short in the connected appliance, the output indicator light (green) will turn OFF, the overload indicator light (red) will turn ON and current to the connected appliance will be shut off. - Page 19 2. Start engine according to “STARTING THE ENGINE” When the output indicator light (green) does not light and the overload indicator light (red) lights instead, set the engine switch to STOP, stop the engine at once and then start the engine again. 3.
- Page 20 (green) will stay lit. Electric Power Electromotor DC battery lamps tools Power factor 1 0.8-0.9 0.4-0.7 (efficiency 0.86) G2000X 0-2000W 0-1520W 0-760w Rated voltage DC Applications For charging 12V automotive batteries: Idling voltage Loading Loading...
- Page 21 • When using the DC output, turn Smart Throttle to the OFF position. The DC current will be below 5A if turning on the Smart Throttle without AC current output. • When charging batteries, person must be present to monitor the voltage.
-
Page 22: Oil Alert System
and call a physician. • Electrolyte is poisonous. • If swallowed, drink large quantities of water or milk and follow with milk or magnesia or vegetable oil and call a physician. • KEEP OUT OF THE REACH OF CHILDREN, PETS AND UNTRAINED PEOPLE. -
Page 23: Stopping The Engine
Stopping the engine To stop the engine in an emergency, turn the engine switch to the OFF position. In normal use: 1. Switch off the connected equipment and pull the inserted plug out. 2. Turn the engine switch to the OFF position. ... -
Page 24: Maintenance
Maintenance • The purpose of the maintenance and adjustment schedule is to keep the generator in the best operating condition. • Inspect or service as scheduled in the table below Shut off the engine before performing any maintenance ,If the engine must be run, make sure the area is well ventilated, The exhaust contains poisonous carbon monoxide gas. -
Page 25: Maintenance Schedule
Maintenance Schedule Note 1. Log hours of operation to determine proper maintenance. 2. Service more frequently when used in dusty areas. 3. These items should be serviced by an authorized dealer, unless the owner has the proper tools and is mechanically proficient. See the Shop Manual. -
Page 26: Changing Oil
Changing oil Drain the oil while the engine is still warm to assure rapid and complete draining. Make sure to turn the engine switch and the fuel cap vent lever OFF before draining. 1. Lean the generator. 2. Fasten the oil lead pipe on the oil exhaust as the picture. Then pour out the oil. -
Page 27: Air Cleaner Service
Wash your hands with soap and water after handing used oil. Please dispose of used motor oil in a manner that is responsible with the environment in mind. We suggest you take it in a sealed container to your local service station for reclamation. Do not throw it in the trash or pour it on the ground. -
Page 28: Spark Plug Servicing
Spark Plug Servicing Please use high quality authentic spark plugs. To ensure proper engine operation, the spark plug must be properly gapped and free of deposits. 1. Remove the bolts on the top maintenance cover and the cover. 2. Take out the ignition coil rubber boot. ... - Page 29 4. Visually inspect the spark plug. Discard it if the insulator is cracked or chipped. Clean spark plug with a wire brush if it is to be reused. 5. Install the spark plug carefully by hand, to avoid cross-threading. 6.
-
Page 30: Transporting And Storage
Transporting and Storage To prevent fuel spillage when transporting or during temporary storage, the generator should be secured upright in its normal operating position, with the engine switch OFF. The fuel cap vent lever is turned counter clockwise to the OFF position. Allow the engine to cool well before turning the fuel cap vent lever to the OFF position, When transporting generator:... - Page 31 5. Remove spark plug and fill cylinder with 2cc’s fresh oil. Pull start motor 3-4 times to discharge the remaining oil. Then reinstall the spark plug. 6. Pull the starting cord slowly until resistance is strong . At this time, the piston is moving to the top of the compression stroke and the valves will be closed.
- Page 32 Fire arrestor service Uncleaned muffler will increase noise and affect the engine’s running. Clean and maintain the fire arrestor regularly to make sure the generator works normally. The fire arrestor needs cleaning frequently if you use the generator in very dirty conditions, or replace the fire arrestor if necessary.
-
Page 33: Troubleshooting
TROUBLESHOOTING • Shake the generator several times from side to side to make the oil float rise if the generator cannot start after adding oil for the first time and the oil alarm indicator stays on when pulling the starting grip. •... - Page 34 The equipment that connects generator doesn’t start There is no power in the direct current electric outlet There is no power in the DC electric outlet...
- Page 35 Deficient AC output...
-
Page 36: Engine Specifications
Specifications Item G2000X L x W x H(mm) 580 x 320 x515 Net weight(kg) Engine Specifications Item G2000X Model 152F Type 4-stroke, OHV, 1-cylinder Displacement 125CC Compression ratio Engine speed 5000rpm(ECO switch is off) Cooling system Forced air cooling Ignition system Oil capacity 0.45L... -
Page 37: Wiring Diagram
Wiring Diagram... -
Page 38: Exploded Parts View
Exploded Parts View ... - Page 41 Warranty Bush Power warrants its products to be free of defects for reasonable consumer use for a period of 12 months. Bush Power will repair or replace the warranted product and it will return the repaired products under warranty to the consumer at Bush Power’s cost.
- Page 42 AS A RESULT OF YOUR FAILURE TO FOLLOW THE INSTRUCTIONS INTENDED FOR THE BUSH POWER PRODUCT In the following paragraph, “Our” means Bush Power and “You” means the customer: Our goods come with guarantees that cannot be excluded under the Australian Consumer Law.
-
Page 43: Warranty Card
WARRANTY CARD (To be detatched and returned with the unit to the below address) Name: Company Name: Address: Fax: E-mail: Purchased From: Date Purchased: Product Purchased (Model No.): This product is supplied with a 5 Year Warranty from date of purchase. Please Note: •...