Table of Contents
Advertisement
P/N 127017-01 Rev. A 01/2014
P127017-01
This book is valuable. In addition to instructing you on how to install and maintain your appliance, it also contains
information that will enable you to obtain replacement parts or accessory items when needed. Keep it with your other
important papers.
INSTALLER: Leave this manual with the appliance.
CONSUMER: Retain this manual for future reference.
This wood burning fireplace complies with
UL127 CAN/ULC-S610-M87 standard as a
FACTORY BUILT FIREPLACE.
This fireplace is approved for use as a wood furning fireplace or for use with a vented gas log approved to
ANSI Z21.60 or Z21.84 standards or for use with a vent-free gas log heater approved to ANSI Z21.11.2 standard.
FOR CANADA: The authority having jurisdiction
(such as the municipal building department, fire
department, etc.) should be contacted before
installation to determine the need to obtain a
permit.
This appliance may be installed in an aftermarket permanently located, manufactured home (USA only)
or mobile home, where not prohibited by local codes. This appliance is only for use with the type of gas indicated
on the rating plate. This appliance is not convertible for use with other gases, unless a certified kit is used.
WARNING: If the information in these
instructions is not followed exactly, a fire or
explosion may result causing property damage,
personal injury or death.
— Do not store or use gasoline or other
flammable vapors and liquids in the vicinity
of this or any other appliance.
— WHAT TO DO IF YOU SMELL GAS:
• Do not try to light any appliance.
• Do not touch any electrical switch; do not
use any phone in your building.
• Immediately call your gas supplier from
a neighbor's phone. Follow the gas
supplier's instructions.
• If you cannot reach your gas supplier, call
the fire department.
— Installation and service must be performed
by a qualified installer, service agency or the
gas supplier.
Installation and Operation Instructions
Superior™ Outdoor Wood Burning Fireplace
PFS
Models
®
WRE4536RS
C
US
WRE4536WS
WRE4536RH
WRE4536WH
SAVE THIS BOOK
Installateur : Laissez cette notice avec l'appareil.
Consommateur : Conservez cette notice pour consultation ultérieure.
Ce foyer au bois est conforme aux UL 127 CAN/ULC-
S610-M87 norme comme une USINE CONSTRUITE
CHEMINÉE.
POUR LE CANADA: L'autorité compétente (comme le
service municipal du bâtiment, les pompiers, etc.) doit
être contacté avant l'installation afin de déterminer la
nécessité d'obtenir un permis.
AVERTISSEMENT : Assurez-vous de bien suivre les
instructions données dans cette notice pour réduire au
minimum le risque d'incindie ou d'explosion ou pour éviter
tout dommage matériel, toute blessure ou la mort.
— Ne pas entreposer ni utilizer d'essence ni d'autres
vapeurs ou liquides inflammables dans le voisinage
de cet appareil ou de tout autre appareil.
— QUE FAIRE SI VOUS SENTEZ UNE ODEUR DE GAZ :
• Ne pas tenter d'allumer d'appareil.
• Ne touchez à aucan interrupteur. Ne pas vous
servir des téléphones se trouvant dans le bâtiment
où vous trouvez.
• Appelez immédiatement votre fournisseur de
gaz depuis un voisin. Suivez les instructions du
fournisseur.
• Si vous ne pouvez rejoindre le fournisseur de gaz,
appelez le service des incindies.
— L'installation et l'entretien doivent être assurés par un
installateur ou un service d'entretien qualifié ou par
le fournisseur de gaz.
WRE4542RS
WRE4550RS
WRE4542WS
WRE4550WS
WRE4542RH
WRE4550RH
WRE4542WH
WRE4550WH
Advertisement
Table of Contents

Related Manuals for Superior WRE4536RS


Summary of Contents for Superior WRE4536RS
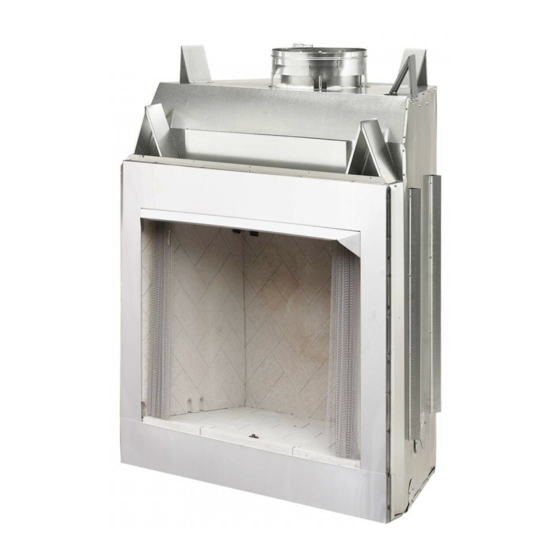
- Page 1 Installation and Operation Instructions Superior™ Outdoor Wood Burning Fireplace P/N 127017-01 Rev. A 01/2014 Models ® WRE4536RS WRE4542RS WRE4550RS WRE4536WS WRE4542WS WRE4550WS WRE4536RH WRE4542RH WRE4550RH P127017-01 WRE4536WH WRE4542WH WRE4550WH SAVE THIS BOOK This book is valuable. In addition to instructing you on how to install and maintain your appliance, it also contains information that will enable you to obtain replacement parts or accessory items when needed.
- Page 2 WOOD BURNING FIREPLACE OWNER’S OPERATION AND INSTALLATION MANUAL ® OUTDOOR WOOD BURNING SERIES FIREPLACES WITH INSULATION SAVE THIS BOOK This book is valuable. In addition to instructing you on how to install and maintain your appliance, it also contains information that will enable you to obtain re- placement parts or accessory items when needed.
-
Page 3: Table Of Contents
WARNING: Improper installation, adjustment, altera- tion, service or maintenance can cause injury, property damage or loss of life. Refer to this manual for assis- tance or additional information. Consult a qualified installer or local distributor. TABLE OF CONTENTS Safety ..............3 Glass Door Installation ........ -
Page 4: Specifications
SPECIFICATIONS 36" MODELS 1" CHIMNEY AIRSPACE CLEARANCE TO COMBUSTIBLE MATERIAL NO COMBUSTIBLE MATERIAL ON FACE COMBUSTIBLE WALL BOARD " AIR SPACE BACK AND SIDES OUTSIDE AIR MINIMUM 12" TO PERPENDICULAR SIDEWALL GAS LINE HEARTH EXTENSION KNOCKOUTS 74" X 20" 0" TO 12"... - Page 5 SPECIFICATIONS Continued 42" MODELS 2" CHIMNEY AIRSPACE CLEARANCE TO COMBUSTIBLE MATERIAL NO COMBUSTIBLE MATERIAL ON FACE COMBUSTIBLE WALL BOARD " AIR SPACE BACK AND SIDES OUTSIDE AIR MINIMUM 18" TO PERPENDICULAR SIDEWALL GAS LINE KNOCKOUTS HEARTH EXTENSION 66" X 20" 0"...
- Page 6 SPECIFICATIONS Continued 50" MODELS 2" CHIMNEY AIRSPACE CLEARANCE TO COMBUSTIBLE MATERIAL NO COMBUSTIBLE MATERIAL ON FACE COMBUSTIBLE WALL BOARD " AIR SPACE BACK AND SIDES OUTSIDE AIR MINIMUM 18" TO PERPENDICULAR SIDEWALL GAS LINE KNOCKOUTS HEARTH EXTENSION 74" X 20" 0"...
-
Page 7: Fireplace Installation
FIREPLACE INSTALLATION SELECTING LOCATION FRAMING 1. Frame opening for fireplace using dimen- To determine the safest and most efficient sions shown in Figures 4 and 5. location for the fireplace, you must take into 2. If fireplace is to be installed directly on consideration the following guidelines: carpeting, tile (other than ceramic) or any 1. - Page 8 FIREPLACE INSTALLATION Continued MANTELS Note: For outdoor installations, fireplace enclosure must allow for adequate drainage A mantel may be installed if desired (see Figure and fresh air ventilation. It is recommended 7). Woodwork such as wood trims, mantels or that a sealed, corrosion resistant catch pan any other combustible material projecting from with provision for drainage be installed under front face must not be placed within 12"...
-
Page 9: Venting Installation
VENTING INSTALLATION OPTIONAL OUTSIDE AIR KIT WARNING: The opening in (MODEL AK4/AK4F) the collar around the chimney at The installation of an outside air kit should the top of the fireplace must not be performed during the rough framing of be obstructed. - Page 10 VENTING INSTALLATION Continued Continue to assemble chimney sections as if properly locked. It is not necessary to add outlined above, making sure that both the screws to keep the chimney together (excep- inner and outer pipe sections are locked to- tion, see Figure 10).
- Page 11 VENTING INSTALLATION Continued Return Return Elbow Elbow Return Offset Offset Elbow Elbow Elbow 6' Max. 6' Max. Ceiling Support Pipe Return 12S-12DM Return 6' Max. Elbow Elbow 6' Max. Offset Offset Elbow 6' Max. Elbow 6' Max. Offset Elbow Figure 12 - Typical Offset Terminations Screws or Staples FIRESTOP SPACERS (FS-10, Firestop...
- Page 12 VENTING INSTALLATION Continued FLASHING INSTALLATION (V6F-10DM 5. Add next sections of pipe until end penetrates roof line. Check to see that OR V12F-10DM) proper clearances are maintained. Extend Determine the flashing to be used with the roof chimney by adding sections of double wall opening chart.
- Page 13 VENTING INSTALLATION Continued Terminations/Spark Arrestor The fireplace system must be terminated with the listed round top or chase terminations. In 18" any case, refer to the installation instructions Min. supplied with the termination. Typ. CAUTION: Do not seal open- ings on the rooftop flashing. Fol- low the installation instructions provided with the termination 24"...
-
Page 14: Refractpry Panel Installation
REFRACTORY PANEL INSTALLATION IMPORTANT: Installation of brick should be done after the fire- place is placed in a permanent location. 1. Remove grate, screen assemblies and all hardware components out of the firebox. The bottom panel is preinstalled in the firebox. -
Page 15: Optional Gas Line Installation
REFRACTORY PANEL INSTALLATION Continued 3. Mount flat end of screen rod with #10 x 5/8" WARNING: Risk of fire! Re- to center of smoke shelf. place grate with an INNOVATIVE 4. Install other screen rod in same manner. HEARTH PRODUCTS grate only Hole for Screen (see Parts, page 23). -
Page 16: Glass Door Installation
OPTIONAL GAS LINE INSTALLATION Continued If you install a decorative gas appliance CAUTION: All gas piping (vented gas log), the decorative gas appliance and connections must be tested must comply with the Standard for Decorative Gas Appliance for Installation in Solid Fuel for leaks after the installation Burning Fireplaces, ANS Z21.60 or Z21.84 is completed. -
Page 17: Operation And Maintenance Guidelines
GLASS DOOR INSTALLATION Continued Bottom Spring Fold Door Door Rail Clip and Slide Top Pins Insert Pin Into Track Ash Box into Spring Clip Center Brick Insert Screws Bottom Ring Pivot Pin Handle into Hole Figure 27 - Installing Bottom Door Frame Pivot 6. - Page 18 OPERATION AND MAINTENANCE GUIDELINES Continued OUTSIDE AIR AND DAMPER HANDLE OPERATION The damper handle, which opens and closes the damper blade, is located in the upper front Doors Fully Closed face of the fireplace. Pushing the handle for- ward and up through the keyway slot will free Fireplace Front damper blade to automatically open.
-
Page 19: Parts
PARTS MODELS (V)G36,42,50 SERIES AND (V)J36,42,50 SERIES 16/17 www.SuperiorFireplaces.US.com 127017-01A... - Page 20 PARTS This list contains replaceable parts used in your firebox. When ordering parts, follow the instructions listed under Replacement Parts on page 23 of this manual. PART NO. DESCRIPTION (V)G36 (V)G42 (V)G50 (V)J36 (V)J42 (V)J50 QTY. Face Assembly • • •...
- Page 21 PARTS MODELS MODELS (V)G36,42,50 SERIES AND (V)J36,42,50 SERIES Picture may vary from actual www.SuperiorFireplaces.US.com 127017-01A...
- Page 22 PARTS This list contains replaceable parts used in your firebox. When ordering parts, follow the instructions listed under Replacement Parts on page 23 of this manual. PART NO. DESCRIPTION QTY. 116084-02 Hearth 36" Red • • 111426-02 Hearth 42" Red •...
- Page 23 PARTS This list contains replaceable parts used in your firebox. When ordering parts, follow the instructions listed under Replacement Parts on page 23 of this manual. PART NO. DESCRIPTION QTY. 116084-01 Hearth 36" Natural White • • 111426-01 Hearth 42" Natural White •...
-
Page 24: Technical Service
TECHNICAL SERVICE You may have further questions about instal- When calling please have your model and se- lation, operation, or troubleshooting. If so, rial numbers of your fireplace ready. contact INNOVATIVE HEARTH PRODUCTS at You can also visit our web site at 1-800-655-2008. -
Page 25: Accessories
ACCESSORIES Continued STORM COLLAR - SC2-1 OPTIONAL OUTSIDE AIR KIT FOR SIDEWALL INSTALLATION - AK4 FIRESTOP SPACER - FS-10 AND 1100EFS-10DM ROOF FLASHING V6F-10DM - 0 to 6/12 Pitch V12F-10DM - 6/12 to 12/12 Pitch ROUND TOP TERMINATIONS RLT-12D AND RLT-12HT SQUARE CHASE-TOP TERMINATION - STL-12D AND STL-12DMP BLACK... - Page 26 THE WARRANTY Innovative Hearth Products ("IHP") 20 Year Limited Warranty warrants your Superior™ Brand wood burning fireplace ("Product") to be free from defects in materials and workmanship at the time of manufacture. The Product body, firebox and ceramic glass carry the 20 Year Limited Warranty. Ceramic glass carries the 20 Year Limited Warranty against thermal breakage only.
- Page 27 KEEP THIS WARRANTY Model (located on product or identification tag) _____________________________ Serial No. (located on product or identification tag) __________________________ Date Purchased __________________________ Keep receipt for warranty verification. www.SuperiorFireplaces.US.com 127014-01A...
- Page 28 IMPORTANT NOTICE Canadian code CAN/ULC-S610-M87 and NOTICE: The firebox canopy (hood) A manufactured shroud which other pertinent codes require stainless steel must not be modified or replaced with chimney for the installation of this fireplace. has been approved by a national a canopy that may be provided with A Cold Air Climate Kit is also required in the unvented decorative room heater.
- Page 29 NOTES www.SuperiorFireplaces.US.com 127017-01A...
- Page 30 NOTES www.SuperiorFireplaces.US.com 127017-01A...
- Page 31 NOTES www.SuperiorFireplaces.US.com 127017-01A...
- Page 32 1508 Elm Hill Pike, Suite 108 Nashville, TN 37210 127017-01 1-800-655-2008 Rev. A www.IHP.US.com 02/14 P127017-01...
Need help?
Do you have a question about the WRE4536RS and is the answer not in the manual?
Questions and answers