Table of Contents
Advertisement
Quick Links
Advertisement
Table of Contents

Related Manuals for TV Star T7200 CX HD


Summary of Contents for TV Star T7200 CX HD
- Page 1 DIGITAL TERRESTRIAL RECEIVER TV STAR T7200 CX HD USER MANUAL...
-
Page 2: Table Of Contents
CONTENTS Important Safety Instructions ......................3 About manual ...........................3 Accessories ............................4 Front and Rear Panel .........................4 Remote Control..........................5 Connecting to a Television ........................6 Connecting to an Audio System ......................7 First time Installation ........................7 View Favourite Channel ........................8 Delete a TV or Radio Program ......................8 Time Setting ........................... -
Page 3: Important Safety Instructions
Important Safety Instructions About manual This manual covers general functional features of your decoder (signal converter). All initial information is provided in this document. Prior operation, please, ensure that your decoder is properly installed. After, using a remote control please perform indications, provided in this manual. Since you will familiarize with the remote control and analyse features of decoder, this manual will be useful as a source of references. -
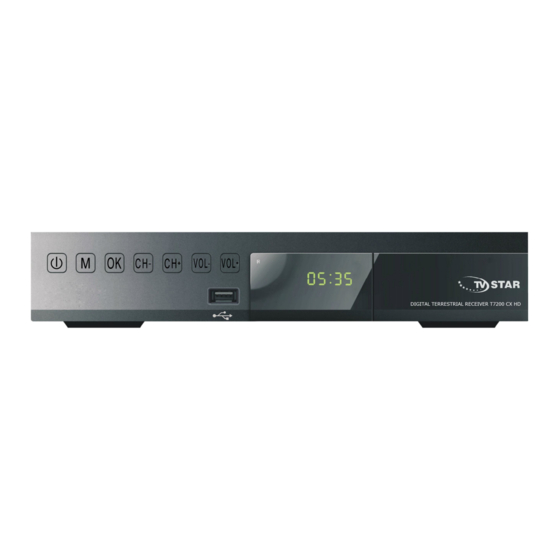
Page 4: Accessories
Accessories AAA battery Power adapter Remote Control User Manual Front and Rear Panel 1.Front panel 1. MENU: To enter into the main menu and exit all menus 2. VOL-: Decrease the volume of sound 3. CH-: Change channels or items from top to bottom on the menus 4. -
Page 5: Remote Control
2. Rear panel 1. RF IN: Use to connect an antenna. 2. RF LOOP THROUGH: Use it when connecting to another STB 3. TV SCART: Use this connector to connect your receiver with your TV set using a SCART cable 4. -
Page 6: Connecting To A Television
TV/RADIO: Switch between Digital Radio and DVB-T modes. PAGE+/PAGE-: To navigate inside the menus. TIMER: Use to access ON/OFF timer directly. PVR and Multimedia keys Installation the Batteries Insert the batteries while observing the correct (+) and (-) polarities as illustrated below: About the batteries ... -
Page 7: Connecting To An Audio System
Connecting to an Audio System First time Installation After all connections have been made properly,switch on TV and make sure the unit is connected to the main Power.Press power button to switch the unit on. If you are using the unit first time or have restored the unit to Factory Default,the Installation Guide Menu will appear on you TV screen. -
Page 8: View Favourite Channel
Channel Search: Press RIGHT or OK key to begin Automatic channel search Once channel tuning is complete ,you can star watching TV programs. Basic Operation Program Manage Settings To access the Menu,press the MENU button and select [Program].Use the RIGHT/LEFT keys to navigate through the menu.The Menu provide options to adjust the Program Mangage Settings.Select an option and press OK or RIGHT to adjust that setting.Press the EXIT button to exit the Menu. - Page 9 Move a TV or Radio Program 1. Select the preferred channel then press the RED button. A move symbol will appear. Press UP/DOWN to move the channel. Press OK to confirm. Repeat the above steps to move more channels Lock Program You can lock selected programs for restricted viewing.
- Page 10 (a) Resolution You can change this setting if the picture resoltion dose not apper to be correct. This setting is to match the most common setting for HDMI. [480P] for NTSC TV system [576P] for PAL TV system [720P] for NTSC or PAL TV system [1080P] for NTSC or PAL TV system (b) TV Format If the picture dose not appear to be cerrect you can change this setting.
-
Page 11: Time Setting
Time Setting To access the Menu, Press MENU then select [Time] using the RIGHT/LEFT key .The Menu provides options to adjust the time settings.Press UP/DOWN to select an option and press RIGHT/LEFT to adjust the setting. Press EXIT to exit the Menu. (a) Time offset Select auto or manual for GMToffset adjustments. -
Page 12: Usb
This option will delete all preset channels and settings. The master unlock password is ‘8888’ (c) Information View model, hardware and software information (d) Start Time This is the time that the unit will scan for software updates Conax CA System This feature allows the user to view conditional access (Conax encryption system), the CA information. - Page 13 [Transparent]: Displays the subtitle in transparent background. [Grey]: Displays the subtitle in grey background. [Yellowgreen]: Displays the subtitle in yellowgreen background. - Subtitle Font Color: [Red]: Displays Subtitle in red font. [Blue]: Displays Subtitle in blue font. [Green]: Displays Subtitle in green font. USB PVR Configure: The most unique feature on your is its ability to record live TV.
-
Page 14: Troubleshooting
- Some USB devices may not be properly recognized. - Even when they are in a supported format, some files may not play or display depending on the content. (e) Timeshift When you are playing the program, you can insert the USB, and at any time you can press the [Time shift] button, the frame will be paused, and you may press the [PLAY] button after a second, it will start to timeshift now. -
Page 15: Technical Specifications
The program is a radio program Press<TV/Radio>key to shift into TV mode The battery is exhausted Change battery Remote Control Remote Control is not facing or Adjust the position of the Remote Control is not responding close enough to the STB and move closer to the unit Picture is The signal is too weak...
Need help?
Do you have a question about the T7200 CX HD and is the answer not in the manual?
Questions and answers