Sign In
Upload
Download
Table of Contents
Contents
Add to my manuals
Delete from my manuals
Share
URL of this page:
HTML Link:
Bookmark this page
Add
Manual will be automatically added to "My Manuals"
Print this page
×
Bookmark added
×
Added to my manuals
Manuals
Brands
FrSky Manuals
Drones
TANDEM X20
User manual
FrSky X20 User Manual
Hide thumbs
Also See for X20
:
Manual
(2 pages)
,
Manual
(2 pages)
,
User manual
(242 pages)
1
Table Of Contents
2
3
4
5
6
7
8
9
10
11
12
13
14
15
16
17
18
19
20
21
22
23
24
25
26
27
28
29
30
31
32
33
34
35
36
37
38
39
40
41
42
43
44
45
46
47
48
49
50
51
52
53
54
55
56
57
58
59
60
61
62
63
64
65
66
67
68
69
70
71
72
73
74
75
76
77
78
79
80
81
82
83
84
85
86
87
88
89
90
91
92
93
94
95
96
97
98
99
100
101
102
103
104
105
106
107
108
109
110
111
112
113
114
115
116
117
118
119
120
121
122
123
124
125
126
127
128
129
130
131
132
133
134
135
136
137
138
139
140
141
142
143
144
145
146
147
148
149
150
151
152
153
154
155
156
157
158
159
160
161
162
163
page
of
163
Go
/
163
Contents
Table of Contents
Bookmarks
Table of Contents
Table of Contents
Main Views
The Top Bar
The Bottom Bar
The Widgets Area
User Interface and Navigation
Editing Controls
Virtual Keyboard
Number Value Controls
Options Feature
Emergency Mode
System Setup
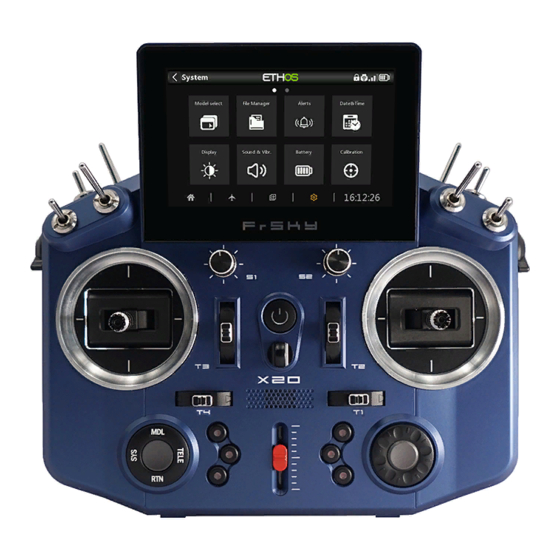
Overview
File Manager
Alerts
Date & Time
Display
Sound & Vibr
Battery
Hardware
Sticks
File Manager
Alerts
Silent Mode Check
Main Battery Check
RTC Battery Check
Inactivity
Date and Time
24 Hour Time
Display Seconds
Date
Time
Time Zone
Auto Adjust from GPS
Display
Brightness
Wake up
Sleep
Shutdown LCD During Sleeping
Style
Language
Top Toolbar
Sound & Vibr
Language
Main Volume
Audio Mode
Vibr Strength
Vibr. Mode
Vario
Battery
Main Voltage
Low Voltage
Display Voltage Range
RTC Voltage
Hardware
Hardware Check
Analogs Calibration
Gyro Calibration
Analogs Filter
Pots/Sliders Settings
Switches Settings
Home Keymap
Function Switches
ADC Value Inspector
Sticks
Channel Order
First Four Channels Fixed
Wireless
Bluetooth Mode
Info
Firmware
Firmware Version
Date
Sticks
Internal Module
Receiver
External Module
Model Setup
Overview
Model Select
Edit Model
Flight Modes
Mixer
Outputs
Timers
Trims
RF System
Telemetry
Checklist
Logic Switches
Special Functions
Curves
Trainer
Device Config
Model Select
Adding a New Model
Selecting a Model
Edit Model
Flight Modes
Flight Mode Management
Mixer
Aileron, Elevator, Rudder Mixer
Throttle Mixer
Predefined Mixes
Outputs
Outputs Setup
Timers
Name
Mode
Alarm/Start Value
Countdown Mode
Haptic
Countdown Start
Countdown Step
Active Condition
Reset
Persistent
Trims
Trim Mode
Extended Trims
Independent Trim Per Flight Mode
Cross Trim
RF System
Owner Registration ID
Internal Module
External Module
Telemetry
Smart Port Telemetry
ACCESS Telemetry
Telemetry Settings
Checklist
Throttle Check
Failsafe Check
Pots Check
Switch Check
Logic Switches
Adding Logic Switches
Logic Switches - Shared Parameters
Logic Switches - Use with Telemetry
Special Functions
Curves
Expo
Function
Custom
Trainer
Trainer Mode = Master
Trainer Mode = Slave
Device Config
Programming Tutorials
Initial Radio Setup Example
Step 1. Charge the Radio and Flight Batteries
Step 2. Calibrate the Hardware
Step 3. Perform the Radio System Setup
Basic Fixed Wing Airplane Example
Step 1. Confirm System Settings
Step 2. Identify the Servos/Channels Required
Step 3. Create a New Model
Step 4. Review and Configure the Mixes
Step 5. Configure the Outputs
Step 6. Introduction to Flight Modes
Step 7. Add a VFR Alert
Step 8. Set up a Lipo Battery Timer
Step 9. Add a MIX for Retracts
How To' Section
How to Set up a Low Battery Voltage Warning
How to Set up a Battery Capacity Warning Using a Neuron ESC
How to Set up a Battery Capacity Warning Using a Calculated Sensor
How to Create a Model for SR8/SR10
How to Reorder Channels E.g. for SR8/SR10
How to Configure a Butterfly MIX
Advertisement
Quick Links
Download this manual
X20 and Ethos
User Manual
Table of
Contents
Previous
Page
Next
Page
1
2
3
4
5
Advertisement
Table of Contents
Need help?
Do you have a question about the X20 and is the answer not in the manual?
Ask a question
Questions and answers
Related Manuals for FrSky X20
Drone & Quadcopter Accessories FrSky Tandem X20 User Manual
(242 pages)
Transmitter FrSky TANDEM X20 Manual
(2 pages)
Remote Control FrSky TANDEM X20 Manual
(2 pages)
Transmitter FrSky TANDEM X20S Manual
(2 pages)
Drones FrSky Ethos User Manual
(163 pages)
Drones FrSky Apus MQ60 V2 Instruction Manual
(2 pages)
Drones FrSky Rover 3 Manual
Tilting rotors drone (2 pages)
This manual is also suitable for:
Ethos
X20s
Table of Contents
Save PDF
Print
Rename the bookmark
Delete bookmark?
Delete from my manuals?
Login
Sign In
OR
Sign in with Facebook
Sign in with Google
Upload manual
Upload from disk
Upload from URL


Need help?
Do you have a question about the X20 and is the answer not in the manual?
Questions and answers