Quidel Sofia 2 User Manual
Hide thumbs
Also See for Sofia 2:
- Quick start manual (9 pages) ,
- Quick reference instructions (7 pages) ,
- Technical bulletin (3 pages)
Table of Contents
Advertisement
Advertisement
Table of Contents

Related Manuals for Quidel Sofia 2


Summary of Contents for Quidel Sofia 2
- Page 1 User Manual...
-
Page 2: Table Of Contents
User Types ..........................13 System Display ..........................14 System Display ........................... 14 Installation, Setup, and Operation ....................15 Sofia 2 Setup ..........................15 Power Up ............................ 15 Calibration Check ........................18 Supervisor Menu ........................18 Logging in as Supervisor ...................... 18 Settings .......................... - Page 3 Export Patient Data to USB Flash Drive ................32 Sofia 2 Firmware and Assay Methods ................. 32 Import Firmware from USB Flash Drive ................32 Import Assay Methods from USB Flash Drive ..............33 Import Language Files from USB Flash Drive ............... 33 Run Test (Patient Specimens) .....................
-
Page 4: General Information
General Information Quidel Contact Information Contact Quidel Technical Support from 7:00 a.m. to 5:00 p.m. Pacific Time Tel: 800.874.1517 (in the U.S.); 858.552.1100 (outside the U.S.) Fax: 858.552.7905 E-mail: technicalsupport@quidel.com or contact your local distributor Website: quidel.com Page 3 of 48... -
Page 5: Main Menu Structure
Main Menu Structure Page 4 of 48... -
Page 6: Labels And Symbols
Labels and Symbols Label/Symbol Description Manufacturer In vitro diagnostic medical device Consult instructions for use Authorized Representative in the European Community Temperature limitation Humidity limitation Waste electrical and electronic equipment (WEEE) Serial Number Catalog Number Warning / Caution Ultraviolet Radiation Potential Biohazard Page 5 of 48... -
Page 7: Icons
Icons Page 6 of 48... - Page 8 Page 7 of 48...
-
Page 9: Brief Warnings, Precautions, And Limitations
◼ Always operate Sofia 2 on a surface that is level, dry, and not in direct sunlight. ◼ Do not stack or place objects on top of the Sofia 2. Maintain a 6” minimum clearance around the sides and back of the Sofia 2. - Page 10 ◼ Sofia 2 should only be used by trained operators. ◼ Do not use if Sofia 2 is reporting an error condition that cannot be corrected. ◼ To obtain accurate results, refer to the assay-specific Package Insert for details on specific tests.
- Page 11 ◼ Clean Sofia 2 per the Maintenance and Cleaning section of this User Manual prior to return or disposal. ◼ Sofia 2 must be disposed of in a safe and compliant manner. Applicable Federal, State, and Local regulatory requirements shall be followed to ensure Sofia 2 is not disposed of as municipal waste.
-
Page 12: Introduction
AWAY Mode) or placed on the counter or benchtop for a manually timed development and then placed into Sofia 2 to be read (READ NOW Mode). Sofia 2 will read the test strip and measure the fluorescent signal by processing the results using method-specific algorithms. Sofia 2 will display the test results. -
Page 13: Development Modes
READ NOW development timing will not be available when this Default Mode has been selected. READ NOW Mode may be most convenient for high volume situations as Sofia 2 can quickly read multiple patient samples sequentially. The User dispenses the patient sample into the Test Cassette. -
Page 14: User Types
◼ Dymo Vinyl Label Roll, 2 5/16” x 4” (Part #30256) ◼ Replacement Battery Contact Quidel Technical Support for additional supplies at 800.874.1517 (in the U.S.). See page 3 for additional contact information. Sofia 2 consumable test kits, including Test Cassettes and External Quality Control materials, are supplied separately. -
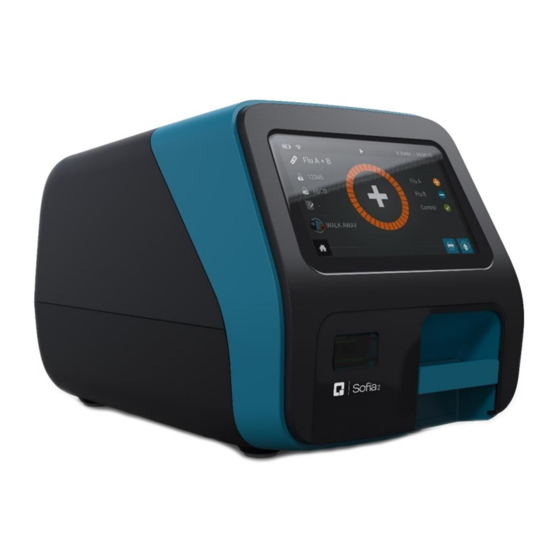
Page 15: System Display
System Display System Display Sofia 2 contains a 4-inch color LCD display for interacting with the user interface (Figure 1). Figure 1 Touchscreen Display Barcode Scanner Cassette Drawer Page 14 of 48... -
Page 16: Installation, Setup, And Operation
Installation, Setup, and Operation Sofia 2 Setup ◼ Place Sofia 2 on the benchtop. The unit is portable and can be moved to a suitable location for testing. Ensure the countertop is stable, level, dry, and free of obstructions. Avoid direct sunlight. - Page 17 Sofia 2 will display the Power On Progress screen and complete a Power On Self-Test. Once the Power On is complete, Sofia 2 will display the Run Test screen (Figure 3) and it is ready for use. Figure 3 After a Firmware update, or when turning on Sofia 2 for the first time, the User may see several screens upon startup designed to personalize their Sofia 2 settings.
- Page 18 Run Test screen. If the Sofia 2 is not already connected to the internet, Sofia 2 will prompt the User to set up their network and will take the User to the Network Interface screen to do so (page 21).
-
Page 19: Calibration Check
Calibration Check A Calibration Check must also be performed before using Sofia 2 for the first time (Figure 7). The default Supervisor ID (1234) will be used for the Calibration Check. Figure 7 Supervisor Menu Logging in as Supervisor The Supervisor Menu allows the Supervisor to access additional functionality and security options depending on the work environment and the location of Sofia 2. -
Page 20: Set Entry Requirements
Set Default Mode and Timeout Default Mode When the Supervisor sets Sofia 2 to a certain default mode, this will be the normal operating mode unless otherwise changed. Select either WALK AWAY, READ NOW, or LOCKED WALK AWAY development mode. -
Page 21: Other Settings
When the Site Name and ZIP Code are complete, continue to Set Language and Sound by pressing . Set Language and Sound Sofia 2 can be set to display languages that were previously installed from the Export, Import, Delete menu (page 31). to select the appropriate language. This language will be displayed once the User returns to the Run Test screen. -
Page 22: Network Settings
Set Time and Date The Time option allows for two different time formats to suit specific country requirements. The User can change the displayed time format to 12h or 24h format. In the field, select either 12h or 24h. Use the on-screen keypad to enter the correct time. When the 12h format is selected, also select AM or PM. -
Page 23: Lis Settings
LIS Settings screen is only available for Sofia 2’s that are Connected to Quidel (page 25). Users with a Sofia 2 that is not Connected to Quidel may also refer to the Send Data section on page 40 for an alternative way to check their LIS connection. -
Page 24: Virena Settings
For Enable Sending Of Test Results To Virena, select either On or Off. For Auto Send, select either On or Off (Figure 11). If Auto Send is set to on, Sofia 2 will send results to Virena when idle. If Auto Send is set to off, the instrument will never send results unless the User manually decides to do so via the Send Data screen (page 40). -
Page 25: Test Virena Connection
Press to continue to the next screen. For Transmit Patient ID, select either On or Off. For Transmit Order Number, select either On or Off (Figure 12). This information is used for study purposes only and this information will not be transmitted regardless of the selection. Figure 12 Press to continue to the next screen. -
Page 26: Connect To Quidel
Figure 14 If the Sofia 2 is Connected to Quidel, the User can also test their Virena connection by pressing the icon on the Virena Settings home screen (seen in Figure 10). However, the will only be visible on this screen if the Sofia 2 is Connected to Quidel. Instructions on how to Connect Sofia 2 to Quidel can be found in the next section. -
Page 27: Software Updates
Run Test screen. If the Sofia 2 is not already connected to the internet, Sofia 2 will prompt the User to set up their network and will take the User to the Network Interface screen to do so (page 21). -
Page 28: Statistics
Figure 17 Statistics View Analyzer Info The first screen of View Analyzer Info displays the Firmware Version, Hardware Version, Number of Tests, Serial Number, IP Address, and LUT Version (Figure 18). Select to continue to the next screen or to return to the Run Test screen. Figure 18 Page 27 of 48... -
Page 29: View Message Log
The second screen of View Analyzer Info displays the Ethernet MAC, Wi-Fi MAC, Wi-Fi SSID, Cellular Firmware Version, IMEI, and ICCID (Figure 19). Select to return to the Run Test screen. Figure 19 View Message Log View Message Log displays the Error Code, Date, and Time (Figure 20). Select to return to the Run Test screen. -
Page 30: Managing Users
Managing Users Add User To add a User, select on the Add User screen (Figure 21). Use the on-screen keypad or barcode scanner to enter the User ID. User ID must be at least 4 digits. Choose User Type by selecting Operator or Supervisor. Enter the Name of the new User using the on-screen keypad. -
Page 31: Edit User
Edit User Select a User by touching anywhere within the row, then select . Use the on-screen keypad to edit the User information (Figure 22). Figure 22 When the information is complete, press Delete User Select a User by touching anywhere within the row, then select to delete User (Figure 23). -
Page 32: Export, Import, Delete
Sofia 2 settings data. Once complete, it is safe to remove the USB flash drive. When cloning Sofia 2, all Users will transfer over. User history, lot status, QC, and test data will not transfer over. Page 31 of 48... -
Page 33: Import Settings From Usb Flash Drive
Connecting their Sofia 2 to Quidel via the Connect to Quidel screen on page 25 of this User Manual. If the Sofia 2 is Connected to Quidel the instrument will automatically download these updates. -
Page 34: Import Assay Methods From Usb Flash Drive
Select the User ID field on the Run Test screen. Use the barcode scanner (Figure 25) to scan the barcode from a User’s ID Card or manually enter the data using the on-screen keypad on Sofia 2. Page 33 of 48... -
Page 35: Enter The Patient Id
Select the Order Number field on the Run Test screen. Use the barcode scanner to scan an order number barcode from a patient test requisition or other source or manually enter the data using the on-screen keypad on Sofia 2. Change Development Mode Select the desired Development mode: WALK AWAY or READ NOW (See the description of the WALK AWAY and READ NOW development modes on page 12). -
Page 36: Test Procedure
. Insert the Test Cassette into the drawer and gently close the drawer (Figure 27). Figure 27 Upon closing the drawer, Sofia 2 will start automatically and display the progress on the screen. Page 35 of 48... -
Page 37: Patient Test Results
Patient Test Results When the test is complete, the results for both the patient specimen test(s) and the internal procedural control will be displayed on the Sofia 2 screen and automatically saved on the device. If configured, results may also be stored in the cloud using Virena or transmitted to the LIS. -
Page 38: Review Qc Results
Figure 29 Select to return to the Run Test screen. Review Calibration Results Sofia 2 Calibration Results include the records for previously run Calibration tests. A list of the Calibrations performed will be displayed (Figure 30). Page 37 of 48... -
Page 39: View Lot Status
QC Lot Status displays the QC Kit/Lots of assays and their expiration dates. This information is captured by Sofia 2 when Quality Controls are run. A list of the Kit/Lots that have been processed by the QC procedure will be displayed along with the expiration date. -
Page 40: Qc Results
Refer to the assay-specific Package Insert for Calibration Check frequency. Perform Sofia 2 Calibration Check Use the specific Calibration Cassette included with Sofia 2 for the Calibration Check. For replacement Calibration Cassettes, please contact Quidel Technical Support. Following the prompts, insert the Calibration Cassette into Sofia 2 and gently close the drawer. -
Page 41: Calibration Results
Caution: Store the Calibration Cassette in the provided storage pouch at room temperature (15°C to 30°C) between uses. Improper storage could damage the Calibration Cassette, which may lead to a failed Sofia 2 Calibration Check. Do not touch the read window of the Calibration Cassette as this may impact the results. -
Page 42: Shutdown
Sofia 2 Storage If the Sofia 2 is intended to be stored and/or not used for an extended period of time (> 3 months), unplug the unit from AC power and remove the battery (Figure 31). When ready to use the Sofia 2 again, install the battery and follow the Installation, Setup, and Operation section of this User Manual. -
Page 43: Cleaning
Ensure that there is no cassette in the drawer and unplug Sofia 2. Gently pull the drawer out until it stops, then lift up Sofia 2 and press the button as shown (Figure 32). The drawer can then be removed. - Page 44 Use a soft cloth with 70% alcohol or 0.6% bleach solution to clean the drawer only. DO NOT clean the interior of Sofia 2. DO NOT submerge drawer in cleaning solution. After cleaning the drawer, insert it carefully aligning the rails of the drawer into the tracks of Sofia 2 (Figure 33).
-
Page 45: Appendices
22 cm deep x 12 cm wide x 12 cm high Weight 2 lbs (1 kg) 100-240 VAC, 50/60 Hz, self-switching Power Supply Input (U.S./International), 2.93 Amp maximum Sofia 2 Input 7.5V DC 2.5A Replaceable Battery LiPo rechargeable battery Display 4-inch color LCD touchscreen... -
Page 46: Appendix B Optimizing Analyzer Placement
◼ Do not place the analyzer near a heat source. ◼ Allow for the spacing of a minimum of 6 inches between Sofia 2 analyzers. ◼ Do not place the analyzer near a wall or other surface that minimizes proper ventilation including the area behind the unit. - Page 47 Cassette not valid for current test. Retest using a Cassette of the correct device type. Assay Method File unavailable for Only test with approved Sofia 2 assays. supplied Cassette. Cassette cannot be reused. Use a Test Cassette that has not been previously run.
- Page 48 Displayed Text Action Battery is low. Please plug in to AC Connect Sofia 2 to AC power or charge power before running another test. battery before running another test. Calibration Failed. Contact Technical Support. Power On Self-Test error. Clean the drawer, including the two...
- Page 49 File has been downloaded from myquidel.com. Some files were not imported Ensure that correct files have been successfully. downloaded from myquidel.com. 20299 – Sofia 2 (US) 20300 – Sofia 2 (OUS) MDSS GmbH Schiffgraben 41 30175 Hannover, Germany Quidel Corporation...
Need help?
Do you have a question about the Sofia 2 and is the answer not in the manual?
Questions and answers
where can i get a replacement cassette for calibration
You can buy a replacement calibration cassette for the Quidel Sofia 2 from Henry Schein Medical.
This answer is automatically generated
error send to virena error