Table of Contents
Advertisement
Quick Links
SIN.ES3BE - QuickStart Guide
Photovoltaic system efficiency and production
monitoring system. SGH-net compliant
1.OVERVIEW
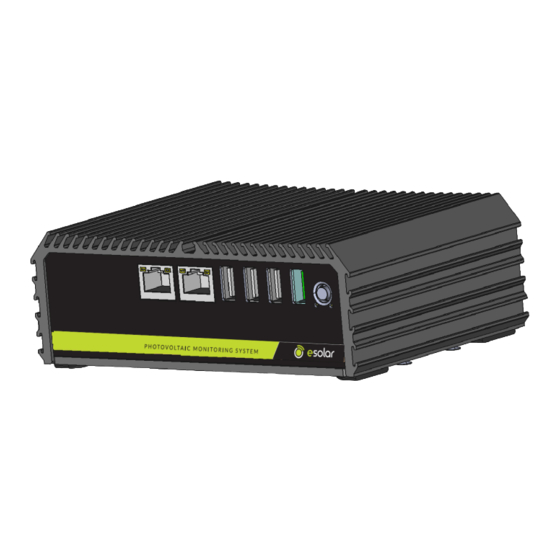
Front
Back
2.Connections/buttons/leds
3
1
2
1 - Ethernet port for internet and devices
2 - Service Ethernet port and devices
3 - USB ports for backup memory devices
4 - On/Off button
5 - Activity LEDs
6 - Power LED
NOTE: For details on the configuration of esolar 3 b.e., please refer to the manual.
3.CONTENTS OF THE PACKAGE
1 x SIN.ES3BE
Before making any connection, remove the power supply and complete the wiring,
then feed the datalogger
4.POSSIBLE INSTALLATION MODES
2
horizontal mounting
2x M4x6mm screws
5.POWER SUPPLY CONNECTION
To power the device use the appropriate power supply supplied with esolar 3 b.e. or one of the following
equivalent.
Manufactured by Cincoze Co.Ltd
- Datalogger with integrated web server
- Acquires up to 120 devices
- Keeps up to 2 years of 15-minute data in memory
- Powerful, compact and very low power consumption
- Acquires data from
(a) inverter
(b) string controllers
(c) energy meters
(d) interface protections
(e) general protections
(f) sensors of any kind
(g) digital inputs
- 2 isolated RS485 ports
- 1 non-isolated RS485 port
- 1 RS232 port
8
4
5 6
7
9
10
7 - 24vdc power supply connector
8 - RS232 serial port
9 - KNX Port (only active on KNX model)
10 - RS485 COM3 INSULATED port
11 - RS485 COM1 INSULATED port
12 - RS485 port NOT INSULATED
2 x wall mounting brackets
1 x Power connector +
3 x 3-pin connector for isolated RS485 ports
(Install at the rear
the DIN RAIL Kit - optional)
DOWNLOAD DOCUMENTAZIONE: https://www.esolar.it/en/useful-documentation/
6.FIELDBUS CONNECTION
esolar 3 b.e. has 3 RS485 ports, 1 RS232 port and one KNX port (active in KNX models).
Two RS485 ports are optoisolated to offer excellent communication performance with the devices in the field
and robustness, while the COM5 is not optoisolated, so it is recommended to connect the latter to devices that
do not present particular problems of electrical disturbances or low probability of the presence of surges.
It is also recommended to always use appropriate cables for RS485 connections and connect always ground
the shield conductor on one side only (preferably on the field side).
RS485 - COM1 & COM3
Connect the cables in accordance with the RS485 standard, paying attention to the impedance of the
section and in the presence of the line termination resistor. It is recommended not to exceed 300mt in
length of the RS485 network in a photovoltaic field, alternatively it is recommended to use RS485
12
repeaters. Respect polarities
RS232 - COM 4
11
Do not exceed 2-3 mt of length for the RS232 section and use shielded cables.
KNX port
Observe the installation rules of KNX networks, do not exceed 350mt of length and
use only KNX certified cable. Respect the polarities.
7.ETHERNET PORTS
esolar 3 b.e. has 2 ethernet ports:
port 1 = normal use port, which can be used to connect the device to the internet, connect to the
device, connect esolar 3 b.e. to the devices in the field, the default address of this port is static and
is 192.168.1.110, it is user-modifiable.
port 2 = service port, which can be used to connect to esolar 3 b.e. and to connect the datalogger to the
devices in the field, the IP address of this port is fixed and cannot be changed: 192.168.1.100
8.ON/OFF BUTTON
- To switch on briefly press button (4), esolar 3 b.e. will be ready for operation after about 2 minutes.
- To switch off esolar 3 b.e. briefly press the button (4), after about 10...20 seconds the LED 5 and 6 will go
off, you can then disconnect the power supply. the device will automatically switch on again when the
power is restored.
9.USB PORTS
esolar 3 b.e. has 4 USB ports to which it is possible to connect an external memory to make a local backup
of the scheduled data. Choosing the USB port to insert the flash memory into outside is indifferent.
It is necessary to insert a flash memory formatted with FAT32 filesystem and of capacity of at least 8 GB.
SIN.ES3BE_QSG_1.0_en
Advertisement
Table of Contents

Summary of Contents for Sinapsi esolar3be RS485
- Page 1 SIN.ES3BE - QuickStart Guide 6.FIELDBUS CONNECTION Photovoltaic system efficiency and production esolar 3 b.e. has 3 RS485 ports, 1 RS232 port and one KNX port (active in KNX models). monitoring system. SGH-net compliant Two RS485 ports are optoisolated to offer excellent communication performance with the devices in the field and robustness, while the COM5 is not optoisolated, so it is recommended to connect the latter to devices that 1.OVERVIEW do not present particular problems of electrical disturbances or low probability of the presence of surges.
- Page 2 To activate the service, scan the QRCode present on the machine and log in or register on MY SINAPSI portal that is opened. Once the procedure has been completed, you can log on to the device with an address like: https://sn12345678.net.sghiot.com Enter the default login credentials: username = admin, password = admin.

Need help?
Do you have a question about the esolar3be RS485 and is the answer not in the manual?
Questions and answers