Table of Contents
Advertisement
Quick Links
Advertisement
Table of Contents

Related Manuals for Spinning SPINPower Performance Crank


Summary of Contents for Spinning SPINPower Performance Crank
- Page 1 PERFORMANCE CRANK OWNER’S MANUAL...
-
Page 3: Table Of Contents
CONTENTS The SPINPower® Performance Crank What’s Inside SPINPower® Performance Crank Feature Checking or Replacing the Batteries Pairing the SPINPower® Performance Crank Removing your Existing Crank and Pedal Installing your SPINPower® Performance Crank 13 Care and Maintenence Frequently Asked Questions Warranty Information and Customer Support... -
Page 4: The Spinpower® Performance Crank
Spinner® bike. Be sure to log on to spinning.com for all of the latest updates and information about SPINPower® and the Spinning® program. -
Page 5: What's Inside
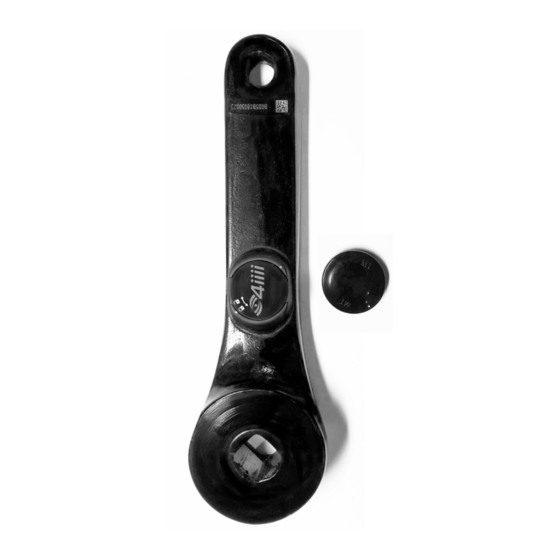
3. Crank bolt cover (plastic) 4. SPINPower® decal Tools Needed for Installation 1. Spinning® or Park CWP-7 crank removal tool. 2. Corresponding wrench to fit the crank removal tool. 3. 14 mm socket wrench for the crank bolt. 4. 15mm open end (pedal) wrench for removal of the pedal 5. -
Page 6: Spinpower® Performance Crank Feature
Powder coated finish for durability. Specifications Compatible only with consumer Spinning® bikes. More specifically, compatible with all Active and Performance line bikes manufactured after 3/2018. which include the Active bikes – A1, A3, A5 and the “25th Year Anniversary”... -
Page 7: Checking Or Replacing The Batteries
2. Twist the battery cover door counter clockwise to reveal the battery compartment. Note the orientation of the CR2032 coin cell battery. Place the cover back on and twist clockwise until the cover is fully closed (as indicated by the lock icon). www.spinning.com 800.847.SPIN (7746) -
Page 8: Pairing The Spinpower® Performance Crank
PAIRING THE CRANK Your crank is designed to pair with a wide variety of devices that receive signals in either ANT+ or Blue- tooth formats. The crank is equipped with a motion sensor that will turn it on while the crank is rotating making an on/off switch unnecessary. -
Page 9: Removing Your Existing Crank And Pedal
SPINPower® crank. To do so, you need a 14mm socket wrench as well as a heavy duty crank removal tool. (SPINTech® tool by Spinning®, Park CWP-7 Tool or equivalent available on Spinning.com). Keep the crank from rotating during installation. - Page 10 REMOVING YOUR EXISTING CRANK (continued) 2. While facing the crank (on the left side of the bike), turn the wrench so that it is rotating over the top towards the back of the bike (clockwise). This is a special left-hand thread and is loosened by turning “over the top”...
- Page 11 7. Once the tool is setup, thread the body of the crank removal tool into the fine threads of the crank. It is VERY IMPORTANT that this tool is threaded into the crank in a straight manner. DO NOT CROSS-THREAD this tool. www.spinning.com 800.847.SPIN (7746)
- Page 12 REMOVING YOUR EXISTING CRANK (continued) 8. Once started by hand, use a wrench on the crank removal tool and turn it clockwise to thread the tool com- pletely into the crank until it is snug. Do not over tighten. 9. Once the tool is fully threaded into the crank, use a wrench to turn the removal bolt clockwise into the crank.
-
Page 13: Installing Your Spinpower® Performance Crank
Now push the crank onto the axle as shown. 2. Once the crank is on, hand-thread the crank bolt clockwise onto the axle. Now use a 14mm torque wrench to tighten the bolt to 35-40 ft-lbs (47-57 Nm). Do not overtighten the bolt. www.spinning.com 800.847.SPIN (7746) -
Page 14: Care And Maintenence
INSTALLING THE SPINPOWER ® CRANK (continued) 3. Once the crank has been tighened it is time to install the pedal. Face the non-drive side of the bike and hand thread the first few threads of the pedal onto the crank turning it counter clockwise. Now use a 15mm pedal wrench on the flat section of the axle of the pedal to completely tighten the pedal by turning the wrench over the top towards the front of the bike (counter-clockwise). -
Page 15: Frequently Asked Questions
Absolutely. As long as your device is capable of reading a Bluetooth® or ANT+ signal. Can I pair my crank to a leaderboard system? Yes. Most leaderboards work with ANT+ signals through a WASP or other translation device. Consult your leaderboard instructions for details. www.spinning.com 800.847.SPIN (7746) - Page 16 ( 1 ) this device may not cause harmful interference, and ( 2 ) this device must accept any interference received, including interference that may cause undesired operation. Changes or modifications not expressly approved by Spinning® could void the user’s authority to operate the equipment. FCC: ZZNPM100...
-
Page 17: Warranty Information And Customer Support
Mobile: +31 6814 7769754 infoeurope@spinning.com Hours: 9:00 AM–5:30 PM CET ©2018 Mad Dogg Athletics, Inc. All rights reserved. Spin®, Spinner®, Spinning®, Spin Fitness®, SPINPower® and the Spinning logo ® are registered trademarks that are owned by Mad Dogg Athletics, Inc. www.spinning.com 800.847.SPIN (7746) - Page 18 800.847.SPIN (7746)
- Page 19 MAD DOGG ATHLETICS, INC. 2111 Narcissus Court Venice, CA 90291 Toll-free: 1.800.847.7746 Dialing outside U.S.: 1.310.823.7008 Fax: 1.310.823.7408 www.spinning.com MAD DOGG ATHLETICS EUROPE B.V. Scheldeweg 3, 3144 ES Maassluis The Netherlands Phone: +31 1059 04508 Mobile: +31 6814 7769754 www.spinning.com...
Need help?
Do you have a question about the SPINPower Performance Crank and is the answer not in the manual?
Questions and answers