
Related Manuals for COMFORTPOOL CP-2910


Summary of Contents for COMFORTPOOL CP-2910
- Page 1 SOLAR BOL Installatie- & gebruikershandleiding SOLAR DOME Installation & Operation Manual...
-
Page 2: Table Of Contents
Inhoud Veiligheidsvoorschriften ........................4 Algemene informatie .......................... 5 Hoe werkt de Solar Bol? ........................5 Aandachtspunten ............................5 Installatie ................................. 5 Waterdruk in de solar bol ............................6 Koppelen van extra solar bollen ..........................6 Installatie van de solar bol ......................... 6 Lay-out van de solar bol .......................... - Page 3 Contents Safety warnings & instructions ....................... 14 General Information .......................... 15 How it works? ............................ 15 Points to Note: ............................15 Installation ................................15 Solar Heater Operating Pressure .......................... 15 Linking Additional Solar Heaters ........................... 16 Solar Heater Installation ........................16 Pool Layout with Solar Heater ........................
-
Page 4: Veiligheidsvoorschriften
Veiligheidsvoorschriften Lees de handleiding zorgvuldig door vóór de montage en het gebruik van de solar bol, en volg alle instructies op. Bewaar deze handleiding voor toekomstig gebruik. Het niet opvolgen van de veiligheidsvoorschriften en instructies uit deze handleiding en op het product kan leiden tot schade aan het product, ernstige verwondingen bij u of anderen, of de dood tot gevolg hebben. -
Page 5: Algemene Informatie
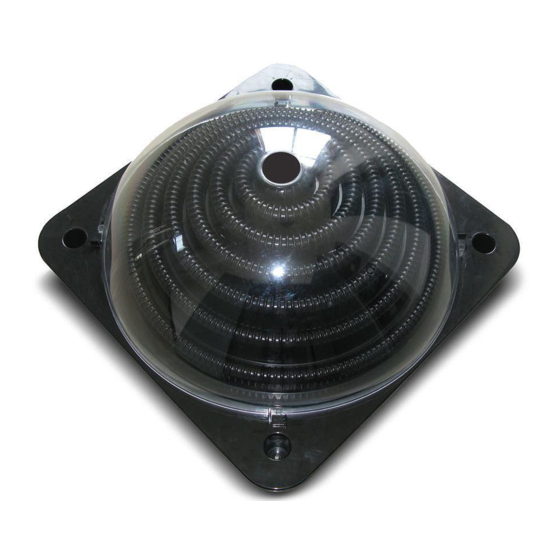
Algemene informatie De Comfortpool Solar Bol heeft een innovatief koepelvormig ontwerp, dat zorgt voor een betere warmteoverdracht dan traditionele solar zwembadverwarming. Bovendien elimineert het de noodzaak om veel ruimte in de tuin over te laten voor solar verwarming. Met de meegeleverde slangaansluiting past de Comfortpool Solar Bol op zwembadfiltersystemen met zowel Ø... -
Page 6: Waterdruk In De Solar Bol
2. Waterdruk in de solar bol Zorg ervoor dat de waterdruk in de solar bol niet hoger is dan 1,5 bar (21psi). Het wordt aangeraden om een drukmeter tussen de zwembadpomp en de solar bol te plaatsen, om toezicht te kunnen houden op de waterdruk van het water dat de solar bol instroomt. -
Page 7: Lay-Out Van De Solar Bol
1 x lange zwembadslang 1 x korte zwembadslang 2 x slangklem 38 mm 38 mm (voor aansluiting op filterpomp) (voor aansluiten van andere solar bol) Het enige gereedschap dat u nodig heeft voor de installatie is een schroevendraaier, om de slangklem aan de slangaansluitingen te bevestigen. -
Page 8: Monteren Van De Koepel Op Het Hoofdpaneel
Draai, voor het aansluiten van de zwembadslang, de slangaansluiting aan de zijkant tegen de klok in, totdat deze niet verder kan. De openingen van de twee slangaansluitingen moeten in tegengestelde richting wijzen. Om de slangaansluitingen los te maken van het hoofdpaneel, draai de aansluitingen met de klok mee los totdat deze niet verder kunnen en trek ze los. -
Page 9: De Solar Bol Aansluiten Op Het Zwembad
De solar bol aansluiten op het zwembad Waarschuwing! Zorg voor het aansluiten van de solar bol op het zwembad dat de zwembaduitlaat en zwembadinlaat zijn afgesloten en al verbonden met zwembadslangen. Raadpleeg de handleiding van het zwembad of uw zwembaddealer voor de juiste instructies. Schakel de zwembadfilterpomp uit alvorens te beginnen met de installatie van de solar bol. -
Page 10: Meerdere Solar Bollen Aansluiten
c) Schroef de slangaansluiting met schroefdraad vast aan de slangaansluiting aan de zijkant van het hoofdpaneel. Zorg ervoor dat de O-ring in de slangaansluiting met schroefdraad zit. d) Schroef de schroefdraadaansluiting van de retourleiding, de zwembadslang die verbonden is met de waterinlaat van het zwembad, op de slangaansluiting met schroefdraad. -
Page 11: In Gebruik Nemen
Door een bypass (niet inbegrepen) aan te leggen kunt u zelf bepalen of het water door de solar bol stroomt of juist rechtstreeks van de filterpomp terug naar het zwembad. Om afkoelen van het zwembad te voorkomen dient het zwembadwater alleen op zonnige dagen door de solar bol te stromen. Wanneer u bijvoorbeeld het zwembadwater ’s nachts door de solar bol laat stromen, zal het water afkoelen. -
Page 12: Winterklaar Maken En Onderhoud
Winterklaar maken en onderhoud Waarschuwing! Schakel de zwembadfilterpomp uit vooraleer u de solar bol en zwembadslangen loskoppelt van de pomp. Om de solar bol winterklaar te maken blokkeert u de zwembadinlaat en -uitlaat, en koppelt u vervolgens de solar bol los van de zwembadslangen. Laat al het water uit de solar bol weglopen aan het einde van het seizoen. -
Page 13: Onderdelenlijst
© 2018 Comfortpool. Alle rechten voorbehouden. Niets uit deze uitgave mag gekopieerd of overgenomen worden, in welke vorm dan ook en op welke wijze dan ook, hetzij elektronisch, mechanisch, door fotokopieën, opnamen, of op enige andere wijze, zonder voorafgaande schriftelijke... -
Page 14: Safety Warnings & Instructions
Safety warnings & instructions Before installing this product, read and follow all warning notices and instructions accompanying this product. Save this instruction manual for future reference. Failure to follow these safety warnings and instructions can result in injury, death or property damage. -
Page 15: General Information
General Information The Comfortpool Solar Dome features an innovative dome design that provides better heat transfer than traditional solar systems and eliminates the need to set aside yard space for conventional solar panels. With the hose connectors provided, the solar heater fits filtration systems which require either Ø32 mm (1¼″) / 38mm (1½″) soft hose connection or Ø57mm (2¼″) threaded nut hose connection. -
Page 16: Linking Additional Solar Heaters
Never install additional solar heaters when filtration/pump is under operation. Always turn off the pump before heater installation or disconnection. Solar Heater Installation Before installing the Comfortpool Solar Dome, check to make sure all parts are present in the package. 1 x Main base with 2 stand 1 x Heater Dome Cover 2 x Hose reducer ) –... -
Page 17: Pool Layout With Solar Heater
Pool Layout with Solar Heater Typical above-ground pool With one Solar Heater With multiple Solar Heaters layout Under the main base, there are two holes for hose connector assembly; one is located in the center and another one is on the side. Water flows in the heater coils from the center hose connector and then out through the side hose connector back to the pool. -
Page 18: Assembling Dome Cover To Main Base
To detach the hose connectors from the main base, turn the connectors clockwise until it stops and then pull it away. To assemble the hose connector to the main base, reverse the steps to finish the assembly. Assembling Dome Cover to Main Base NOTE: Start this assembly after finishing all hose connections. -
Page 19: For Pools Using Hose Connection Of Ø 57 Mm (2¼")
For pools using hose connection of Ø 57 mm (2¼") a) Detach the pool return hose from your pump/filter. b) Use soft hose of either Ø32mm (1 1/4in) or Ø38mm (1 1/2in) or to connect the center hose connector to the pump/filter. -
Page 20: For Multiple Solar Heaters
3. For multiple solar heaters Depending on the weather conditions, 1 heater is recommended per 10,000 liters of pool volume. NOTE: Make sure to have enough hose clamps and hose reducers before linking additional solar heaters. A hose reducer is required for Ø38mm (1 1/2’in) hose connection, and a hose clamp should be used to secure all hose connections. -
Page 21: Initial Operation
By installing a bypass (not included) you can choose whether the pool water will flow through the solar heater, or directly from the pump back to the pool. To prevent the pool from cooling down, the water should only flow through the solar heater on sunny days. -
Page 22: Winterizing And Maintenance
Winterizing and Maintenance Warning: Turn of the pump before disconnecting the heater/hoses from your filtration system. For winterizing, block the pool water inlet and outlet and then disconnect the solar heater from the hoses. Drain all the water out of the solar heater at the end of the season. Water left inside may freeze, causing the material to rupture as the ice expands. -
Page 23: Exploded Drawing
O-ring (for threaded nut hose connector) © 2018 Comfortpool. All rights reserved. No part of this document may be reproduced or transmitted in any form or by any means, electronic, mechanical, photocopying, recording, or otherwise, without prior written permission of Comfortpool...
Need help?
Do you have a question about the CP-2910 and is the answer not in the manual?
Questions and answers