Table of Contents
Advertisement
Advertisement
Table of Contents

Related Manuals for Crest Audio CPX1500


Summary of Contents for Crest Audio CPX1500
- Page 1 owner’s manual S E R I E S CPX power amplifier CPX 900 CPX 1500 CPX 2600...
-
Page 2: Important Precautions
Do not parallel- or series-con- nect an amplifier output with any other amplifier output. Crest Audio is not responsible for damage to loudspeakers for any rea- son. Do not connect the inputs or out- puts of amplifiers to any other... - Page 3 introduction installation unpacking mounting cooling and ventilation powering maintenance features overview front panel rear panel application details installations bridged connections p.27 input output Specifications p.31 wire gauge charts CPX Owner’s manual p.11 p.23 p.32, 33 contents p. 1...
- Page 4 introduction CPX owner’s manual p. 2...
- Page 5 Congratulations on your purchase of a new CPX Series power amplifier, and thank you for your confidence in Crest Audio products. You are among the grow- ing number of audio professionals who have made Crest Audio one of the world’s leading suppliers of professional and commercial/industrial audio systems.
-
Page 6: Installation
installation CPX owner’s manual p. 4... -
Page 7: Cooling And Ventilation
what to do with the shipping carton proper rack-mounting technique keeping the amplifier cooled routine maintenance practices installation unpacking mounting cooling and ventilation maintenance p. 5... - Page 8 If you ever need to ship the unit anywhere without mounting it in a rack, you should take advantage of the original factory packing materials in order to avoid unnecessary damage. p. 6 CPX owner’s manual For replacement pack- aging, call Crest Audio’s Customer Service Department directly. see—service and support...
- Page 9 mounting All CPX Series amplifiers mount in standard 19-inch racks and occupy two rack spaces. Use of rear supports is highly recommended in all mobile and touring sound systems. CPX Front panel front height 3.47" / 88 mm CPX rear panel front height 3.47"...
- Page 10 installation INSTALLATION CPX professional power amplifiers are designed for durability in com- mercial installations and provide the quality performance required in studio and home applications. They are 2-rack-space units of 16" (406 mm) depth designed to mount in a standard 19" rack. Rear mounting ears are provided for additional support.
-
Page 11: Basic Setup
Basic setup Rack mount the amplifier in the location where it is to be used, remembering to allow for adequate access and cooling space. Make all the connections to the proper INPUT connectors on the desired channel. Select the proper mode con- figuration (STEREO or BRIDGE). -
Page 12: Features Overview
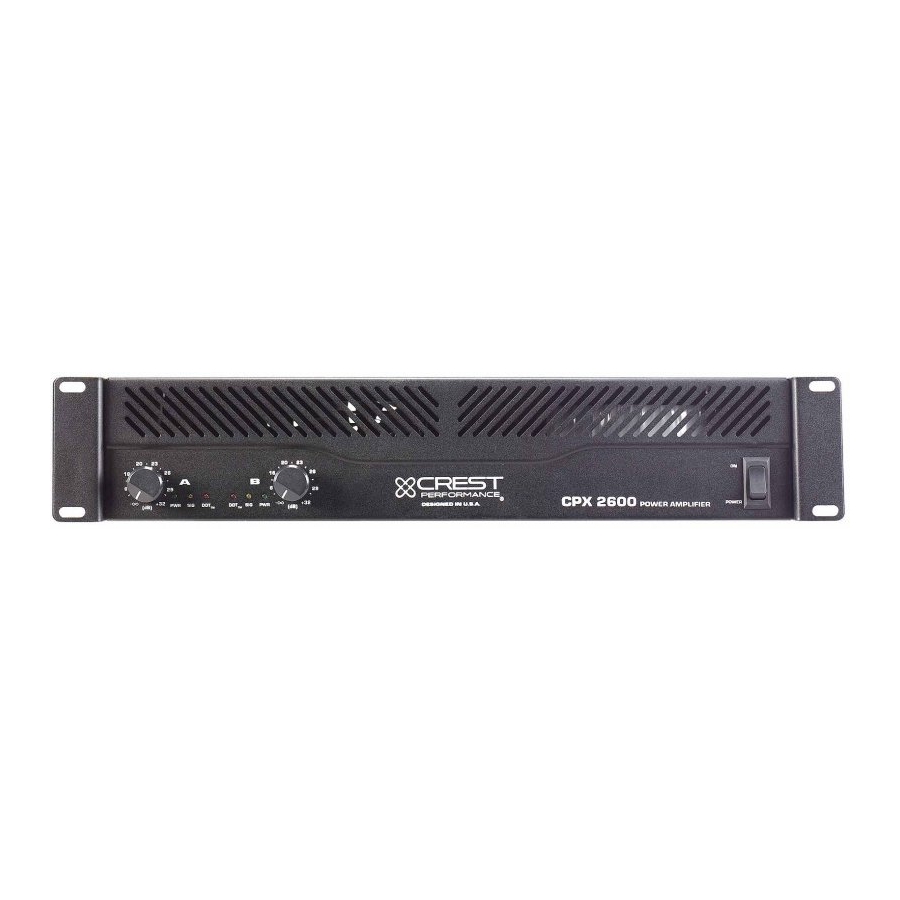
features overview CPX owner’s manual p. 10... - Page 13 location of connectors and controls Descriptions of connectors and controls features overview front panel rear panel p. 11...
- Page 14 features overview CPX owner’s manual CPX Front panel p. 12...
-
Page 15: Front Panel
With the GCL ENABLE / DEFEAT switch on the back panel in the ENABLE position, these LEDs indicate clipping is occurring in the corre- sponding channel. The Crest GCL limiting system will be covered in greater detail later in this manual. - Page 16 features overview CPX Rear Panel p. 14 CPX owner’s manual...
-
Page 17: Rear Panel
A normal reset button is relatively flat. If the breaker trips instantly each time you attempt to turn the unit on, it should be taken to a qualified Crest Service Center for repair. IEC Mains connector This is a standard IEC power connector. - Page 18 features overview CPX Rear Panel p. 16 CPX owner’s manual...
-
Page 19: Binding Post Outputs
rear panel Binding post outputs Shockproof binding post speaker outputs are provided on the CPX amplifier. For each channel, the outputs are in parallel and the speaker connection cables can be terminated with banana plugs or stripped wires for use in the binding post terminals, or can be connected using the Speakon outputs (9). - Page 20 features overview CPX Rear Panel p. 18 CPX owner’s manual...
- Page 21 With this feature defeat- ed, a severe overload could cause the mains circuit breaker to trip. The Crest GCL limit- ing system will be covered in greater detail later in this manual.
- Page 22 features overview CPX Rear Panel p. 20 CPX owner’s manual...
- Page 23 (parallel mode), or to other amp inputs in the same rack. This function allows one balanced mixer feed to be connected to the amp via the desired balanced input connector (XLR, ¼", Barrier), and then further distributed locally.
-
Page 24: Application Details
Application details CPX owner’s manual p. 22... -
Page 25: Bridge Mode
Then, as temperatures in the amplifier heat sinks increase, the automatic thermal-sensing circuitry will cause high-speed operation to occur. Depending upon signal conditions and amp loading, high-speed fan operation may continue or the fan may cycle continuously between high and low. - Page 26 Application details CPX owner’s manual p. 24...
- Page 27 Industrial & commercial installations Crest's patented GCL (Gain Comparator Limiting) circuit enables the sound tech- nician to maximize the performance of the amplifier/speaker combination by pre- venting the power amplifier from running out of headroom (clipping). This limiting system is activated by a unique circuit that senses signal conditions that might overload the amplifier and activates compression (reduces the channel gain) when clipping is imminent.
- Page 28 connections CPX owner’s manual p. 26...
-
Page 29: Amplifier Configurations
AMPLIFIER CONFIGURATIONS BASIC FULL-RANGE STEREO SYSTEM Right Full-range Speaker(s) MONO BI-AMPED SYSTEM Full-range Speakers Speakers connections L & R THRU Outputs Left L & R Full-range Inputs Speaker(s) ¼” Tip/Sleeve Patch Cord Mono Input Push-Push Switch Activation List: - Chan A, Low Cut Switch IN - Chan A, 150 Hz Xover Switch IN p. - Page 30 connections CPX owner’s manual p. 28...
-
Page 31: Bridge Configuration
- Chan B Low Cut Switch IN - Chan B 150 Hz Xover Switch IN Left Sub Speaker(s) Push-Push Switch Activation List: - Chan A, Low Cut Switch IN - Mode Switch IN (Bridge) connections L & R Inputs Mono Input p. 29... -
Page 32: Specifications
specifications CPX owner’s manual p. 30... -
Page 33: Frequency Response
Electronic balanced; Barrier Strip, XLR, TRS ¼" (6.3 mm) Low/Thru and High, TS ¼" (6.3 mm) Speakons for Chan A, Chan B & Bridge; Binding Posts Red, GCL™/clipping; Yellow, signal; Green, power Full short circuit, open circuit; over-temp thermal; RF; stable into any load... -
Page 34: Wire Gauge
wire gauge stranded cable length meters meters meters meters p. 32 wire gauge power loss 8 Ohm load 4 Ohm load 2.9% 5.6% 1.74 0.75 1.16 0.58 1.16 0.35 0.70 0.22 0.44 4.3% 8.2% 0.75 1.45 0.87 1.74 0.55 1.09 0.37 0.73 8.24%... - Page 35 stranded cable length wire gauge feet feet feet feet power loss 8 Ohm load 4 Ohm load 0.81% 1.61% 0.51 1.02 0.32 0.64 0.20 0.40 0.128 0.25 1.61% 3.2% 1.02 0.64 1.28 0.40 0.80 0.25 0.51 6.2% 11.9% 1.60 1.01 0.60 1.20 11.9%...
- Page 36 http://www.crestaudio.com CPX Owner's Manual Version 1.0 02/18/01...
Need help?
Do you have a question about the CPX1500 and is the answer not in the manual?
Questions and answers