Table of Contents
Advertisement
Quick Links
Advertisement
Table of Contents

Related Manuals for ASTRO DEVICES Nexus DSC Pro


Summary of Contents for ASTRO DEVICES Nexus DSC Pro
- Page 1 Nexus DSC USER MANUAL Nexus...
- Page 2 NEVER leave Nexus DSC Pro where it is subjected to extremes in temperatures. This includes low levels as well as high. DO NOT leave Nexus DSC Pro where it is in direct sunlight or in an enclosed space, such as a car, that can become extremely hot very rapidly.
- Page 3 It is all available at a press of a button! This user manual will get you started and help you make the most of your Nexus DSC Pro. Nexus DSC Pro User Manual...
- Page 4 ~ This page intentionally left blank ~ Nexus DSC Pro User Manual...
-
Page 5: Table Of Contents
TABLE of CONTENTS USB................. 28 Serial ..............28 TABLE of CONTENTS .......... 1 Info ................28 Introduction ............. 2 About Nexus DSC Pro ..........28 Time ............... 28 Product Features ............ 2 Environment ............29 Technical specifications..........2 Battery ..............29 Digital setting circles specifications ....... 2 GPS ................. -
Page 6: Introduction
Introduction Supports a two star alignment • Filter objects by magnitude, constellation and object type Nexus DSC Pro is a digital setting circles • Displayed angular resolution is 0.001 of a degree computer with optional WiFi interface for your •... -
Page 7: Controls
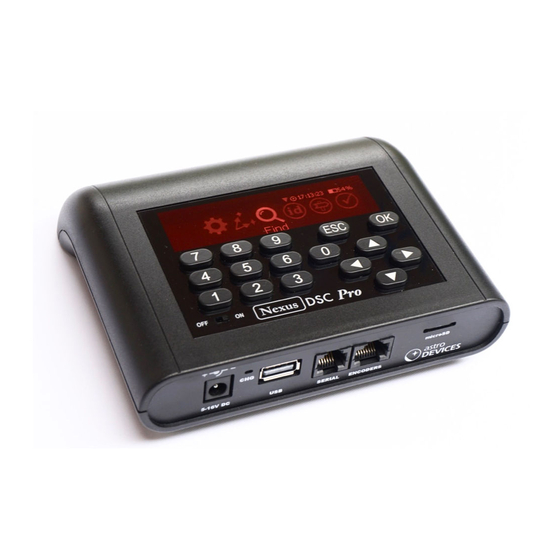
All controls are situated on front panel of Nexus computer directly. DSC Pro: The USB port on Nexus DSC Pro is used for: • To interface Nexus DSC Pro to ServoCAT • To interface Nexus DSC Pro to SiTech motor... -
Page 8: User Interface
Nexus DSC Pro in detail. In order to be able to use Nexus DSC Pro for locating celestial object it is necessary to set a few parameters first: • Time and date •... -
Page 9: Connecting To Your Telescope
‘Telescope’: To make sure that encoders are functioning correctly Nexus DSC Pro has a test mode to test the encoders. Selecting Test from the main menu activates it: Then you need to select the telescope:... -
Page 10: Two Star Alignment
Two star alignment Nexus DSC Pro needs to be aligned on two star before it can locate celestial objects. Your telescope does not need to be levelled for Nexus DSC Pro to locate celestial objects accurately unless a one star alignment method is used. -
Page 11: Alignment Object Screen
CATALOGUE, OBJECT, INFO and HELP. You While Nexus DSC Pro can be aligned on any can use keys to switch between object in its database it is best to use objects the tabs. The OBJECT tab is selected by default: form either Named Stars catalogue or Bright Stars catalogue. -
Page 12: Locating An Object
• Polaris should never be used as one of the alignment stars • Alignment stars with a declination greater Nexus DSC Pro will now show where to move than 80 degrees should be avoided the telescope to aim at NGC55: •... -
Page 13: Nexus Dsc Pro's Menus
Mpoint. Mpoint is described later in this manual. Sync objects are used to improve the pointing accuracy when a telescope is pointing in the proximity of a synced object. Nexus DSC Pro limits the number of sync objects to 128. The then by selecting Telescope: size of the area is limited to 10º... -
Page 14: Align
The pointing accuracy will depend on the accuracy of polar alignment/levelling the telescope. Nexus DSC Pro has a provision for changing the Enable magnitude limit is forcing displaying default direction of the arrows indicating where (during alignment only) only objects brighter to move the telescope. -
Page 15: Other Parameters
Press the key to finish the selection. for your Nexus DSC Pro. • Precision setting determines the number of digits displayed after the decimal point in all Find modes. It can be set to display one, two or three digits after the decimal point. -
Page 16: Astrolock
• Limiting slewing the telescope when • Alt backlash and AZ backlash – specify the Nexus DSC Pro is used with a motor backlash values for the altitude and the azimuth controller (ServoCAT, SiTech, motors. SkyTracker) Communications • Reverse Scrolling changes the behaviour of key presses. -
Page 17: Time And Date
Now the serial port parameters can be adjusted as required: The easiest way of using Nexus DSC Pro with a • Communication protocol smartphone/tablet/laptop is to switch the WiFi to Access Point mode: • Baud rate • Stop bits • Data bits •... -
Page 18: Display/Keypad
4) Alignment status For example, if the display brightness level was • One star alignment: left at a low level and Nexus DSC Pro was turned ON during daytime then it would be very 1) First Object Alignment difficult to see the text on the screen. The... -
Page 19: First Object Alignment
Second Object Alignment You can choose first alignment object by selecting Second object alignment from the Align menu if Nexus DSC Pro did not activate it automatically – for example, if you decided that the telescope was not aimed at the second alignment object precisely. - Page 20 Calibration stars are automatically added The first step has been described earlier. The to sync objects list and Nexus DSC Pro will second steps starts with selecting Mpoint Start apply the correction to pointing immediately from the Align menu: and the offsets will become equal zero;...
-
Page 21: Mpoint Parameters
Activate the Next button and press key to Flexure flexure (DAF) go to the next page: RA Sine AZ Sine for AltAz (HCES) RA Cosine (HCEC) Dec Sine (DCES) Dec Cosine (DCEC) Mount Square Sine Nexus DSC Pro User Manual... -
Page 22: Mpoint Edit Points
Equatorial Timer is intended to be used when Select Mpoint Analyse from the Align menu: Nexus DSC Pro is operated with a telescope mounted on an equatorial platform. Once you performed the two star alignment (with... -
Page 23: Find
Find • Constellation – only objects from the Nexus DSC Pro allows you to locate celestial specified constellation are shown. objects by using one of the following modes: • From Catalogues • From Observation List •... - Page 24 Soft00Cmt.txt, Soft00CritList.txt, Soft00Distant.txt and Soft00Unusual.txt) • Turn Nexus DSC Pro on and you will see additional catalogues – Bright Asteroids, Comets, Critical List Asteroids, Distant Asteroids, Unusual Asteroids; the list of new catalogues will depend on which orbitals...
- Page 25 After changing the sign press the key and format. finish typing the rest – 5731 and Nexus DSC Pro will automatically switch back to the previous To go to an object quickly and easy you can start screen showing where to move the telescope to typing the object’s number.
- Page 26 Filter is set to Disable. If V443 And is desired then type 443 in the third The last selection of the catalogue and object field: will be save in non-volatile memory. Constellation Nexus DSC Pro User Manual...
-
Page 27: From Observation List
SD card. Once the observation list is copied to the micro SD card Nexus DSC Pro will be able to guide you to an object from the list. To find an object from an observation list is... -
Page 28: Object At Ra/Dec
Object at RA/Dec From Planetarium Nexus DSC Pro allows you to find an object whose coordinates are specified manually. Nexus DSC Pro allows to connect to a This mode can be used if you need to find an... -
Page 29: Identify
(ServoCAT, SiTech, SkyTracker, ScopeDog and AZ-EQ5/6): In the Identify mode you can select catalogues of objects where Nexus DSC Pro will try to find an object that is most close to the current telescope coordinate. Object type, limiting magnitude and search radius can also be The screen above shows the current drive rates specified. -
Page 30: Tour
Once finished the object You can also use the Identify function of screen will appear. The bottom right of the Nexus DSC Pro when you wish to find other screen shows the number of objects found (up objects nearby. -
Page 31: Test
SiTech Test performing a 45º turn (or 90º/180º) turn and Nexus DSC Pro has a test mode that will help checking the change in motor encoder tics you to diagnose a possible problem. compared to angles from the telescope Select Test from the main menu: encoders. -
Page 32: Wifi
It shows you the type of the adapter connected (FT232, CP210x or PL2303), number of bytes Time received and number of bytes sent: Nexus DSC Pro can show local time, UTC and sidereal time. This is activated by selecting Time: Nexus DSC Pro User Manual... -
Page 33: Environment
Also Location old indicates that Battery the location is the location Nexus DSC Pro Nexus DSC Pro has a built-in battery fuel gauge acquired last time it was used. that stays active even when Nexus DSC Pro is Once the GPS receiver acquires a fix and a date turned off. -
Page 34: Settings For Motorised Telescopes
This section describes how to setup Nexus DSC Pro with various telescopes that are motorised. AZ-EQ5 & AZ-EQ6 Please note that Nexus DSC Pro is capable of controlling AZ-EQ5 and AZ-EQ6 mounts but the Now press the key. The screen will change testing has been done only in Alt-Azimuth mode. -
Page 35: Scopedog
ScopeDog Nexus DSC Pro is connected to a SiTech servo controller using a serial cable (SERIAL port on Nexus DSC Pro needs to be configured for Nexus DSC Pro to RS232 port on SiTech). operating with ScopeDog. Please go to Please note that it is best to turn on Nexus Settings->Communications->Serial and set... -
Page 36: Firmware And Catalogues Update
4. Perform the same steps (2-3) for the second alignment object. 5. The alignment error should be very small. Once Nexus DSC Pro is aligned you can go to the main menu, go to Find->From Catalogue, • Once the firmware update is finished it will... -
Page 37: Apendix
The pins are numbered according to the following diagram: Serial Port Nexus DSC Pro has one RS-232 serial port. It uses a standard 6P6C connector. The pins are numbered according to the following diagram: The pin descriptions are in the following table:... -
Page 38: List Of Compatible Planetarium Software
Q: What kind of power source can I use to power Nexus DSC Pro? A: Nexus DSC Pro can be powered with a DC power source with a voltage from 5V to 16V. The power source must be capable of supplying at least 2A at 5V/6V or 1.5A at 12V for best results. - Page 39 Problem Source of the problem Solution Poor pointing The number of steps for Check that the encoder steps were accuracy encoder(s) was set incorrect set for the encoders used Pointing accuracy Equatorial platform timer was Turn off the equatorial platform deteriorates with time activated timer...
-
Page 40: Warranty
Warranty Nexus DSC Pro is covered by a one-year limited warranty. Please refer to the enclosed warranty certificate for full details. Technical Support You can find the latest version of the manual and firmware in the support section of our website. - Page 41 FCC Statement for Nexus DSC Pro Contains: FCC ID:YOPGS2200M IC ID: 9154A-GS2200M This device complies with Part 15 of the FCC Rules. Operation is subject to the following two conditions: (1) this device may not cause harmful interference, and (2) this device must accept any interference received, including interference that may cause undesired operation.
- Page 42 DECLARATION OF CONFORMITY Astro Devices, ABN 75 270 616 917, 198 The Esplanade, SYLVANIA, NSW 2224, AUSTRALIA, E-mail: info@astrodevices.com, As manufacturer/producer declare that: Nexus DSC Pro Product Name: Product Series: NXD200 Product Description: Digital setting circles for telescopes conforms to the following directives and standards therein Directives: WEEE- Waste from Electrical and Electronic Equipment - 2002/96/EC Radio Equipment &...
- Page 43 ~ This page intentionally left blank ~ Nexus DSC User Manual...
- Page 44 Printed in Australia firmware version 2.X.X...
Need help?
Do you have a question about the Nexus DSC Pro and is the answer not in the manual?
Questions and answers