HENN I19-10 Assembly Instructions Manual
Hide thumbs
Also See for I19-10:
- Assembly instructions manual (24 pages) ,
- Assembly instructions manual (26 pages) ,
- Assembly instructions manual (18 pages)
Advertisement
Quick Links
I19-10 Branco
I19-18 Rústico/Branco
Opção Berço
Opción de cuna
Crib Option
07
01
09
02
Requisitos para montagem
Requisitos para la montaje
Assembly Requirements
Imagens meramente ilustrativas
Imágenes meramente ilustrativas
Images for illustration only
Ind. e Com. de Móveis Henn
Mondaí - SC - Brasil
+55 49 3674.3500
@moveishenn
www.henn.com.br
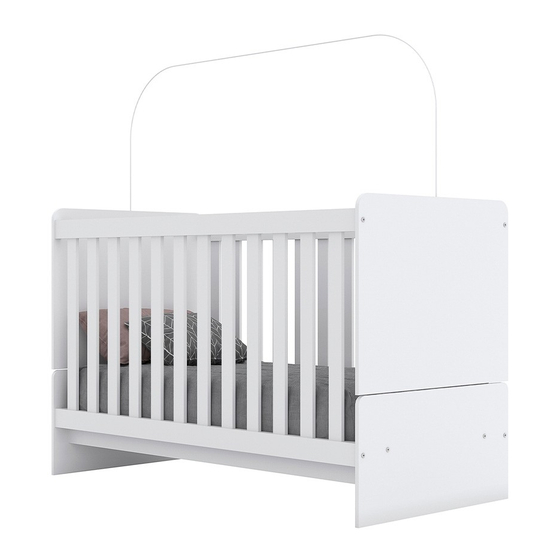
Berço Mini Cama Labirinto
Cuna Mini Cama Labirinto
Crib Labirinto
11
03
10
08
08
05
Para limpeza de seu móvel, use uma fl anela seca ou umedecida, e não utilize
produtos químicos que possam danifi car seu produto.
O sistema de montagem dos produtos, funciona de acordo com a ordem
crescente dos números indicados no desenho. Ex: 01, 02, 03, 04... até a
conclusão da montagem.
Para limpieza de su móvil, use una franela seca o húmeda, y no utilice
productos químicos que puedan dañar su producto.
El sistema de montaje de los productos funciona de acuerdo con el orden
creciente de los números indicados en el dibujo. Ej.: 01, 02, 03, 04... hasta la
conclusión del montaje.
To clean your furniture, use a dry or wet cloth, and do not use chemicals that
may damage your product.
The products' assembly system works according to the increasing order of
the indicated numbers. For example: 01, 02, 03, 04 ... to the end of the as-
sembly.
Opção Mini Cama
Opción de cama mini
Mini Bed Option
04
Pesos máximos recomendados com carga distribuída
Peso máximo recomendado con la carga distribuida
Recommended maximum weight with distributed load.
AVISO
SISTEMA DE MONTAGEM
ADVERTENCIA
SISTEMA DE MONTAJE
NOTICE
ASSEMBLY SYSTEM
INSTRUÇÕES DE
MONTAGEM
INSTRUCCIONES DE MONTAJE
ASSEMBLY INSTRUCTIONS
1
Advertisement

Related Manuals for HENN I19-10


Summary of Contents for HENN I19-10
- Page 1 Ind. e Com. de Móveis Henn INSTRUÇÕES DE Mondaí - SC - Brasil MONTAGEM +55 49 3674.3500 INSTRUCCIONES DE MONTAJE @moveishenn ASSEMBLY INSTRUCTIONS www.henn.com.br Berço Mini Cama Labirinto Cuna Mini Cama Labirinto Crib Labirinto I19-10 Branco I19-18 Rústico/Branco Opção Berço Opción de cuna...
- Page 2 IMPORTANTE LER COM ITM/I19- ATENÇÃO E GUARDAR PARA EVENTUAIS CONSULTAS I) Advertências: Não posicionar ou utilizar o produto perto de chama aberta e outras fontes de calor, tais como aquecedores elétricos, aquecedores a gás ou outras fontes, pois o material é infl...
- Page 3 IMPORTANTE LEER CON ITM/I19- ATENCIÓN Y GUARDAR PARA EVENTUALES CONSULTAS I) Advertencias: No colocar o utilizar el producto cerca de llama abierta y otras fuentes de calor, tales como calentadores eléctricos, calentadores de gas u otras fuentes, ya que el material es infl...
- Page 4 WARNING READ WITH ITM/I19- ATTENTION AND SAVE FOR EVENTUAL CONSULTATIONS I) Warnings: Do not position or use the product near open fl ame and other sources of heat such as electric heaters, gas heaters or other sources as the material is fl ammable. II) Do not use the crib if any part is broken, torn or missing.
- Page 5 ITM/I19- O REGISTRO NO INMETRO E O SELO DE IDENTIFICAÇÃO DA CONFORMIDADE REFEREM-SE SOMENTE AO BERÇO EL REGISTRO EN EL INMETRO Y EL SELLO DE IDENTIFICACIÓN DE LA CONFORMIDAD SE REFERE SOLAMENTE AL BERZO THE INMETRO REGISTRATION AND THE CONFORMITY IDEN- TIFICATION SEAL REFER ONLY TO THE CRIB...
- Page 6 ITM/I19- Furação para Berço - Furação para Berço - Furação para Opção Mini Cama Opção mais baixa do lastro Opção mais alta do lastro Perforación de cuna - Perforación de cuna - Mini cama Opción de perforación Opción de lastre superior Opción de lastre inferior Cradle Drilling - Cradle Drilling -...
- Page 7 ITM/I19- Utilizar a parafusadeira com o torque em 15 para fi xar a grade e para fi xar o lastro. Utilizar la atornilladora con el torque en 15 para fi jar la rejilla y para fi jar el lastre. Use the screwdriver with the torque at 15 to attach the rail and base frame.
- Page 8 ITM/I19- Utilizar a parafusadeira com o torque em 15 para fi xar a grade e para fi xar o lastro. Utilizar la atornilladora con el torque en 15 para fi jar la rejilla y para fi jar el lastre. Use the screwdriver with the torque at 15 to attach the rail and base frame.
- Page 9 fi jar el lastre. Use the screwdriver with the torque at 15 to attach the rail and base frame. 10mm Ind. e Com. de Móveis Henn Ltda. A distância entre os CNPJ 85.355.592/0001-17 lastros deve ser 10mm. Berço Mini Cama Labirinto La distancia entre los Norma ABNT NBR 15860-1 :2010;...
- Page 10 ITM/I19-...
- Page 11 ITM/I19- Montagem berço concluída Montaje cuna completa Completed crib assembling Os lastros da base não deverão ser removidos para fi ns de transporte e /ou armazenamento. Los balastos base no deben retirarse para fi nes de transporte y / o almacenamiento. Base ballasts should not be removed for transportation and / or storage purposes.
- Page 12 ITM/I19- Para a montagem da mini cama, tirar as peças marcadas com “X” e o restante das peças deverão ser utilizadas para a montagem da mini cama. Para el montaje de la mini cama, sacar las piezas marcadas con "X" y el resto de las piezas deberán ser utilizadas para el montaje de la mini cama.
- Page 13 ITM/I19- Apenas nesta Opção Mini Cama pode ser utilizado os Adesivos Tapa parafusos (K), aonde há furos aparentes. Sólo en esta opción Mini Cama se pueden utilizar los adhesivos Tapa tornillos (K), donde hay agujeros aparentes. Only in this Mini Bed Option can be used the Adhesive Cover Screws (K), where there are apparent holes.
- Page 14 ITM/I19- Para fi xação da lateral inferior (02) na travessa estrutural (05) deve ser feita as furações. Para la fi jación del lateral inferior (02) en el tramo estructural (05) se deben realizar las perforaciones. For fi xing the lower side (02) on the structural cross member (05) drills must be made.
- Page 15 ITM/I19- Colocação da cantoneira (J). Colocación de la esquina (J). Attaching the bracket (J). Mini Cama concluído Mini cama completa Mini Bed Complete...
- Page 16 ITM/I19- Rev.000 Lista de Peças | Lista de piezas | List of parts Medidas (mm) | Caixa Descrição Dimensions (mm) | Item Caja Descripción Size (measurements) Description (mm) 01=03 Lateral superior | Lateral superior | Upper Lateral 660x524x12 Lateral inferior | Lateral inferior | Lateral side 660x340x12 03=01 Lateral superior | Lateral superior | Upper Lateral...
Need help?
Do you have a question about the I19-10 and is the answer not in the manual?
Questions and answers