
Related Manuals for CHCNAV AlphaUni 900


Summary of Contents for CHCNAV AlphaUni 900
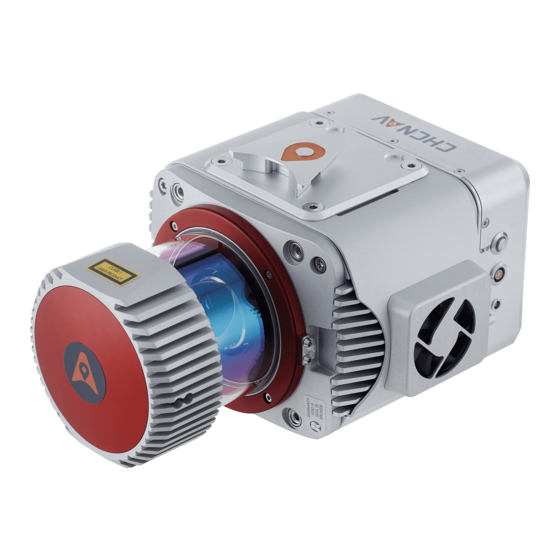
- Page 1 CHCNAV AlphaUni 900 User Manual Mobile Mapping | June 2020 Make your work more efficient...
-
Page 2: Table Of Contents
Configuration List ..................9 3.2.2 Instrument Container ................10 3.2.3 Orange Battery Container ................. 11 Product Details ....................... 11 3.3.1 AlphaUni 900 Hardware ................11 3.3.2 Physical Characteristics ................12 3.3.3 Electrical Characteristics ................12 Primary Sensor Introduction .................. 13 3.4.1 VUX-1UAV Laser Scanner ................ - Page 3 LiDAR Turn Off ......................47 Frequently Asked Questions ..................48 Matters Need Attention ................... 49 Important Notes ..................... 49 Product Transportation ..................49 Using Notes ......................50 Storage Notes ......................50 CHCNAV ALPHAUNI 900 USER MANUAL | 2020-06 P a g e | 3...
-
Page 4: Reading Tips
If the service life of equipment is affected due to improper use or maintenance, even broken, CHCNAV will not bear the relevant responsibility. All repairs and maintenance services resulting from this will be charged at standard prices. - Page 5 CHCNAV will not bear the relevant responsibility. ▪ During equipment using time, if customer disassembles and assembles the equipment without CHCNAV’s suggestions & permission, and resulting in damage, CHCNAV will not bear the relevant responsibility. ▪ Customer should use default batteries and accessories. If use non-dedicated batteries, the charger may cause unexpected situations like explosions, fires etc.
-
Page 6: Using Requirements
Before start work, check the remaining capacity of the scanner memory card. If the remaining capacity is less than 10% or does not meet the current collection capacity CHCNAV ALPHAUNI 900 USER MANUAL | 2020-06 P a g e | 6... -
Page 7: Tips After Using
After using, unplug the cable first, then place the equipment into equipment case and accessories into accessory case. ▪ During transportation, take care the equipment and try to avoid bump. CHCNAV ALPHAUNI 900 USER MANUAL | 2020-06 P a g e | 7... -
Page 8: Product Overview
3 Product Overview 3.1 Product Introduction AlphaUni 900 is one of the most advanced multi-platform lidar measurement system in the field of photogrammetry and remote sensing. The system integrates one high-precision laser scanner and one inertial navigation system. Due to its small structure and light weight, it is suitable for data collection on various mobile platforms. -
Page 9: Product Component
3.2 Product Component 3.2.1 Configuration List AlphaUni 900 multiplatform LiDAR system configuration list is shown below: Classification Name Model Number AlphaUni 900 LiDAR system AlphaUni 900 Remote controller RC-8 GPS antenna feeder Indoor power supply line CN power line Data copy line... -
Page 10: Instrument Container
Lidar backpack 22000mAh smart battery PC520 charger PC1080C charger CoMapping Other CoProcess V1.0 CoRefineV1.0 CoSurvey for CAD V1.0 CoPower V1.0 CoManager V1.0 Inertial ExplorerV8.7 3.2.2 Instrument Container CHCNAV ALPHAUNI 900 USER MANUAL | 2020-06 P a g e | 10... -
Page 11: Orange Battery Container
FAN: Fan connect interface. ▪ DC24V: Power interface with DC24V. ▪ CAMERA: External camera connect interface. ▪ DATA: Data copy interface. ▪ GNSS-S/GNSS-M: GNSS antenna interface, always choose GNSS-M. CHCNAV ALPHAUNI 900 USER MANUAL | 2020-06 P a g e | 11... -
Page 12: Physical Characteristics
Input voltage DC24V (11~32 V) Rated power 75 W (Max) Working temperature -10 °C to +40 °C Storage temperature -20 °C to +50 °C Humidity <80%, non-condensation CHCNAV ALPHAUNI 900 USER MANUAL | 2020-06 P a g e | 12... -
Page 13: Primary Sensor Introduction
The standard update rate is 200Hz, but the option is up to 600Hz. 。 Orientation accuracy 0.01 。 Attitude accuracy 0.005 Positioning accuracy ≤ 1cm 。 Heading error ≤ 0.03 Data updating rate 200 Hz Weight 140 g CHCNAV ALPHAUNI 900 USER MANUAL | 2020-06 P a g e | 13... -
Page 14: At312 Antenna
Pull the handle bolt back to the maximum position with the right hand and keep it. The left hand can translate the scanner to the head direction to complete the separation of the scanner and quick-release module. CHCNAV ALPHAUNI 900 USER MANUAL | 2020-06 P a g e | 14... -
Page 15: Vehicle Platform
Install the vehicle quick release platform at the proper position on the roof first, then push the bottom slider of the V-shaped groove of scanner until a sound is heard. CHCNAV ALPHAUNI 900 USER MANUAL | 2020-06 P a g e | 15... - Page 16 100mm. The brand of vehicle cross-bar is chosen as THULE and the maximum load weight is 70kg. Turning in clockwise direction to unscrew thumb screws and turning in anti-clockwise direction to lock thumb screws. CHCNAV ALPHAUNI 900 USER MANUAL | 2020-06 P a g e | 16...
- Page 17 CHCNAV ALPHAUNI 900 USER MANUAL | 2020-06 P a g e | 17...
-
Page 18: Vehicle Platform With Ladybug5
Drag the bottom of the scanner with left hand and turn the handle bolt on the side of the quick release fixture counterclockwise until the threaded part of the handle bolt disengages. CHCNAV ALPHAUNI 900 USER MANUAL | 2020-06 P a g e | 18... -
Page 19: Backpack Platform
Push the scanner diagonally upward toward the scanner head to complete the separation. CHCNAV ALPHAUNI 900 USER MANUAL | 2020-06 P a g e | 19... -
Page 20: Battery Container Overview
4 Battery Container Overview 4.1 Battery Container Introduction AlphaUni 900 battery container is a small set of power supply unit which includes three parts: orange container, controller box and battery charger. The number of used orange containers is depending on user requirement. The container has following characteristics: ▪... -
Page 21: Orange Container Port
1. Top View 2. Front View The detailed sketch map of orange container port definition is shown below: 1. Output port (Male head) 2. Input port (Female head) CHCNAV ALPHAUNI 900 USER MANUAL | 2020-06 P a g e | 21... -
Page 22: Controller Box Port
Self-locking switch Display screen Input port 1 Input port 2 24V Output port 12V Output port Fuse Cooling fan 1. Top View 2. Front View 3. Left View CHCNAV ALPHAUNI 900 USER MANUAL | 2020-06 P a g e | 22... -
Page 23: Functional Specification
Under charge condition, the switch button cannot work. When charger light changes from red to green and charge current is 0A, it means the battery is full charged. CHCNAV ALPHAUNI 900 USER MANUAL | 2020-06 P a g e | 23... - Page 24 The highest voltage orange container will give priority to supply power for AlphaUni 900 which will have N orange containers charge time. 1. Side View 2. Top View 1. 2+1 Combination 2. 3+1 Combination CHCNAV ALPHAUNI 900 USER MANUAL | 2020-06 P a g e | 24...
-
Page 25: Controller Box Function
When orange container connected with controller box, 12V port is always charged and 24V port is controlled by self-locking switch. 1. Self-locking switch 2. Output port CHCNAV ALPHAUNI 900 USER MANUAL | 2020-06 P a g e | 25... - Page 26 4.2.2.4 Controller Box Communication The controller box supports RS485 communication function which can transfer received orange container information to AlphaUni 900 (under operating state) for display. 4.2.2.5 Controller Box Overcurrent Protection The controller box supports overcurrent protection function. If output port is short or current exceed than 30A, the fuse will burn out.
-
Page 27: Electrical Parameter
Green flicker: Empty connect or pulse state. Suitable temperature of charging environment is 5℃~35℃. Input 200-240VAC/110-130VAC 50/60Hz Output 13.8V——7.2A Left View: Red light: CC fast charge. Green light: Small current charge CHCNAV ALPHAUNI 900 USER MANUAL | 2020-06 P a g e | 27... -
Page 28: Operation Instruction
Prepared accessories list: orange container, standard battery, 12*M3*6 torque 15Ncm and 4*M4*6 torque 50Ncm. ▪ Clamp the electrode wire with the battery electrode first and then put the battery inside of case. CHCNAV ALPHAUNI 900 USER MANUAL | 2020-06 P a g e | 28... - Page 29 ▪ Install limiting plate on the above of cushion with four M4 screws. Prepared to connect two power ports on next step. CHCNAV ALPHAUNI 900 USER MANUAL | 2020-06 P a g e | 29...
- Page 30 Connect two power interfaces which shown in below: ▪ Put the lower edge of cover completely inside the battery case and use 12 M3 screws to fix it. CHCNAV ALPHAUNI 900 USER MANUAL | 2020-06 P a g e | 30...
-
Page 31: Containers Assemble Steps
4.4.2 Containers Assemble Steps ▪ First, connect orange container and controller box which shown below: ▪ Second, tighten the screws if transport is required: Screw Side view Top view CHCNAV ALPHAUNI 900 USER MANUAL | 2020-06 P a g e | 31... - Page 32 Can add more orange containers according to actual needs: Two orange containers & One controller box (2+1, two sides) Two orange containers & One controller box (2+1, one side) CHCNAV ALPHAUNI 900 USER MANUAL | 2020-06 P a g e | 32...
-
Page 33: Charge Steps
▪ Third step: Battery is full charged when charger light changes to green and current is 0. Then, turn of charger switch and unplug charger. Charger light CHCNAV ALPHAUNI 900 USER MANUAL | 2020-06 P a g e | 33... -
Page 34: Common Problems & Solutions
Aging of battery may influence battery life and it is recommended to change a new battery. If instrument still cannot work, please contact CHC Support team for further check and maintenance. CHCNAV ALPHAUNI 900 USER MANUAL | 2020-06 P a g e | 34... -
Page 35: Product Using
After powered on, the remote controller will blink one time, then the screen will show operate interface. If using tablet App, it will show same information compare with remote controller. CHCNAV ALPHAUNI 900 USER MANUAL | 2020-06 P a g e | 35... -
Page 36: Capture Operation Instructions
The remote controller interface is mainly composed of four parts: initialization interface, main display interface, system settings interface and laser settings interface which are shown below: Initialization interface Main display interface CHCNAV ALPHAUNI 900 USER MANUAL | 2020-06 P a g e | 36... -
Page 37: Initialization Interface Description
When the communication between the controller and the equipment is normal, the "A" icon in the upper left CHCNAV icon will appear orange, otherwise it will always show grey which indicate abnormal communication and LiDAR is not connected. -
Page 38: Main Display Interface
6.1.3 Main Display Interface Below figures show the main display interface of AlphaUni 900 and AlphaUni1300 controller which contains System state, GNSS state, IMU state, SD card state, Camera state, Laser state and related buttons. AlphaUni 900 Interface AlphaUni1300 Interface 6.1.3.1 System state... - Page 39 0, it means that the camera is working normally. The default record is 000000. CHCNAV ALPHAUNI 900 USER MANUAL | 2020-06 P a g e | 39...
- Page 40 6.1.3.6 Laser state ▪ Laser icon: It indicates the laser scanner status and generally it will show green, If the laser scanner does not work normally, it will display red color and please contact CHCNAV Support Team. ▪ Laser state: After successfully connect to LiDAR, the "link" state will be displayed. When the collection operation begins, the laser status will be shown as “capturing”.
-
Page 41: System Setup Interface
Picture No: It indicates the number of taken pictures. ▪ Photograph: Before work start, click here to take a photo manually to check whether camera is connected properly. CHCNAV ALPHAUNI 900 USER MANUAL | 2020-06 P a g e | 41... -
Page 42: Laser Settings
Advanced settings: Enter password 123321 and the controller will enter the “Laser Settings” interface. 6.1.5 Laser Settings ▪ Storage: The storage location of the raw laser data is inside the AlphaUni 900 equipment. ▪ Parameters: It indicates some synchronization parameters which no need to modify here. CHCNAV ALPHAUNI 900 USER MANUAL... -
Page 43: Capture Process
6.2.1.1 Export POS data Before the equipment is powered on, connect the data copy line between DATA interface and PC first and then power on unit. PC will show an AlphaUni 900 disk where can copy POS data. CHCNAV ALPHAUNI 900 USER MANUAL... -
Page 44: Automatic Copy
Turn on the equipment and wait about 1 minute until the laser initialization is completed. Click CopyDataTool software and enter the following interface: CHCNAV ALPHAUNI 900 USER MANUAL | 2020-06 P a g e | 44... - Page 45 After the data copy is finished, click the "Turnoff scanner" button to power off the equipment. Do not directly press the power on/off key on the equipment as it may cause CHCNAV ALPHAUNI 900 USER MANUAL | 2020-06 P a g e | 45...
-
Page 46: Data Structure
PARA: Store parameter files (include default and new files which create during process) ROVER: Store GPS and IMU data. SYNC: Store log and TRIG data (No used during processing). TRACE: Store trace data (No used during processing). CHCNAV ALPHAUNI 900 USER MANUAL | 2020-06 P a g e | 46... -
Page 47: Lidar Turn Off
Long press equipment “ON/OFF” button to turn off equipment until the light is out and buzzer is ring. ▪ After the buzzer is stop ringing, disconnect the power supply cable to finish turn off. CHCNAV ALPHAUNI 900 USER MANUAL | 2020-06 P a g e | 47... -
Page 48: Frequently Asked Questions
If camera connection is normal, the issue may because of internal IMU, please contact CHCNAV Support team for repair. Tips: Do not connect camera and camera cable to PC before the equipment powered on. As USB cable will power the camera in reverse which will cause the camera can not turn on. -
Page 49: Matters Need Attention
There are some important notes listed below: ▪ Do not disassemble equipment privately. If equipment has issue, please contact CHCNAV Support team. ▪ Please use the default battery and accessories. Use non-dedicated battery may cause charger exploding or burning. -
Page 50: Using Notes
The room where the equipment is stored should be clean, dry, bright and well ventilated. It should be placed flat or upright, and it should not be leaned casually to prevent distortion. CHCNAV ALPHAUNI 900 USER MANUAL | 2020-06 P a g e | 50... - Page 51 Building D, NO. 599 Gaojing Road, Qingpu District, 201702 Shanghai, China Tel: +86 21 542 60 273 | Fax: +86 21 649 50 963 Email: sales@chcnav.com | support@chcnav.com Skype: chcnav_support Website: www.chcnav.com CHCNAV ALPHAUNI 900 USER MANUAL | 2020-06 P a g e | 51...
- Page 52 This equipment has been tested and found to comply with the limits for a Class B digital device, pursuant to part 15 of the FCC Rules. These limits are designed to provide reasonable protection against harmful interference in a residential installation. This equipment generates, uses and can radiate radio frequency energy and, if not installed and used in accordance with the instructions, may cause harmful interference to radio communications.
Need help?
Do you have a question about the AlphaUni 900 and is the answer not in the manual?
Questions and answers