Advertisement
Available languages
Available languages
Quick Links
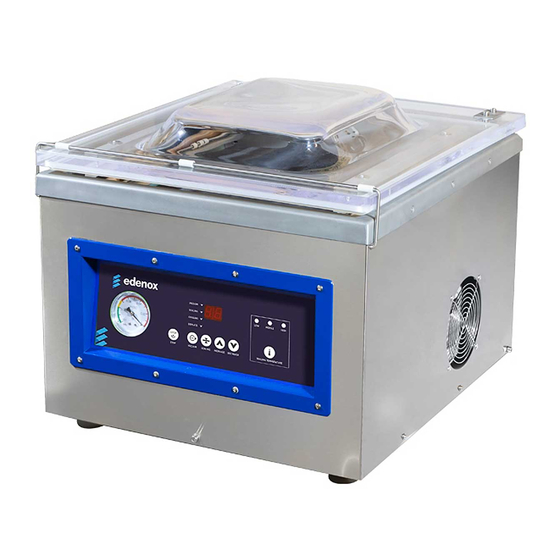
CHAMBER VACUUM
Model: MICRO-1834-D
PACKING MACHINE
Read these instructions carefully before using your
microwave oven, and keep it carefully.
If you follow the instructions, your oven will provide you with
many years of good service.
SAVE THESE INSTRUCTIONS CAREFULLY
USER'S MANUAL
Advertisement

Related Manuals for edenox VAKSIC-8 E


Summary of Contents for edenox VAKSIC-8 E
- Page 1 CHAMBER VACUUM Model: MICRO-1834-D PACKING MACHINE Read these instructions carefully before using your microwave oven, and keep it carefully. If you follow the instructions, your oven will provide you with many years of good service. SAVE THESE INSTRUCTIONS CAREFULLY USER’S MANUAL...
- Page 2 INDEX 1. SUMMARY 2. USAGE 3. FEATURE 4. TECHNICAL PARAMETER 5. STRUCTURE AND PRINCIPLE 6. CONTROL PANEL INDICATION 7. INSPECTION AND ADJUSTMENT 8. OPERATION PROCESS 9. TROUBLESHOOTING 10. MAINTENANCE 11. CONTROL PANEL VIEW 12. ELECTRIC PRINCIPLE DIAGRAM 13. MACHINE EXPLODED DIAGRAM 14.
- Page 3 The machine has character of advanced design, complete function, sable behavior, wide usage, strong sealing and convenient maintenance. It is an ideal packing machine. Technical Parameter Model Number VAKSIC-8 E VAKSIC-10 E VAKSIC-20 2A E VAKSIC 20L 2A E VAC-20E...
- Page 4 “cooling pilot lamp” is on and then machine enters the cooling time setting state. c. To set the cooling time: model VAKSIC-8 E / VAKSIC-10 E: press “set” key three times, the “cooling pilot lamp” is on, and the machine enters the setting state of cooling time. It shows the current cooling time on time monitor, and user set the cooling time according to the sealing time and sealing temperature.
- Page 5 7. Inspection and Adjustment 7.1 After opening the container, check whether accessory is completely, and the screws in all parts of the machine are tighten and the organic glass cover move up and down freely. 7.2 Lubricate the moving parts, oil hole and oil nozzle regularly. Add rational gasoline, vacuum oil into vacuum pump, oil level is between 1/4-3/4 of oil window.
- Page 6 10.5 Turn off the power while appears trouble, or press the emergency stop. 10.6 Lift the cover up after releasing air, then turn of power and check it. 11. Control Panel VAKSIC-8 E / VAKSIC-10 E VACUUM PACKER VACUUM HIGH...
- Page 7 12. Electric Principle Diagram (same for all models) Diagrama del principio eléctrico Working circuit diagram Micro Swich High Middle Breaker Heating wire Sealing Transformer out Sealing Transformer in Pump...
- Page 8 13. MACHINE EXPLODED DIAGRAM VAKSIC-8 E / VAKSIC-10 E vacuum packing mahcine parts list USE Quantity Number Name Cover's Platen Plexiglass cover Silicone seat Silicone Heating block Vacuum chamber Chassis Breaker Solenoid valve Micro Switch Vacuum pump Sealing transformer AC contactor...
- Page 9 VAKSIC-20 2A E / VAKSIC 20L 2A E vacuum packing mahcine parts list USE Quantity Number Name Cover's Platen Plexiglass cover Silicone seat Silicone Heating block Vacuum chamber Chassis Breaker Solenoid valve Micro Switch Vacuum pump Sealing transformer AC contactor Control Panel Vacuum Meter Panel frame...
- Page 10 VAC-20E SGQ2600-102,103 spare parts exploded View & list 14. Accessories Description Quantity Vacuum packing machine 1 SET Pump oil 1 BOTTLE Heating wire 2 PCS Teflon tape 2 PCS User's manual 1 PC Allen wrench 4mm 5mm 2 PCS Screwdriver 2 PCS Open-end wrench pump 1 PC...
-
Page 11: Manual Del Usuario
ENVASADORA AL VACÍO Model: MICRO-1834-D CON CÁMARA Read these instructions carefully before using your microwave oven, and keep it carefully. If you follow the instructions, your oven will provide you with many years of good service. SAVE THESE INSTRUCTIONS CAREFULLY MANUAL DEL USUARIO... - Page 12 ÍNDICE 1. RESUMEN 2. USO 3. PRESTACIONES 4. PARÁMETROS TÉCNICOS 5. ESTRUCTURA Y PRINCIPIOS 6. INDICACIONES DEL PANEL DE CONTROL 7. INSPECCIÓN Y AJUSTE 8. PROCESO DE FUNCIONAMIENTO 9. DETECCIÓN Y SOLUCIÓN DE PROBLEMAS 10. MANTENIMIENTO 11. VISTA DEL PANEL DE CONTROL 12.
- Page 13 La máquina cuenta con un diseño avanzado, funcionalidad completa, funcionamiento estable, amplias aplicaciones de uso, un sellado fuerte y un mantenimiento sencillo. Es la máquina ideal para envasar. 4. Parámetros técnicos Model Number VAKSIC-8 E VAKSIC-10 E VAKSIC-20 2A E VAKSIC 20L 2A E VAC-20E...
- Page 14 5.Estructura y principios La máquina está compuesta de carcasa orgánica, cámara de vacío, cuerpo de la máquina, circuito eléctrico y sistema de vacío. La cámara de vacío tiene un dispositivo de sellado térmico. El elemento calefactor está sujeto con níquel, instalado en la estructura de sellado térmico y aislado con la cámara de vacío. La estructura de sellado térmico está...
- Page 15 c. Para establecer el tiempo de enfriamiento: VAKSIC-10E: pulse la tecla “set” tres veces, la “lámpara piloto de enfriamiento” se encenderá y la máquina entrará en el estado de ajuste del tiempo de enfriamiento. Muestra el tiempo de enfriamiento actual en el monitor de tiempo. El usuario establece el tiempo de enfriamiento según el tiempo de sellado y la temperatura de sellado.
- Page 16 8. Proceso de funcionamiento 8.1 Conecte la unidad al suministro eléctrico, encienda el interruptor de alimentación, esto es, la lámpara piloto debe iluminarse. Establezca el tiempo de aspiración, el tiempo de la soldadura térmica y la temperatura de la soldadura térmica. 8.2 Ponga el producto en una bolsa de envasado (de plástico, compuesta o de aluminio), introdúzcalo en la cámara de vacío y coloque la parte superior de la bolsa debajo de la tira de soldadura térmica, alineada con ella.
- Page 17 10.5. Desconecte la alimentación de la máquina si hay un problema, o pulse la parada de emergencia. 10.6. Levante la cubierta después de liberar el aire, luego desconecte la alimentación y compruébela. 11. Vista del panel de control VAKSIC-8 E / VAKSIC-10 E VACUUM PACKER VACUUM...
Need help?
Do you have a question about the VAKSIC-8 E and is the answer not in the manual?
Questions and answers