Table of Contents
Advertisement
Available languages
Available languages
Quick Links
Advertisement
Chapters
Table of Contents

Subscribe to Our Youtube Channel
Related Manuals for KNOVA KN 7053

Summary of Contents for KNOVA KN 7053
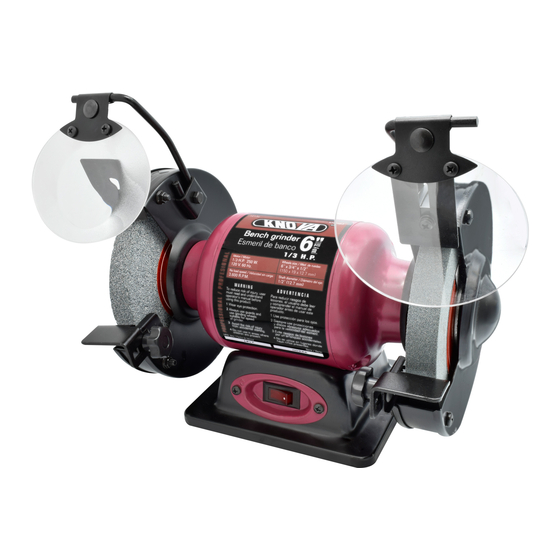
- Page 1 ” Bench grinder Esmeril de banco KN 7053...
-
Page 2: Table Of Contents
No load speed: 3,600 R.P.M. operator’s manual. If you do not understand the warnings and instructions in Input: 120V AC, 60Hz, 2.1 Amps the operator’s manual, do not use this product. Call Knova customer service for assistance. WHEELS Wheel diameter: 6 in. -
Page 3: General Safety Rules
GENERAL SAFETY RULES • AVOID ACCIDENTAL STARTING. Be sure switch WARNING Read and understand all instructions. is off when plugging in any tool. Failure to follow all instructions listed below, may result in electric shock, fire and/or serious personal injury. •... -
Page 4: Specific Safety Rules
GENERAL SAFETY RULES • USE ONLY RECOMMENDED ACCESSORIES listed in • DOUBLE CHECK ALL SETUPS. Make sure blade is tight this manual or addendums. Use of accessories that are not and not making contact with saw or workpiece before listed may cause the risk of personal injury. Instructions connecting to power supply. -
Page 5: Know Your Bench Grinder
ELECTRICAL ELECTRICAL CONNECTION WARNING Improper connection of the grounding plug can result in a risk of electric shock. When This tool is powered by a precision-built electric motor. It repair or replacement of the cord is required, do not should be connected to a power supply that is 120 volts, 60 Hz, AC only (normal household current). -
Page 6: Tools Needed And Loose Parts
TOOLS NEEDED AND LOOSE PARTS The following tools Adjustable wrench (not included or drawn to scale) are needed for 13 mm wrench assembly and alignment: Phillips screwdriver Fig. 3 A. Hex head bolt H. Work rest, left B. Washer I. Work rest knob C. -
Page 7: Operation
ASSEMBLY MOUNTING SPARK SHIELD ASSEMBLY MOUNTING WORK REST See Figure 6. See Figure 7. • Attach the spark shield assembly and bracket to the wheel • Unscrew and remove the carriage bolt from guard using a clamp the work rest knob. bracket, washer, •... - Page 8 OPERATION NOTE: Excessive pressure may damage the tool, cause SHARPENING LAWN MOWER BLADES the motor to overheat, and prematurely wear down See Figure 10. the grinding wheel. Lawn mower blades are usually sharpened on only one edge On/Off and dressed up slightly on the other. Perform this sharpening Switch ON/OFF SWITCH process on both cutting ends of the blade.
-
Page 9: Maintenance
MAINTENANCE WARNING When servicing, use only identical WARNING Do not at any time let brake fluids, replacement parts. Use of any other parts could gasoline, petroleum-based products, penetrating oils, create a hazard or cause product damage. etc., come in contact with plastic parts. Chemicals can damage, weaken or destroy plastic which could WARNING result in serious personal injury. -
Page 10: Parts List
PARTS LIST I.D. No. D e s c r i p t i o n S i z e Qty. I.D. No. D e s c r i p t i o n S i z e Qty. Hex Bolt t(Black) M6 x 14 Philips Screw (Black) M4 x 8... -
Page 11: Exploded View
EXPLODED VIEW (152.4 mm) -
Page 12: Introducción
120V AC, 60Hz, 2.1 Amps comprende las advertencias e instrucciones en el manual del DISCOS operador, no utilice este producto. Llame a servicio al cliente Knova para obtener ayuda. Diámetro del disco: 150 mm. (6 pulg.) Espesor del disco: 19 mm. (3/4 pulg.) Orificio del árbol:... -
Page 13: Reglas De Seguridad Generales
REGLAS DE SEGURIDAD GENERALES • ASEGURE LA PIEZA DE TRABAJO. Utilice prensas de ADVERTENCIA Lea y comprenda todas las mano o de banco para sujetar la pieza de trabajo cuando instrucciones. El incumplimiento de las instrucciones resulte práctico hacerlo. Es más seguro que utilizar la mano señaladas abajo puede causar descargas eléctricas, y deja ambas manos libres para manejar la herramienta. -
Page 14: Reglas De Seguridad Específicas
REGLAS DE SEGURIDAD GENERALES • INSPECCIONE PERIÓDICAMENTE LOS CORDONES • NUNCA TOQUE LA HOJA ni ninguna otra pieza en ELÉCTRICOS DE LAS HERRAMIENTAS. Si se daña la movimiento durante el funcionamiento de la unidad. herramienta, permita que la repare un técnico calificado •... -
Page 15: Aspectos Eléctricos
ASPECTOS ELECTRICOS CORDONES DE EXTENSIÓN VELOCIDAD Y CABLEADO Sólo utilice cordones de extensión de 3 conductores con La velocidad en vacío de esta producto es de 3 600 rpm clavijas de tres patillas y receptáculos de tres polos que aproximadamente. Esta velocidad no es constante y acepten la clavija del cordón de la herramienta. -
Page 16: Conozca Su Esmeril De Banco
CONOZCA SU ESMERIL DE BANCO FAMILIARICESE CON LA ESMERILADORA DE BANCO INTERRUPTOR DE ENCENDIDO/APAGADO Vea la figura 2. La esmeriladora de banco dispone de un interruptor de encendido/apagado frontal para mayor conveniencia El uso seguro que este producto requiere la comprensión de y seguridad. -
Page 17: Armado
ARMADO DESEMPAQUETADO Este producto requiere armarse. • Extraiga cuidadosamente de la caja la herramienta y los accesorios. Asegúrese de que estén presentes todos los artículos enumerados en la piezas sueltas. ADVERTENCIA No utilice este producto si alguna pieza incluida en la lista de piezas sueltas ya está ensamblada al producto cuando lo desempaqueta. -
Page 18: Funcionamiento
ARMADO MONTAJE DEL APOYO DE LA PIEZA DE TRABAJO Vea la figura 7. • Usando Destornille y retire del perno de carrocería del perilla de apoyo de la pieza de trabajo. • Conectar el apoyo de la pieza de trabajo al dentro del protección para la rueda como se muestra. - Page 19 FUNCIONAMIENTO AFILADO DE BROCAS HELICOIDALES AVISO: Una cuchilla desequilibrada puede causar una vibración Vea la figura 9. excesiva, lo cual puede dañar la podadora de pasto. Las brocas se afilan mejor con un aditamento de afilar (se encuentran en la mayoría de las ferreterías). Comience por AFILADO DE CINCELES Y DESTORNILLADORES un lado de la punta, al ángulo correcto, y luego gire la broca manteniendo el contacto con la superficie abrasiva.
-
Page 20: Mantenimiento
MANTENIMIENTO Utilice paños limpios para eliminar la suciedad, el polvo, ADVERTENCIA Al dar servicio a la unidad, sólo el aceite, la grasa, etc. utilice piezas de repuesto idénticas. El empleo de piezas diferentes puede causar un peligro o dañar ADVERTENCIA el producto. -
Page 21: Lista De Partes
LISTA DE PARTES D e s c r i p c i ó n M e d i d a Cant. D e s c r i p c i ó n M e d i d a Cant. Tornillo hex. M6 x 14 Tornillo Phillips M4 x 8... -
Page 22: Vista Explosiva
VISTA EXPLOSIVA (152.4 mm) - Page 23 NOTES / NOTAS...
- Page 24 www.knova.com.mx...
Need help?
Do you have a question about the KN 7053 and is the answer not in the manual?
Questions and answers