Advertisement
Table of Contents
- 1 Table of Contents
- 2 Safety Instructions
- 3 Exploded Diagram
- 4 Parts List
- 5 Assembly Instructions
- 6 Folding Instructions
- 7 Technical Parameter
- 8 Operation Guide
- 9 Exercise Instructions
- 10 Warm up Exercises
- 11 Running Belt Adjustment
- 12 Center the Running Belt
- 13 Trouble Shooting Guide
- Download this manual
Advertisement
Table of Contents

Subscribe to Our Youtube Channel
Related Manuals for Active Intent GB-K6480

Summary of Contents for Active Intent GB-K6480
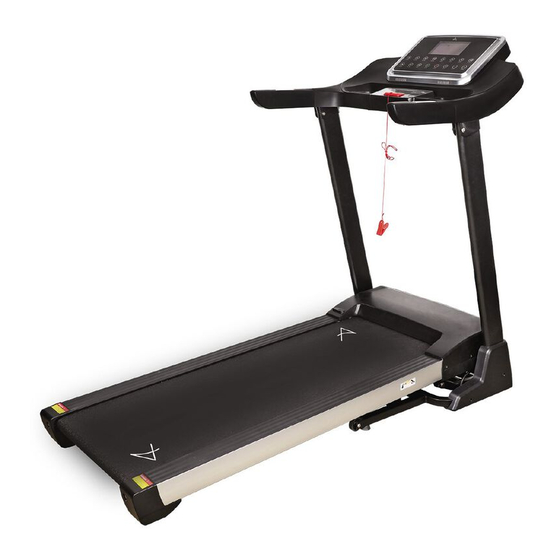
- Page 1 MOTOR TREADMILL OWNER’S MANUAL Model:GB-K6480 IMPORTANT: Read all instructions carefully before using this product. Retain this owner’s manual for future reference. The specification of this product may vary from this photo, subject to change without notice.
-
Page 2: Table Of Contents
Table of Contents WARRANTY ------------------------------------------------------------------------------- 1 SAFETY INSTRUCTIONS ------------------------------------------------------------- 2 EXPLODED DIAGRAM ----------------------------------------------------------------- 3 PARTS LIST ------------------------------------------------------------------------------- 4 ASSEMBLY INSTRUCTIONS ----------------------------------------------------------5 FOLDING INSTRUCTIONS - - --------------- ----------------------- ---------------------10 TECHNICAL PARAMETER - - --------------- ----------------------- ---------------------11 OPERATION GUIDE - - ------ - - ------ --------- -----------------------... -
Page 3: Safety Instructions
Safety Instructions Read all instructions carefully before operating this product. Basic precautions should always be followed, including the following safety instructions when using this equipment: 1. Read all the instructions in this manual and do warm up exercises before using this equipment. -
Page 4: Exploded Diagram
Exploded Parts Diagram... -
Page 5: Parts List
Part list DESCRIPTION SPECS. DESCRIPTION SPECS. Main frame Power wire socket Base frame Power wire Upright bracket Overload protector Incline bracket Single wire 1 Computer bracket AC single wire Running board strengthen Single wire tube Tubing assembly Grounding wire Silicone oil Front roller Rear roller Lock nut... -
Page 6: Assembly Instructions
Assembly Instructions When you open the carton, and you will find the below parts in the carton PART LIST : DES. Specification Nos. DES. Specification Nos. Main frame Safety key 6#Allen wrench Left base cover Bolt M8*42 Right base cover Wrench with screw S=13、14、15 Bolt... - Page 7 STEP 1: 1. Open the carton, take out the above spare parts, put the Main Frame on the level ground. STEP 2: 1. Support the computer bracket, and lock the computer on the upright tube with 5# Allen wrench(10), Bolt(62) and lock washer(88). refer to the picture left.
- Page 8 STEP 3: 1. Fold up the computer as the direction of arrow in left picture. STEP 4: 1. Use 5#Allen wrench (10), Bolt(70) and lock washer(88) to lock the right upright tube onto the base frame. 2. Use 5#Allen wrench (10), Bolt(62) and lock washer(88) to lock the right upright tube onto the base...
- Page 9 STEP 5: 1. Use wrench with screw driver(12), bolt(74) to lock the right base cover (28)into the base frame. 2. Right side is same as the left side. Note: The base cover needs to be fastened to the upright. STEP 6: 1.
-
Page 10: Folding Instructions
Folding Instruction Pulling up: Pull up the base frame at position( A) till hearing the sound that the air pressure bar (B) is locked into the round tube. Pulling down: Support place A with hand , kick the place of air pressure bar, then the base frame will fall down automatically Please... -
Page 11: Technical Parameter
Technical Parameter BUILT UP As the rating label showing 1645*763*1332mm POWER SIZE(mm) FOLDABLE Maximum output As the rating label showing 1028*763*1317mm power SIZE(mm) RUNNING SURFACE SPEED RANGE 480*1300mm 1-16KM/H SIZE(mm) NET WEIGHT 72.5KG Speed, Time, Distance, Calories, Pulse 1 LCD WINDOW Grounding Methods This product must be grounded. -
Page 12: Operation Guide
Operation Guide 1.DISPLAY WINDOW: 2.LCD WINDOW DISPLAY DETAILS: PROG: show program number. In manual mode, it show”--” TIME: Show running time; SPEED: Show speed; INCLINE/PULSE: Show incline level and heart beat data, When the corresponding icon is lit, the corresponding element is displayed; CAL/DIST: show Calories and distance. - Page 13 again, the machine will stop completely and all the data will reset. But in this PAUSE state, if you press START button, the treadmill will go on from the data of PAUSE state “SPEED+/-”: Adjust the speed. Press the button to adjust the speed when running, or adjust the data when stop.
- Page 14 4.4 USER DEFINED PROGRAM There are three program U1, U2, U3 for user defined. Press “PROGRAM” continuously under standby mode until window display U1-U3,press “MODE” to start setting first segment, setup speed and incline by pressing ‘SPEED + -’ 、 ’ SPEED ( 3 12)’、’’INCLINE + -’’、’’NCLINE(3 6 9 12)’’, .press “MODE”...
- Page 15 6.2 BMI reference (BMI) <19 Under weight 19--26 Normal weight 26--30 Over weigh >30 Obesity 7. SLEEP FUNCTION Stopped more than 10 minutes, the system turns off all displays and enters a sleep mode. Press any key to wake up. 8.
- Page 16 10. RUNNING DATA DISPLAY AND SETTING RANGE DEFAULT DEFAULT SHOW RANGE SET RANGE MODE PROGRAM SPEED(KM/H) 1.0-16KM -------- -------- -------- INCLINE(%) 0---15% 0—15% TIME 0:00—99:59 30:00 30:00 5:00---99:00 DISTANCE 0.00KM—99.9KM 1.00KM -------- 0.5KM—99.9KM CALORIES 0Kcl—999Kcl 50Kcl -------- 10Kcl—990Kcl 11. DATE TABLE: Setting time/16= interval running time TIME PROG...
-
Page 17: Exercise Instructions
Exercise Instructions Warm up stage: If you are over 35 years old, or not very healthy, also it’s your first time exercise, please consult with your doctor or professional person. Before you use the motorized treadmill, please learn how to control the machine, know well how to start, stop, adjust the speed and so on, don’t stand on the machine at this time. - Page 18 You should consult with your physician or health professional as keep going. You can choose the normal walking speed or the jogging speed ,if you always take workout with treadmill. If you don’t have enough experiences or confirm the testing velocity ,you can follow the instruction : Speed 1-3.0KM/H not well physical Speed 3.0-4.5KM/H less movement and workout...
-
Page 19: Warm Up Exercises
Warm Up Exercises A successful exercise program consists of a warm-up, aerobic exercise, and a cool-down. Do the entire program at least two and preferably three times a week, resting for a day between workouts. After several months, you can increase your workouts to four or five times per week. Warming up is an important part of your workout, and should begin every session. - Page 20 Calf-Achilles Stretch Lean against a wall with your left leg in front of the right and your arms forward. Keep your right leg straight and the left foot on the floor; then bend the left leg and lean forward by moving your hips toward the wall. Hold, then repeat on the other side for 15 counts.
-
Page 21: Running Belt Adjustment
RUNNING BELT ADJUSTMENT Warning: ALWAYS UNPLUG THE TREADMILL FROM THE ELECTRICAL OUTLET BEFORE CLEANING OR SERVICING THE UNIT. Clean: General cleaning the unit will greatly prolong the treadmill. Keep treadmill clean regularly. Be sure to clean the exposed part of the deck on either side of the walking belt and also the side rails. -
Page 22: Center The Running Belt
CENTER THE RUNNING BELT sides ,if the best not too tight nor loose. ●Place treadmill on a level surface. Run Treadmill at approximately 6-8KM/H, checking the running condition. If the belt has drifted to the right, pull out of the save clock and switch, turn the right adjusting bolt 1/4 turn clockwise, then start running until centering the belt. -
Page 23: Trouble Shooting Guide
TROUBLE SHOOTING GUIDE CODE REASON SOLUTION 1.message wire is broken or not 1. Check if the computer and bottom control connected well board wire connect well; 2. Check if IC on bottom control board is loosen, reset the IC 1. Check if the power voltage is 50% lower Burst clash than the normal voltage, please use the normal voltage to test;...
Need help?
Do you have a question about the GB-K6480 and is the answer not in the manual?
Questions and answers