
Related Manuals for iGenix IG3920


Summary of Contents for iGenix IG3920
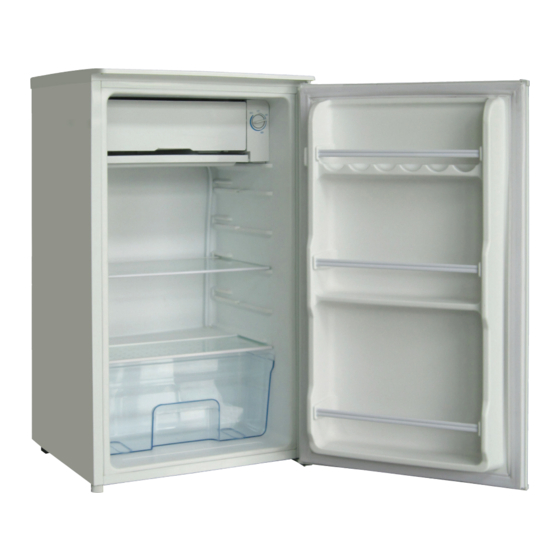
- Page 1 USER MANUAL Under Counter Fridge with Chill Box IG3920 PO Number: Please read these instructions carefully before use and retain for future reference...
-
Page 2: Table Of Contents
CONTENTS Safety Warnings................3-5 Specification .................6 Appliance Overview ..............6 Installation .................7-8 Operating Intructions ............8-9 Cleaning & Maintenance ............9-10 Troubleshooting ................ 11 Fuse/Plug Replacement ............12 Disposal Information ............... 12 Igenix Warranty ..............14-15... -
Page 3: Safety Warnings
SAFETY INSTRUCTIONS Read and follow all of the instructions even if you feel you are familiar with the product, and find a place to keep this manual handy for future reference. Important: This product is intended for domestic use only, for food refrigeration and frozen food storage only. - Page 4 • Always unplug the appliance before cleaning. When disconnecting from the electricity supply, pull the plug, not the cord. • This product is for indoor use only. • Do not store explosive substances such as aerosol cans with a flammable propellant in this appliance. •...
- Page 5 • Children between the ages of 3 and 8 are allowed to load and unload refrigerators. • When positioning the unit, make sure that the power cord is not pinched or damaged. • Make sure that there are no multiple sockets or power supplies on the back of the unit.
-
Page 6: Specification
SPECIFICATION Model Number IG3920 Climate Class N,ST Refrigerator Interior Temperature (°C) 0 - 10 Chill Box Interior Temperature (°C) 0 - -6 Chill Box Star Rating Total Net Capacity (Litres) Voltage (V) 220 - 240 Frequency (Hz) Rated Current (A) -
Page 7: Installation
INSTALLATION Location and Air Circulation The appliance must stand vertically on a flat, even surface, to level the appliance use the levelling feet by turning them until the appliance is as level as possible. Install the appliance in a well ventilated room with an average room temperature of between 18°C and 38°C. -
Page 8: Operating Intructions
Note: Check that the door is aligned horizontially and vertically and that the seals are closed on all sides before tightening the bottom hinge. Re-adjust the levelling feet to minimise operation noises caused by vibration. OPERATING INSTRUCTIONS Before using your Refrigerator •... -
Page 9: Cleaning & Maintenance
Using your Fridge Efficiently • Avoid opening the door for long periods or unnecessarily. • To maintain adequate air circulation, do not over fill the refrigerator. • Allow hot or warm foods to cool to room temperature before storing in the refrigerator. Storing Food in your Fridge •... - Page 10 Exterior Use a clean, damp soft cloth to wipe the exterior surface of the refrigerator and dry thoroughly. WARNING: Do not use abrasive cloths, powders, household cleaners, bleach or wax polish to clean the refrigerator as these can leave a smell in the refrigerator and can damage the exterior. Use a vacuum cleaner to remove dust from underneath the refrigerator and from around the compressor which is situated at the back of the refrigerator, regularly to maintain adequate ventilation.
-
Page 11: Troubleshooting
TROUBLESHOOTING If you are having problems with your appliance, please use our troubleshooting guide below. If you are unable to resolve the issue using this guide please ring our Customer Service Department on 01473 271 272. Please have the model code, batch number and purchase information available. Problem Possible Cause Solution... -
Page 12: Fuse/Plug Replacement
MAINS PLUG FUSE REPLACEMENT Fuse Cover Fuse Replacement (Class I) This appliance must be eathed. Remove the fuse cover with a small flat head screw driver. Take out the fuse and replace with a new fuse of the same Amp. Replace the fuse cover and push back into place. DISPOSAL INFORMATION The European Directive 2012/19/EU on Waste Electrical and Electronic Equipment (WEEE), requires that old household electrical appliances must not be... -
Page 14: Igenix Warranty
lgenix Warranty Terms & Conditions This product is guaranteed for a period of 12 months as standard from the date of purchase against mechanical and electrical defects. You can extend your warranty for a further 12 months by registering your product. Upon registration we will cover your product for a period of 24 months from the original purchase date against any mechanical or electrical defects. - Page 15 To qualify for the 2 year warranty you must register your product within 30 days of purchase. The full Terms & Conditions of our warranty policy are shown on the opposite page. They are also available on our website. www.igenix.co.uk...
- Page 16 38 Bluestem Road, Ransomes Europark, Ipswich, IP3 9RR Tel. 01473 271 272 Disclaimer: Igenix operate a policy of continual improvement and development. We therefore reserve the right to change/alter the specification and appearance of our appliances without prior notice. All diagrams and images shown in this manual are for illustration purposes only.
Need help?
Do you have a question about the IG3920 and is the answer not in the manual?
Questions and answers