Table of Contents
Advertisement
Quick Links
Advertisement
Table of Contents

Summary of Contents for YOKOYAMA KP6210
- Page 1 210x297 KP6210 KP6210A...
- Page 2 "IMPORTANT SAFETY INSTRUCTIONS" When using an electrical appliance, basic safety should always be followed, including the following: Read all instructions before using this sewing machine. DANGER - To reduce the risk of electric shock: 1. An appliance should never be left unattended when plugged in. 2.
- Page 3 26-29 32-33 , Darning stitches User operates an error warning, Darning sewing Thick fabric sewing, For European version Dimensions: 438 mm x 200 mm x 315mm Mass of the equipment: 6.8 kg Rated Voltage: 220~240 V Rated Frequency: 50 Hz Rated input: 45 W Using ambient temperature: Normal temperature...
-
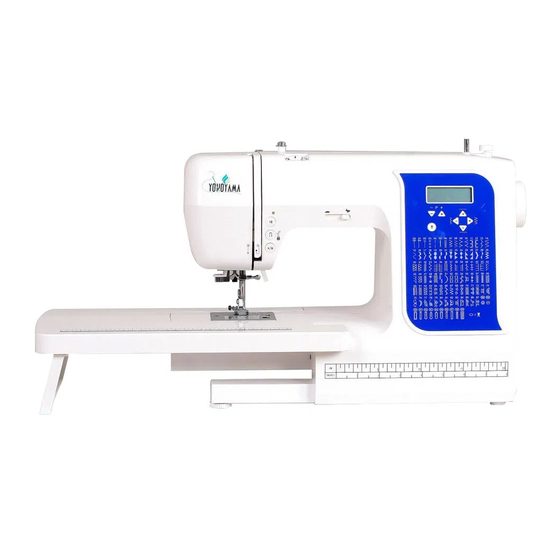
Page 4: Knowing Your Sewing Machine
26. Threading guide 27. Needle 28. Bobbin case cover release button 29. Bobbin case cover 30. Power line cord 31. Foot control (Type:4C-333B) * Optional parts for KP6210 * Standard parts for KP6210A 32. Instruction manual 33. Large extension plate (Optional part) - Page 5 ACCESSORIES 1. Needles 2. Bobbins (4 total - 1 in machine) 3. Auxiliary spool pin 4. Spool pin felt discs 5. Spool pin cap 6. Screwdriver for needle plate 7. Buttonhole opener/seam ripper and brush 8. Oiler (Optional part) 9. Darning plate 10.
-
Page 6: Setting Up Your Machine
SETTING UP YOUR MACHINE Be sure to wipe off any surplus oil from needle plate area before using your machine the first time. POWER LINE CORD/FOOT CONTROL (1) Connect the power cord and plug as illustrated. (2) Connect the foot pedal into the machine socket as Set power/light switch at "OFF"... -
Page 7: Spool Pins
SPOOL PINS HORIZONTAL SPOOL PIN for normal thread spool Place thread spool on the pin and secure with a spool cap to ensure smooth flow of thread. If the thread spool has a thread retaining slit, it should be placed to the right. Select the correct spool pin cap according to the type and diameter of the spool. - Page 8 Push bobbin winder shaft to far left position , if it is not already there. Place bobbin onto shaft with end of thread coming from top of bobbin. Push bobbin winder shaft to the right until it clicks. Hold onto end of thread.
- Page 9 Remove the bobbin cover plate by pushing the release button to the right. Bobbin cover will pop up to allow you to remove the cover. With your finger placed gently on top of the bobbin, pull the thread until it reaches the slot (B).
- Page 10 NOTE: You may want to cut the end of the thread with scissors for easier needle threading. Switch the power on after threading the machine and bobbin. You are now ready to sew.
-
Page 11: Using Automatic Needle Threader
USING AUTOMATIC NEEDLE THREADER Lower the presser foot. Raise the needle. Lower the needle threader lever slowly. Pass thread round hook as inset A. Lower the lever to its lowest position. Thread hook passes through needle eye. Bring thread from hook A to the right side under the hook. - Page 13 Loosen the needle clamp screw by turning it counter clockwise. Your fabric will determine the choice of a needle and thread. Thefollowing table is a practical guide to needle and thread selectionAlways refer to it before commencing a new project. Be sure to use the same size and type of thread in the bobbin as in the top thread supply.
- Page 14 When the sewing machine is placed on an uneven surface, turn the adjusting screw to adjust the height until the sewing machine is stable. Adjusting screw...
- Page 15 Place the large extension table along the machine body as illustrated.
-
Page 17: Control Buttons Functions
CONTROL BUTTONS FUNCTIONS Start/stop button (If your machine has this function button) Push this button lightly and machine will start to run. Push this button lightly again and the machine will stop to run. *When foot controller (pedal) is connected to the machine, the function of this button will be invalid. Reverse stitch/Tacking stitch button (2 functions) A. - Page 18 CONTROL BUTTONS FUNCTIONS Pattern Numeral decreasing select button Push this button, the digital on the LCD display will be decreased. keep to push this button continually and then the digital will be decreased continually rapidly. Pattern Numeral increasing select button Push this button, the digital on the LCD display will be increased.
- Page 19 2.STARTING TO SEW QUICK REFERENCE TABLE OF STITCH LENGTH AND WIDTH STITCH NO. STITCH PATTERN STITCH LENGTH STITCH WIDTH STITCH NO. STITCH PATTERN STITCH LENGTH STITCH WIDTH AUTO MANUAL AUTO MANUAL AUTO MANUAL AUTO MANUAL 0.8 - 5.0 1.0 - 2.6 2.0 - 7.0 0.8 - 5.0 1.0 - 2.6...
- Page 20 STITCH NO. STITCH PATTERN STITCH LENGTH STITCH WIDTH STITCH NO. STITCH PATTERN STITCH LENGTH STITCH WIDTH AUTO MANUAL AUTO MANUAL AUTO MANUAL AUTO MANUAL 0.4 - 1.0 4.0 - 7.0 1.0 - 2.6 4.0 - 7.0 0.4 - 1.0 4.0 - 7.0 1.4 - 2.6 4.0 - 7.0 0.4 - 1.0...
- Page 21 STITCH NO. STITCH PATTERN STITCH LENGTH STITCH WIDTH STITCH NO. STITCH PATTERN STITCH LENGTH STITCH WIDTH AUTO MANUAL AUTO MANUAL AUTO MANUAL AUTO MANUAL 1.4 - 2.6 4.0 - 7.0 1.4 - 2.6 4.0 - 7.0 1.4 - 2.6 4.0 - 7.0 1.4 - 2.6 4.0 - 6.5 1.4 - 2.6...
- Page 22 STITCH NO. STITCH PATTERN STITCH LENGTH STITCH WIDTH STITCH NO. STITCH PATTERN STITCH LENGTH STITCH WIDTH AUTO MANUAL AUTO MANUAL AUTO MANUAL AUTO MANUAL 1.4 - 2.6 4.0 - 7.0 0.4 - 1.0 1.4 - 2.6 4.0 - 7.0 0.4 - 1.0 1.4 - 2.6 4.0 - 7.0 0.4 - 1.0...
-
Page 23: Straight Stitching
STRAIGHT STITCHING Straight stitch is most frequently used for all types of sewing. Let's begin by following the steps below. 1. SETTINGS Presser foot : General Purpose Foot Thread tension control: (4) NOTE: Based upon the weight of the fabric, slight "fine tuning" of the tension may be desired. - Page 24 Thread bobbin with desired top stitch color. When sewing the machine will pull this thread to the top.
-
Page 25: Zigzag Stitching
ZIGZAG STITCHING SETTINGS Presser foot : General Purpose Foot Thread tension control: (4) The top thread may appear on the bottom depending on the thread, fabric, type of stitch and sewing speed, but the bobbin thread must never appear on the top of the fabric. If bobbin thread is pulling to the top or you are experiencing puckering, slightly reduce the tension with the Threading tension dial. -
Page 26: Blind Hem Stitch
BLINDHEM STITCH The blindhem stitch is primarily used for hemming curtains trousers, skirts,etc. SETTINGS Presser foot : General Purpose Foot Thread tension control: (4) - Regular blind stitch for normal woven fabrics - Elastic blind stitch for soft, stretchable fabrics With matching thread finish the raw edge. -
Page 27: Multi-Stitch Zigzag
MULTI-STITCH ZIGZAG SETTINGS Presser foot : General Purpose Foot Thread tension control: (4) This is a strong stitch because as its name implies, it makes three short stitches where the normal zig-zag makes only one For this reason it is highly recommended for overcasting all types of fabrics. It is also ideal for bartacks, mending tears, patching, sewing toweling, and... - Page 28 Stretch stitches are mainly for use on knit, or stretchable fabrics, but alsobe used on woven fabrics. Straight stretch stitch is far stronger than ordinary straight stitch because it locks three times - forwards, backwards and forwards. It is particularly suitable for reinforcing the seams of sportswear in stretch and non-stretch fabrics and for curved seams.
- Page 29 This stitch enables it to be used for top stitching, or attaching lace or inset panels when making lingerie. The Blanket stitch is traditionally a hand embroidery stitch used to put bindings on blankets. This multi-purpose stitch can also be used for attaching fringe,attaching edgings, couching, applique and drawn thread hemstitching.
- Page 30 Excellent for hemstitching table and bed covers with an elegant touch. Picot-like stitch can also be made on sheer materials. Sew along the raw edge of fabric and trim close to the outside of the stitching.
- Page 32 Before starting to sew, check that there is enough thread wound onto the bobbin to ensure that the thread will not run out during sewing.
- Page 33 These are the patterns often seen on borders or hems of garments and home decorating projects. Use whichever patterns suit your preference. Position your fabric and button under the presser foot. Lower presser foot. Turn the handwheel to make sure needle clears both left and right openings of the button.
-
Page 34: Sewing A Buttonhole
SEWING A BUTTONHOLE USING BUTTONHOLE FOOT The size of the buttonhole is automatically set by placing a button in the automatic buttonhole foot(R). The button holder of the foot takes a button size up to 2.5 cm (1") in diameter. Make a test buttonhole on a sample duplicating the fabric interfacing and seams of the actual garment. -
Page 35: Corded Buttonholes
When buttonhole sewing is finished, push the buttonhole lever upward as far as it will go. CORDED BUTTONHOLES Hook filler cord (crochet thread or buttonhole twist) over the spur and pull both Spur ends of the cord forward under the foot and tie off the cord as shown in the illustration. - Page 36 After use, keep sewing machine and foot controller clean. Use dry rags to remove dust from the sewing machine and foot controller.
-
Page 37: Other Information
4. OTHER INFORMATION SATIN STITCH FOOT The Satin stitch foot is grooved to permit dense stitching to pass under it easily. It is most useful for sewing satin stitches and as an alternative to the General Purpose Foot when sewing stretch stitches. Closely spaced zig-zag stitches are called satin stitches. - Page 38 HINTS!! MACHINE WILL BEEP A WARNING TONE AND FOLLOWING ERROR CODE WILL APPEAR ON DISPLAY SCREEN. PF– Start the machine when presser foot is lifted up. 《lower down the presser foot》 ƆC – Bobbin winder is ON. 《push the bobbin winder reel to left hand side, see pic.4 on page 6 》 –...
-
Page 39: Performance Checklist
5. PERFORMANCE CHECKLIST Condition Causes Solutions Reference GENERAL PROBLEMS Machine does not sew. Power switch is turned off. Turn on the switch. See page 4 Buttonhole lever is not lowered when sewing Lower buttonhole lever. See page 30 buttonhole. There is a gap between slider and spring holder on Press the buttonhole foot lightly to avoid the gap See page 30 buttonhole foot. - Page 40 621960007-BS01 04-2018...
Need help?
Do you have a question about the KP6210 and is the answer not in the manual?
Questions and answers