
Related Manuals for Ibml ImageTracDS 1210


Summary of Contents for Ibml ImageTracDS 1210
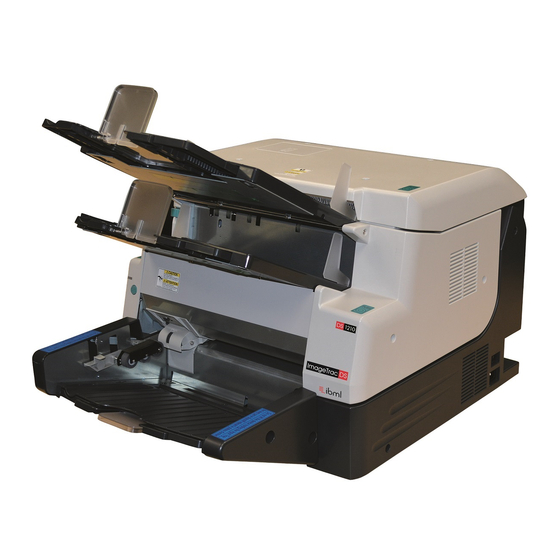
- Page 1 Information capture. Done right.™ Version 1.0 ImageTracDS 1210/1155 Installation Manual 25-Jan-16...
- Page 2 Disclaimer Caution ibml does not take on any responsibility for any damage caused by inability or error in scanned or data abnormality. The user must be reliable for scanned data validation. ibml does not take on any responsibility for any damage caused by using a poor-quality sheet or sheet not up to standard.
-
Page 3: Table Of Contents
Contents Revision History ························································· 4 Safety Precautions ························································ 6 General safety precautions ························································ 6 Safety Notice Label on device ···················································· 10 1 Scope ······························································· 11 2 Installation Time ······················································ 11 3 Procedure ···························································· 11 4 Tools and Parts required at device installation ······························· 12 5 Requirement for Host Systems ···········································... -
Page 4: Revision History
C o r r e c t e d C h e c k e d b y Ap p r o v e d Description First edition 10.30 2015 Murofushi Uchida Kameda 01.25.2016 ibml Support Support ImageTracDS 1155 / 1210 Installation Manual... - Page 5 Imaging Business Machines, LLC. ibml is shipping totally RoHS compliant machines to the European Community Members. ImageTracDS 1155 / 1210 Installation Manual...
-
Page 6: Safety Precautions
Safety Precautions The safety precautions are written on the labels below. The safety precautions are safety alert symbols with signal words such as; "DANGER", "WARNING", or "CAUTION". symbol Message Description This symbol is accompanied by text to indicate that the following information is related to safety. - Page 7 Common Safety Precautions WARNING Caution for heavy components • When lifting heavy components, use your leg muscles keeping your back straight not to injure your spine or back muscles. WARNING Caution for moving parts • Do not power on without covers for moving parts. •...
- Page 8 CAUTION Location • This device weighs approximately 94 lbs (43 kg). At least 2 people are required to handle the device. Take stable posture when installing the device. • Be sure to hold the bottom of the device. If you hold input/output tray or other parts, the device may break or drop.
- Page 9 • Since the ink cartridge bundled with the DS 1210 equipped the back side imprinter(option) is used for only printer check purpose at the device installation, the specifications of ink cartridge described in documentations provided by ibml for the DS 1210 shall not applied to it. (Install 08-0020)
-
Page 10: Safety Notice Label On Device
Safety Notice Label on device Clean each safety notice label regularly so the text be read clearly. If the label is worn or unreadable, replace a new label. ImageTracDS 1155 / 1210 Installation Manual... -
Page 11: Scope
Scope This manual is applied to the on-site installation of ImageTracDS 1155 / 1210 scanner. The scanner can be operated by connecting to the host with the USB interface. Installation Time About 60 minutes Procedure NOTICE Due to the transportation in winter, there might be dew condensation on the device. If you power on just after unpack and install the device, glasses might be misted up and it may cause of read error. -
Page 12: Tools And Parts Required At Device Installation
Tools and Parts required at device installation (1)Tools for required device installation No.1: Digital Voltage Meter No.2: Philips Screwdriver(No.2) (2) ImageTracDS 1155 / 1210 Installation Manual (This manual) (3) ImageTracDS 1155 / 1210 User's Manual ImageTracDS 1155 / 1210 Installation Manual... -
Page 13: Requirement For Host Systems
Requirement for Host Systems OS, Required Capacity of Memory and Disk Prior to set up of the Scanner Driver, confirm whether the host systems meet the requirement below. Device installation should be done after setting up the host systems that satisfy the requirement. <... -
Page 14: Requirement For Usb Interface
Requirement for USB Interface Be sure to log on as a user with administrator privileges. In order to set up the scanner driver appropriately, the USB port and the USB driver need to be operating correctly with the host system. Check the following items. -
Page 15: Hardware Installation
*1: Since the ink cartridge bundled with the DS 1210 equipped the imprinter(option) is used for only printer check purpose at the device installation, the specifications of ink cartridge described in documentations provided by ibml for the DS 1210 shall not applied to them. (cont.) - Page 16 (cont.) Item Procedure Cleaning If the device is contaminated, clean up it with gauze and ethanol. Appearance Ensure there is no scratch, deformation, or discoloration on the device. Power Supply Required Power (Voltage): about 95W(AC200-240V /AC100-120V) Frequency: for both 50/60Hz±1Hz Earth:The earth environment is according to the National Electrical Code (NEC).
- Page 17 (cont.) Item Procedure (cont.) (cont.) (2) Attach input tray according to following instructions. Input Tray 2-1. Lift Hopper Plate so that Elevator Arm is under Hopper Plate. (Hopper 2-2. Attach input tray securely with sheet stopper. Attachment A : First step for fixing. B : Second step for fixing.
- Page 18 (cont.) Item Procedure (cont.) (cont.) 1-2 Insert output tray guide on the position A and slides it to position B. Output Tray (Stacker) Attachment Output tray guide Note: Upper tray and lower tray are same process. CAUTION When the Top Unit is open, hands and objects can be caught by the Top Unit when the Top Unit closes unexpectedly, Make sure you hold the Top Unit with your hand while you work.
- Page 19 (cont.) Item Procedure Imprinting Position CAUTION When the Top Unit is open, hands and objects can be caught by the Top Unit if the Top Unit closes unexpectedly, Make sure you hold the Top Unit with your free hand while you work. (1) Push the Top Latch Button and the Top Cover will open.
- Page 20 (cont.) No. Item Procedure Connecting NOTICE cable Do not turn the power on until installing the software in the PC. (1) Connect the bundled Power Cable to the inlet connector that is at the side of the device. The other side of the cable should be connected to the power outlet whose voltage was measured at No.
-
Page 21: Installation Of Scanner Driver
Installation of Scanner Driver Contents of installation CD The following contents are included in installation CD. 1. TWAIN Driver and Tools These programs are collectively called "Scanner Driver". 2. USB Driver 3. The installer of Scanner Driver and USB Driver(Setup.exe). System Requirement Make sure your computer meets the system requirements for this software. -
Page 22: Install The Scanner Driver
Install the Scanner Driver 7.3.1 Confirm the administrator privileges. Be sure to log on as a user with administrator privileges to install the program. 7.3.2 Connect the Scanner Connect the USB cables between the scanner and the PC. Turn on the scanner. If "Found New Hardware"... - Page 23 In case of Windows(R) 8 (32- or 64-bit) / Windows(R) 8.1 (32- or 64-bit) (1)If this screen is displayed, click it. (2)The following screen might be displayed. Click "Run Setup.exe" to continue. (3)The message of "Do you want to allow the following program from an unknown publisher to make changes to this computer?"...
-
Page 24: About Readme
7.3.4 About readme When Setup.exe is started, the following screen is displayed. This readme document contains important information to read before installing. Click "OK" to continue. ImageTracDS 1155 / 1210 Installation Manual... -
Page 25: Install The Scanner Driver
7.3.5 Install the Scanner Driver When OK is clicked with readme, the following screen is displayed. Click "Start" to start installation. Confirm Installation Folder, and then click "OK"button to continue. (Only new installation) Usually, it is not necessary to change Installation Folder. Click "Next"... - Page 26 Choose "I Agree" after reading all the texts. Click "Next" to continue. Click "Close" to end. ImageTracDS 1155 / 1210 Installation Manual...
-
Page 27: Install Usb Driver
7.3.6 Install USB Driver The Window Security dialog might be displayed. Click "Install" button to continue. (This screen is one example. It is likely to be displayed several times. This dialog is different depending on OS.) Click "OK" to end. ImageTracDS 1155 / 1210 Installation Manual... -
Page 28: Imprint Setting And Test
Imprint setting and test Imprint test (front side) • Prepare a sheet to be used for the Imprint Test. • During the Imprint Test, only one sheet is fed even if many sheets are set on the Input Tray. In case of Windows 7 Click the [Start] button. - Page 29 Select "Imprint Test" and click "Execute" to continue. (1) Specify sheet size and side of imprint test. Set a sheet whose size you selected on the Input Tray. Click the [Execute] (3) Select “Yes” when following screen is shown. After that imprinting will start. (4) When the print test finishes, the window below is displayed.
-
Page 30: Imprint Setting And Test (Back Side: Option)
Since the ink cartridge bundled with the DS 1210 equipped the back side imprinter(option) is used for only printer check purpose at the device installation, the specifications of ink cartridge described in documentations provided by ibml for the DS 1210 shall not applied to it. -
Page 31: Install The Ink Cartridge
8.2.2 Install the ink cartridge This part applies only for the scanner which equips the back side imprinter. (1) Open the Imprint Cover (Back) on the Top Unit. Imprint Cover (Back) Top Unit (2) Open the lever of the Ink Jet Print assembly as much as possible in the direction of the arrow so that it will not interfere with installing the ink cartridge. - Page 32 (4) Move the lever on the Ink Jet Print assembly in the direction of the arrow to fix the ink cartridge. Ink Cartridge Lever (5) Close the Imprint Cover (Back). ImageTracDS 1155 / 1210 Installation Manual...
-
Page 33: Reset The Ink Level
8.2.3 Reset the ink level This part applies only for the scanner which equips the back side imprinter. In case of Windows 7 Click the [Start] button. From the menu, select "All Programs" > "ImageTracDS 1155 / 1210 Scanner" > "Utility for End User"... - Page 34 Check here when the ink cartridge (Back) is installed/replaced. Check "Ink level reset" and click "Execute". Click "Yes" to continue. Click "OK" to continue ImageTracDS 1155 / 1210 Installation Manual...
- Page 35 Confirm the following: "Ink level" is 100 (%), "The number of printed sheets" is 0 (Sheets), and "Cartridge replacement date" is updated. Click "End" to back .Scanner Utility menu selection. ImageTracDS 1155 / 1210 Installation Manual...
-
Page 36: Imprint Test
8.2.4 Imprint Test This part applies only for the scanner which equips the back side imprinter. • Prepare a sheet to be used for the Imprint Test. • During the Imprint Test, only one sheet is fed even many sheets are set on the Input Tray. Select "Imprint Test"... -
Page 37: Test Scanning
When the print test finishes, the window below is displayed. Confirm print condition as readable characters clearly. Click “OK” after finished it. Terminate Scanner Utility. Test Scanning Ensure the scanner can be operated properly by the host systems. 10 Delivery Item Procedure Explanation and... -
Page 38: 11 Installation Confirmation With Check Sheet
11 Installation Confirmation with Check Sheet With the check sheet below, ensure all work has been completed. Item Content Check Result Unpacking Unpacking and checking the device Requirement for Host OS, Required capacity of Memory and Disk Systems Requirement for USB USB driver ,USB3.0 card Interface Hardware Installation...
Need help?
Do you have a question about the ImageTracDS 1210 and is the answer not in the manual?
Questions and answers