Advertisement
Quick Links
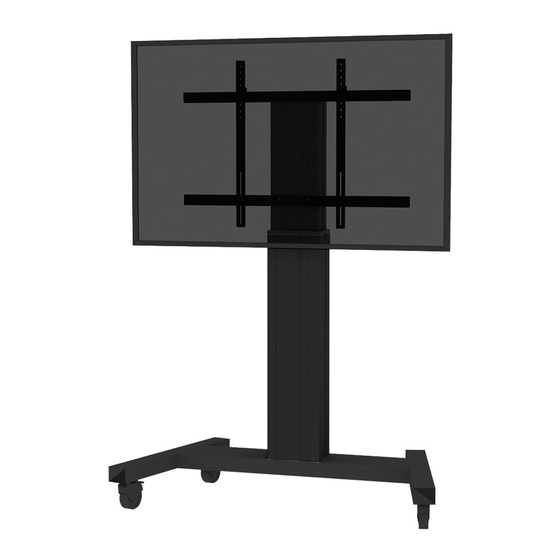
900 mm
1035 mm
PLASMA-M2250
PLASMA-W2250
PLASMA-M2500(T)
PLASMA-W2500
EN
Floor stand
NL
Vloersteun
DE
Bodenständer
FR
Support au sol
IT
Supporto da pavimento
ES
Soporte de suelo
PT
Suporte de chão
DK
Gulvstander
INSTRUCTION MANUAL
890 mm
1035 mm
735 mm
BLACK/SILVER
BLACK/SILVER
BLACK/SILVER
BLACK/SILVER
NO
Gulv stativ
SE
Golvstativ
FI
Lattiateline
PL
Stojak podłogowy
CS
Podlahový stojan
SK
Podlahový stojan
RO
Stativ pentru podea
860 mm
165 mm
420 mm
100 mm
735 mm
1035 mm
WWW.NEOMOUNTS.COM
420 m
100 mm
Advertisement

Related Manuals for NewStar Neomounts PLASMA-M2250


Summary of Contents for NewStar Neomounts PLASMA-M2250
- Page 1 INSTRUCTION MANUAL 860 mm 420 m 890 mm 165 mm 420 mm 900 mm 100 mm 100 mm 1035 mm 735 mm 1035 mm 735 mm 1035 mm PLASMA-M2250 BLACK/SILVER PLASMA-W2250 BLACK/SILVER PLASMA-M2500(T) BLACK/SILVER PLASMA-W2500 BLACK/SILVER Floor stand Gulv stativ Vloersteun Golvstativ Bodenständer...
- Page 2 Tool PLASMA-M2250 BLACK/SILVER 200x200 - 0-130 kg | 120-170 cm 800x600 mm 0-286,6 lbs C. “Lift&Lock”-brackets (x2) PARTS F. M8x40mm (x4) A. Upper bar (x1) G. M8x85mm (x2) B. Lower bar (x1) H. M6x30mm (x2) D. Motorised column (x1) K. Power cable (x1) L.
- Page 3 STEP 3 Attach the “lift&lock”-brackets (C) to the display (I/J), before attaching them to the mount and secure the bracket with the “lift&lock” system Bevestig de de twee verticale “lift&lock”-steunen (C) aan het scherm (I/J), hang vervolgens aan het frame en vergrendel de steun met het “lift&lock”-systeem Einhängeschienen (C) am Display befestigen (I/J), bevor diese eingehängt werden und befestigen Sie die Halterung mit dem “Lift &...
- Page 4 Tool PLASMA-M2500 BLACK/SILVER 200x200 - 0-150 kg | 111-161 cm 800x600 mm 0-330,7 lbs B. “Lift&Lock”-brackets (x2) PARTS E. M8x40mm (x8) A. Frame (x1) F. M8x75mm (x4) G. M8 (x4) C. Motorised column (x1) J. Power cable (x1) K. Control unit (x1) L.
- Page 5 STEP 3 Attach the “lift&lock”-brackets (B) to the display (H/I), before attaching them to the mount and secure the bracket with the “lift&lock” system Bevestig de de twee verticale “lift&lock”-steunen (B) aan het scherm (H/I), hang vervolgens aan het frame en vergrendel de steun met het “lift&lock”-systeem Einhängeschienen (B) am Display befestigen (H/I), bevor diese eingehängt werden und befestigen Sie die Halterung mit dem “Lift &...
- Page 6 Tool PLASMA-M2500T BLACK/SILVER 200x200 - 0-150 kg | Vert. 89-139 cm 800x600 mm 0-330,7 lbs Hor. 95-145 cm B. Vertical brackets (x2) PARTS A. Tiltable E. M8x40mm (x8) frame (x1) F. M6x70mm (x4) C. Motorised G. M8x16mm (x4) column (x1) I.
- Page 7 STEP 3 Attach the vertical brackets (B) to the display (G/H), before attaching them to the mount and secure the bracket (F) Bevestig de de twee verticale steunen (B) aan het scherm (G/H), hang vervolgens aan het frame en vergrendel de steun (F) Einhängeschienen (B) am Display befestigen (G/H), bevor diese eingehängt werden und befestigen Sie die Halterung (F) Fixez les 2 barres verticales (B) à...
- Page 8 Tool Pencil Tool Pencil Drill PLASMA-W2250 BLACK/SILVER 200x200 - 0-130 kg | 105-155 cm 800x600 mm 0-286,6 lbs C. “Lift&Lock”-brackets (x2) PARTS A. Upper bar (x1) E. Z-Bracket F. Hexagon sliding G. M8 H. 8mm (x2) block with bolt (x2) (x2) (x2) B.
- Page 9 STEP 3 Attach the “lift&lock”-brackets (C) to the display (K/L), before attaching them to the mount and secure the bracket with the “lift&lock” system Bevestig de de twee verticale “lift&lock”-steunen (C) aan het scherm (K/L), hang vervolgens aan het frame en vergrendel de steun met het “lift&lock”-systeem Einhängeschienen (C) am Display befestigen (K/L), bevor diese eingehängt werden und befestigen Sie die Halterung mit dem “Lift &...
- Page 10 Tool Pencil Tool Pencil Drill PLASMA-W2500 BLACK/SILVER 200x200 - 0-150 kg | 119-169 cm 800x600 mm 0-330,7 lbs B. “Lift&Lock”-brackets (x2) PARTS E. M8x40mm (x8) A. Frame (x1) F. M8x75mm (x4) E. Z-Bracket F. Square sliding G. M8 H. 8mm (x2) block with bolt (x2) (x2)
- Page 11 STEP 3 Attach the “lift&lock”-brackets (B) to the display (L/M), before attaching them to the mount and secure the bracket with the “lift&lock” system Bevestig de de twee verticale “lift&lock”-steunen (B) aan het scherm (L/M), hang vervolgens aan het frame en vergrendel de steun met het “lift&lock”-systeem Einhängeschienen (B) am Display befestigen (L/M), bevor diese eingehängt werden und befestigen Sie die Halterung mit dem “Lift &...
- Page 14 IMPORTANT HAZARD AND SAFETY NOTES (EN) Please carefully read the below hazard and safety notes before using the height adjustment unit. This adds to make the unit work failure-free and avoids accidents. Electrical safety • Connect unit to a free accessible 110-230 V / 50 Hz grounded power outlet only. Make sure, the unit can be immediately separated from the power outlet.
- Page 15 GEFAHREN- & SICHERHEITSHINWEISE (DE) Lesen Sie die nachfolgenden Gefahren- & Sicherheitshinweise vor der Verwendung der Höhenverstellungseinheit sorgfältig durch. Dies trägt dazu bei, dass die Einheit störungsfrei arbeitet & Unfälle vermieden werden. Elektrische Sicherhe • Anschluss der Einheit nur an eine frei zugängliche schutzgeerdete Steckdose mit 110-230 Volt / 50 Hz, damit das Gerät im Notfall direkt, ohne Verzögerung vom Stromnetz getrennt werden kann.
Need help?
Do you have a question about the Neomounts PLASMA-M2250 and is the answer not in the manual?
Questions and answers