
Related Manuals for InstroTek NoNuke


Summary of Contents for InstroTek NoNuke
- Page 1 Moisture / Density Gauge OPERATING MANUAL www.InstroTek.com...
- Page 2 ‘This page may be removed from the manual to prevent the unauthorized access to the restricted menu functions of the InstroTek NoNuke .’ ® ™ Restricted Menu Function Access Code: 5557...
- Page 4 © 2021 InstroTek, Inc. NoNuke Density Gauge Operation Manual Version 1.7 07.06.2021...
-
Page 5: Table Of Contents
InstroTek 1. Table of Contents **************************************** 1. INTRODUCTION 2. CHARGING THE BATTERIES 3. KEYPAD 4. GETTING STARTED 5. MENU FUNCTIONS 6. VERIFICATION 7. READING MODES 8. MAX DENSITY VALUE 9. INPUT MIX INFORMATION 10. DENSITY OFFSET 11. PROJECT STORAGE AND PRINTING 12. -
Page 6: Introduction
InstroTek 1. Introduction Thank you for your purchase of the InstroTek NoNuke, the most advanced non-nuclear asphalt density gauge. InstroTek has led the industry in Innovation and development of advanced instrumentation technologies since 1997. InstroTek designs and manufactures gauges used in a variety of applications, such... - Page 7 Pavement density and % compaction measurements • Optimum Rolling pattern and Pavement quality control • Segregation Safety The NoNuke gauge is a safe, reliable, non-nuclear device. Thus, it does not require any special handling, monitoring badges, license, special storage or have any special...
- Page 8 InstroTek transportation requirements. Please follow the important steps below regarding use, safety maintenance, well other internal company/agency specific use or safety procedures to prevent injury and obtain accurate results: • Only use Acetone to clean bottom sensor surface. Do not use WD-40 or any solvent that do not evaporate.
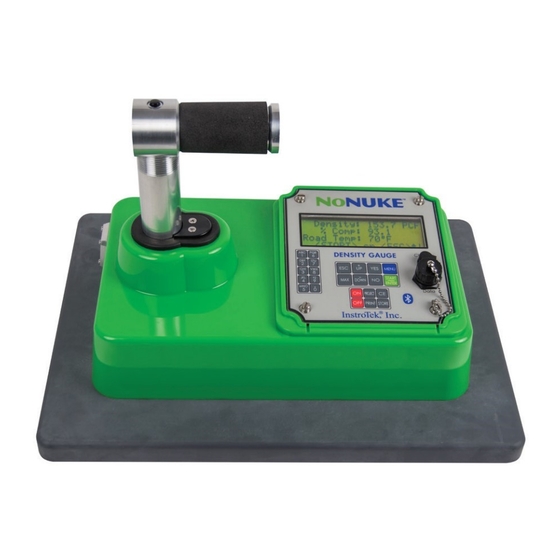
- Page 9 InstroTek Model NoNuke and Standard Accessories Fig 1.1 NoNuke Gauge & Accessories Model NoNuke 1. NoNuke 2. AC, DC charger, and flash drive, one each 3. Gauge Case with removable wheels 4. Standard Block 5. Manual of operation and gauge paperwork...
-
Page 10: Charging The Batteries
The NoNuke contains a pack of six AA size Rechargeable Nickel Metal Hydride batteries. The batteries are charged at the factory prior to shipment. Life of rechargeable batteries depends on the number of charge/discharges cycles. -
Page 11: Keypad
InstroTek 3. Keypad Note: Press each alphabetic key repeatedly to select a desired letter. Note: The minus key <-> is also the <DOWN> key. The decimal point is entered by holding the <0> key down for over one second. Decimal limited to use in setting offset value only. -
Page 12: Getting Started
This chapter covers the initial set up and basic operation and procedures of your gauge from powering on to taking a measurement. The following initial steps are recommended to start taking measurements with the NoNuke. 1. Powering the gauge ON 2. Set Time/Date 3. - Page 13 10 minutes. Simply press the ON key when you are ready to restart again. Note: The GPS on the NoNuke gauge will stay off until it is turned on though the menu function by the user. When the GPS is turned on, the battery consumption if increased and the gauge may have to charged more often.
- Page 14 Select AM or PM for the last setting. Select 1. AM 2. PM After selecting the Date and Time, the NoNuke returns to the first menu screen. -MENU- 1. Verification 2. Density Offset...
- Page 15 AM-PM or 24-hour display. Time Displayed in 24 Hour Mode <YES> to Change <ESC> to Exit After selecting Yes, the NoNuke returns to the first menu screen. Press ESC to return to the Gauge Ready screen: Gauge Ready <Start> to Begin Date...
- Page 16 2. kg/m3 3. G/CC Select#, ESC Exit Press 1 for (lb/ft3-inch-ºF), 2 for (kg/m3-mm- ºC), or 3 for (g/cc /mm/ ºC). After selecting the Unit of Measurement, the NoNuke returns to the first menu screen. -MENU- 1. Verification 2. Density Offset 3.
- Page 17 4. Input Max Density NoNuke measures % compaction based on the MAX Density input by the operator. In NoNuke, you can easily change the MAX density value as needed to accurately measure % compaction. To set the daily MAX density value complete the following steps.
- Page 18 InstroTek 5. Take a Measurement To assure a good measurement, the gauge should be placed on the pavement making sure there is proper contact between the gauge bottom surface and the pavement. Avoid wet areas for best accuracy. Then from the main screen, Gauge Ready <Start>...
- Page 19 If the NoNuke measures density values greater than 171 PCF (2440 kg/m3), the user will see a warning message on the screen. This message instructs the user to change the factory calibration from Factory 1 to Factory 2.
-
Page 20: Menu Functions
7. Keypad Sound – Enables/Disables the buzzer/alarm function of the NoNuke. 8. GPS – Enables or disables the GPS module. Note, to preserve battery life, the GPS module is normally off. Enable the GPS by using this Menu option. - Page 21 InstroTek for customized, extended additional tests and further diagnostics by trained technicians. Some of the items in this module require an access code. 11. Mix Information – Allows input of mix parameters for storage purposes. Includes the mat thickness and the maximum aggregate size.
-
Page 22: Verification
InstroTek 6. Verification If there are questions about gauge operations, you can always perform a gauge verification. To ensure proper gauge operation, you can use the following procedure to verify the gauge. First clean the bottom surface of the gauge. Debris and residue attached on the bottom surface may negatively affect the verification measurements. -
Page 23: Reading Modes
WD-40 or any solvent that do not evaporate. 7. Reading Modes NoNuke has two reading modes: Single Reading and Multiple Readings. To select or change the reading mode complete the following steps. When comparing your results to cores or to obtain the best results for each measurement spot, the Multiple Reading Mode is recommended. - Page 24 Select new number of readings and press Yes, otherwise, press ESC. For the multiple reading mode, we recommend 5 reading spots as illustrated in Figure 6.1. Make sure the areas you want to measure are flat and dry. Place the NoNuke on the pavement...
- Page 25 InstroTek and move between reading. Figure 6.1 illustrates a 5-point reading setup. Move the gauge 3 to 4 inches from center of first position up, right, down and left respectively, in order to collect data from positions 2, 3, 4 and 5.
-
Page 26: Max Density Value
8. Daily MAX Density Value NoNuke measures % compaction based on the MAX Density input by the operator. In NoNuke you can easily change this value to measure accurate % compaction. To set Daily MAX density value complete the following steps. - Page 27 InstroTek Press the MENU; the first screen will be: -MENU- 1. Verification 2. Density Offset 3. Reading Mode Scroll down the MENU to menu item 11 and enter that menu number. The 4 option erase is not shown. Mix Information 1.
-
Page 28: Density Offset
InstroTek Pressing Enter moves the screen to the next parameter as shown below. Max Den. : 145 PCF <Yes> to Change <Enter> to Continue <Esc> to Save Selecting Yes allows the user to change the Max Density as shown in the screen below. A blinking cursor will be on the first digit. - Page 29 Multiple Readings using 5 readings at each core location. Make sure the area you want to use for calibration is flat and dry. Place the NoNuke on the pavement and move after each reading in a pattern similar to figure 6.1 to get a representative...
- Page 30 InstroTek Press YES to change the offset value. Enter Value for Offset: <ENTER> to Accept <ESC> to Exit Input the calculated offset value and press ENTER to procced. Activate Density Offset? <YES> to Accept <NO> to Exit Note: The minus key <-> is also the <DOWN> key. The decimal point is entered by holding the <0>...
-
Page 31: Project Storage And Printing
The NoNuke is equipped with data storage capability. Up to 25 Projects and more than 100 stations (readings) per project can be stored in the NoNuke. The stored data can be printed or transferred into a USB external drive located on the front panel. - Page 32 After you enter a station number, the gauge saves the data for future review and reporting. Note: the design of the project and data storage in NoNUke is similar to setting up folders and file names in our PC. Project name is the same as setting up a folder and station number is the same as saving a file name.
- Page 33 InstroTek To manually store data, press PROJECT: 1. Auto Store 2. Start New Project UP/DOWN for Next <ESC> to Exit Select 2 to start a new project. Enter Project Name: <YES> to Accept <ESC> to Exit Press each alphanumeric key repeatedly to select a desired letter.
- Page 34 InstroTek Select 1 to automatically increment station numbers within the project. Starting Station Number: ## <ENTER> to Accept <ESC> to Exit Input the desired starting station number and press ENTER. When Auto is selected, the station numbers will increment to the next higher number from the starting station number.
- Page 35 <ESC> to Exit Select a stored project from the list by scrolling UP/DOWN through the choices and then press ENTER. After selecting the stored project, NoNuke will allow you to either enable or disable auto storage for this project. Auto Store: OFF <YES>...
- Page 36 InstroTek press 4: (Project names) <ENTER> to Select UP/DOWN for Next <ESC> to Exit Scroll UP/DOWN and select the project to review. (Station names) <ENTER> to Select UP/DOWN for Next <ESC> to Exit Scroll UP/DOWN and select the station to review. Then press ENTER and review the stored station data.
- Page 37 InstroTek -Delete Project- 1. Delete All Proj. 2. Delete One Proj. Select #, <ESC> to Exit Press 1 to delete all Projects and data. Press<ENTER> to Delete All Proj. <ESC> to Exit Press 2 to delete a specific project. Scroll UP/DOWN and select the project to review.
- Page 38 InstroTek Press ENTER to delete the project. Finally, NoNuke asks for final confirmation to do the task. Erase Project Data? From Memory? <YES> to Accept <ESC> to Exit To store and Send Data to USB Go the main Gauge Ready screen: Gauge Ready <Start>...
-
Page 39: Gps
InstroTek To print a specific project on a USB drive, press 2. (Project names) <ENTER> to Select UP/DOWN for Next <ESC> to Exit Scroll UP/DOWN and select which data you would like to save and press ENTER. Insert a USB drive and press ENTER. -
Page 40: Keypad Sound
InstroTek To change, press YES, otherwise, press ESC. When the GPS is on, “N”, “F”, or “E” is shown on top the screen. “N” means the GPS is searching for satellites, “F” means that the position is fixed, and “E” means there is a communication error. If the “E”... - Page 41 InstroTek To change, press YES; if not, press ESC.
-
Page 42: Led Backlight
InstroTek 14. LED Backlight LED light can be turned on for ease of viewing at night. When LED light is on, the gauge display and keypad will light up. To turn LED backlight on or off complete the following steps. -
Page 43: Diagnostics
Diagnostic functions that require an access code should be performed by a trained technician or under InstroTek’s instructions. To access the diagnostics module complete following steps: Press the MENU; the first screen will be: -MENU- 1. - Page 44 Place the file NoNukeUpdate.cyacd (available from InstroTek) on a compatible USB drive. Insert the USB drive into the Data port and go to the Update Firmware menu. Follow the instructions to read the file from the USB drive and update the gauge’s firmware.
-
Page 45: Bluetooth And Android Software
16. Bluetooth and Android Software NoNuke Android software provides another platform for the operator to connect to NoNuke, to review and print project reports. To use the software, the NoNuke software must be downloaded and installed on a tablet. Bluetooth in the NoNuke must be turned on. - Page 46 InstroTek To change, press YES, otherwise, press ESC. When the Bluetooth is on and the NoNuke is connected to a tablet, “B” is displayed on the top of the screen. The next step is to install the NoNuke software on the tablet. The software is available for free on the Google Play store.
- Page 47 InstroTek 3. After you connected to a NoNuke, you will see following screen: The next time you start the application, it will automatically connect to this NoNuke. To use the application: After connecting to a NoNuke the following screen will be...
- Page 48 InstroTek Across the top of the screen are 4 tabs. They are described below: a) Main: This is the main application where the results of each test are displayed. You must press the START button on the gauge to take a test. When the test has finished, the results...
- Page 49 InstroTek The “Recall” button will recall the results of the last test from the gauge. The “Disconnect” button will allow you to disconnect from the gauge, permitting you to connect to a different gauge. This is the projects name.
- Page 50 InstroTek Check automatically save the test Press the button to save the currently displayed results to the project. Pressing this button with “Auto Save” checked will save a duplicate reading. b) Review:...
- Page 51 InstroTek You can review all the projects stored on your device from this page. Select the file you wish to view from this dropdown list.
- Page 52 InstroTek checkbox. Check it to include the result in the PDF and uncheck it to exclude it from the PDF. Clicking the arrow to the left of the entry will show additional details of the result. ...
- Page 53 InstroTek Project Information: On this page, you can enter pertinent information for the current project. Use these fields to enter your company’s information. This will be displayed on the PDF.
- Page 54 InstroTek Use these fields to enter your client’s information. This will be displayed on the PDF. Use these fields to enter your report information. This will be displayed on the PDF. Use these fields to enter your project information.
- Page 55 InstroTek Press this button to load a company logo that will appear on the PDF. It should bitmap with dimensions: width=131 pixels and height=71 pixels.
- Page 56 InstroTek d) Camera: On this page, you can take a picture of the area you are testing for the current project. Press the button to take a picture. Press “Save Picture” to save it or “Cancel” to try again.
- Page 57 InstroTek Sample Gauge Data Report:...
-
Page 58: Specifications And Appendices
InstroTek 17. Specifications and Appendices Specifications: • Meets and exceeds the requirement of ASTM D7113 and AASHTO T343 • Gauge performance Verification • Download reports to external devices via USB or Bluetooth • GPS for Precise Location Data • Latest software updates via USB flash drive •... - Page 59 InstroTek • LCD Display: Easy to read 4x20 character LCD with backlight • Project Storage: Stores up to 25 detailed mixes and projects • Data Logging: Log data to USB storage • Reports: Downloadable via USB or Bluetooth • Location: GPS for precise location data •...
- Page 60 InstroTek Surface to 1 in. (25mm), over 97% from the top 0.5 inch (13 • Quick Count Button: Button on Handle to Take Count • ASTM: D7113 • AASHTO T343 • Weight: 19lbs (8.6kg) • Dimensions: 14.5in (37cm) H x 16in (41cm) L x 10.5in (27cm) W •...
-
Page 61: Index
Battery Life ..........8, 40, 55 Bluetooth and Android Software ....41 Bluetooth ..........41, 43, 55 Charging the Batteries ........6 Connecting to a NoNuke ......44 Daily Max Density ........13, 22 Daily Max Density Value ......13, 22 Verification ............18 Density Offset ........ - Page 62 LED Backlight ..........16, 38 Menu Functions ..........16 Mix Information ......... 17, 22 Offset ............19-21 Operating the NoNuke ........8 Powering the Gauge On ......... 8 Project Storage and Printing ..... 27, 39, 55 Reading Modes ........16, 19, 55 Safety ..............
- Page 63 InstroTek Shipping Dimensions ........56 Specifications ..........54 Taking a Measurement ........14 Units ..........8, 12, 16, 55 Update Firmware ....... 16, 39, 40 USB Test ..........16, 39, 40 Verification .......... 16, 18, 55 Warranty ............59 Weight ............. 56...
-
Page 64: Warranty
Verification plate. InstroTek will replace, free of charge, any part found to be defective within the warranty period. This warranty is void if inspection shows evidence of abuse, misuse, or unauthorized repair. - Page 65 InstroTek Contact Information Innovators in Instrumentation Technology www.InstroTek.com | (919) 875-8371 | sales@InstroTek.com Research Triangle Park, NC | Austin, TX | Bensalem, PA | Grand Rapids, MI | Denver, CO | Las Vegas, NV | Concord, CA...
- Page 66 Contact us for top quality, best value and superior service! email: sales@instrotek.com visit: InstroTek.com ª CALL A LOCATION NEAR YOU: Headquarters: Research Triangle Park, NC phone: 919.875.8371 Bensalem, PA phone: 215.645.1064 ª Grand Rapids, MI phone: 616.726.5850 Denver, CO phone: 303.955.5740 ª Austin, TX phone: 512.452.8848...
Need help?
Do you have a question about the NoNuke and is the answer not in the manual?
Questions and answers