Table of Contents
Advertisement
Available languages
Available languages
Quick Links
Advertisement
Table of Contents

Related Manuals for Auxilab MGM039


Summary of Contents for Auxilab MGM039
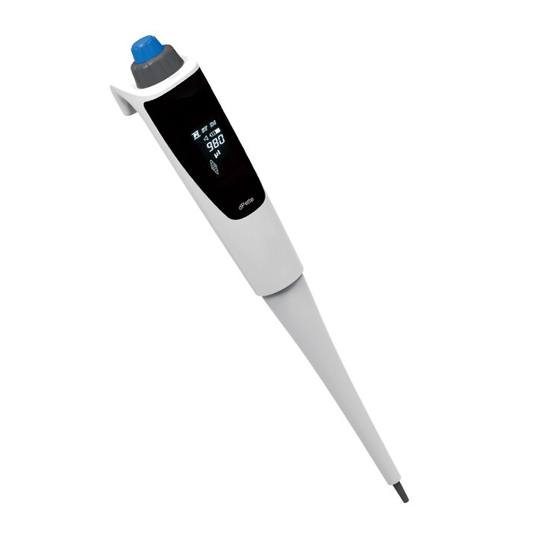
- Page 1 MANUAL DE USO USER MANUAL DOSYPETTE...
- Page 2 ÍNDICE DE IDIOMAS / INDEX OF LANGUAGES ESPAÑOL………………………………………………………………………………………………………………….5 ENGLISH…………………………………………………………………………………………………………………20...
-
Page 3: Table Of Contents
Introducción .......................... 5 Especificaciones ......................5 Punta de la pipeta ......................5 Descripción ..........................6 Pantalla ..........................8 4. Modo de uso ..........................8 4.1. Encendido ........................... 8 4.2. Selección de la función ....................... 8 4.3 Pipeteado (PI) ........................9 4.4 Dispensar (ST) ........................ - Page 4 Product Overview ........................ 20 1.1 Specifications........................20 1.2 Pipette Tip ......................... 20 2. Parts Description ........................21 Display ..........................23 4. Operation ..........................23 4.1 Power On ........................... 23 4.2 Function Selection ......................24 4.3 Pipetting (PI) ........................24 4.4 Dispensing (ST) ........................27 4.5 Diluting (DI) ........................
-
Page 5: Introducción
Las pipetas DosyPette tienen un rango de volumen amplio: 0.5-10 μL, 5-50 μL, 30-300 μL, 100-1000 μL Referencia Canales Rango de volumen Incremento Tips MGM039 0.5-10 μL 0.01 μL 10 μL MGM040 5-50 μL 0.1 μL 200; 300; 350 μL MGM041 30-300 μL... -
Page 6: Descripción
Cable USB Soporte Manual de uso Informe de calibración Descripción... -
Page 8: Pantalla
Pantalla 4. Modo de uso 4.1. Encendido Presione el botón (mando) azul durante 2 segundos. 4.2. Selección de la función Gire rápidamente el mando azul hacia la izquierda y hacia la derecha para activar el menú. -
Page 9: Pipeteado (Pi)
Una vez activado gire el mando negro para moverse entre las distintas opciones que son cuatro: pipeteado normal (PI), dispensador (ST), dilución (DI) y ajustes. Para confirmar la operación presione el mando azul. 4.3 Pipeteado (PI) 4.3.1 Selección del volumen 1. - Page 10 4.3.3 Dispensado del volumen Cuando el indicador este parpadeando en dirección hacia abajo puede presionar el mando azul para dispensar. 4.3.4 Mezclado del volumen o muestra Presione el mando azul hasta que la pipeta comience a coger y dejar muestra, lo verá en la pantalla porque estarán alternándose las flechas de aspirado y dispensado de muestra.
-
Page 11: Dispensar (St)
2. Si el volumen ajustado es menor de un 30% del rango de la pipeta el volumen que podrá estar cogiendo y soltando es del 50% del volumen seleccionado. Por ejemplo si se selecciona un volumen de 270 µl se podrá mezclar 135 µl. 3. -
Page 12: Ajuste De La Pipeta
2. Retirando la punta del líquido volvemos a presionar el mando azul 3. Presionando de nuevo con la punta ya en el líquido aspiraríamos el volumen B. 4. Presionaremos el mando azul de nuevo para poder dispensar el volumen total. Para seleccionar los volúmenes es muy sencillo vamos a la pantalla DI y tenemos que seleccionar primero el primer volumen abajo pondrá... -
Page 13: Ajuste De La Velocidad De Aspirado Y Dispensado De Muestra
Ajuste de la velocidad de aspirado y dispensado de muestra. Gire el mando negro para seleccionar la velocidad; podrá cambiar el valor del parámetro cuando empiece a parpadear. Gire el mando azul a izquierda y derecha para seleccionar la velocidad deseada, 1, 2 o 3. -
Page 14: Apagado De La Pipeta
Presione el mando azul para confirmar. Apagado de la pipeta. Utilizando el mando negro gírelo hasta que el símbolo de apagado/encendido parpadee. Presione el botón azul para apagar el equipo. Nota: la pipeta se apagará automáticamente después de 15 minutos de inactividad. Almacenamiento. -
Page 15: Limpieza De La Parte Externa De La Pipeta
Nota: realice un examen a la pipeta cada tres meses. 7.1. Limpieza de la parte externa de la pipeta. Utilice un spray para limpiar la superficie, ya sea un detergente especial o una disolución al 75% etanol. Es recomendable limpiar con un paño que no deje pelusa. Nota: consulte con su distribuidor para utilizar otros materiales de limpieza. - Page 16 Esta parte no es autoclavable 2. Retire el muelle. Desenrosque la cubierta del pistón en sentido antihorario y retírelo. 3. Retire la junta de sellado y el anillo O de la cubierta del pistón.
-
Page 17: Calibración
4. Separe el pistón del muelle. 5. Limpie las partes superiores con un 75% etanol, o esterilice las partes a 121ºC con una presión de 1Bar durante 20 minutos. 6. Aplique grasa en el anillo, muelle y pistón y monte de nuevo la pipeta. Notas: - Después de autoclavar y montar la pipeta espere al menos 12 horas antes de usarla. -
Page 18: Guía De Errores Y Soluciones
Guía de errores y soluciones Problema Causa posible Soluciones Punta incompatible Quedan gotas en Use una punta original la punta Problema de lubricación Pérdida de la punta Una la punta con firmeza Limpie el cono de la pipeta e Objetos extraños entre la punta y el conector introduzca la punta de nuevo Limpie y engrase el anillo y el La pipeta está... -
Page 19: Accesorios
11. Accesorios Soporte: hay dos piezas de adhesivo. Retire el papel que cubre el adhesivo, elija una superficie para dejar la pipeta, limpie la superficie donde va a pegar el soporte y péguelo. Inserte la pipeta y conecte el puerto USB si quiere cargar la batería de la pipeta. -
Page 20: Product Overview
Dosypette covers a wide range of volume: 0.5-10 μL, 5-50 μL, 30-300 μL, 100-1000 μL Reference Channels Volume Range Increment Tips 0.5-10 μL 0.01 μL 10 μL MGM039 MGM040 5-50 μL 0.1 μL 200;300;350 μL MGM041 30-300 μL 1 μL 300;350 μL 100-1000 μL... -
Page 21: Parts Description
● Stand x 1 ● User manual x 1 ● Calibration card(ISO8655-6 / DIN12650)x 1 2. Parts Description... -
Page 23: Display
3. Display 4. Operation 4.1 Power On Press the Parameter Knob for about 2 seconds. -
Page 24: Function Selection
4.2 Function Selection 1. Fast turn the Function wheel right or left, then turn the Parameter Knob to do the function Selecting form the blowing item: 1: Pipetting(PI) 2:Dispensing(ST) 3:Diluting(DI) 4:Settings 2. Clicking Parameter Knob to confirm after selecting the Item. 4.3 Pipetting (PI) 4.3.1 Volume Setting 1. - Page 25 3. Turn the Parameter Knob anticlockwise to increase, Turn clockwise to decrease. Press Parameter Knob to confirm. Note! Do volume range setup in aspirating mode only. 4.3.2 Aspiration When upward arrow blinks, press Parameter Knob for Aspiration. 4.3.3 Dispensing When downward arrow blinks, press Parameter Knob for dispensing. 4.3.4 Mixing Press Parameter Knob until mixing activity begins.
- Page 26 Note! Take the operation of Dosypette (10-1000μL) for the purpose of illustration. Three mixing volume modes in Dosypette: 1. If the pipetting volume is set larger than 30% of the total volume range of Dosypette, 30% of the maximum volume of the pipette will be mixed. e.g. set volume: 700 μL actual mixing volume: 300μL 2.
-
Page 27: Dispensing (St)
4.4 Dispensing (ST) 4.4.1 Dispensing volume setting 1. Left and right turn Parameter Knob to set the one-time dispensing volume. Pressing Parameter Knob to confirm. 2. Left and right turn Parameter Knob to set the one-time dispensing frequency. (The image shows, dispensing frequency is 5 times and each volume is 200μL) 4.4.2 Dispensing Pressing Parameter Knob to do liquid dispensing. -
Page 28: Dosypette Setup
4.5.2 Diluting 1. Pressing Parameter Knob to aspirating target A. 2. Remove the Tips from the liquid and Pressing Parameter Knob to aspirating a bit of air. 3. Pressing Parameter Knob to aspirating target B. 4. Pressing Parameter Knob to dispensing target A and B. 3. -
Page 29: Adjustment Of Aspiration / Dispensing
(three speeds) Buzzer status (ON/OFF) Power off 5.1 Adjustment of Aspiration / Dispensing Use Function Wheel to select aspiration or dispensing speed when corresponding signs and parameters start to blink. Turn Parameter Knob right or left to select among three speeds (1,2,3). e.g. -
Page 30: Power Off
2. Turn Parameter Knob to the right or left to select between ON and OFF. 3. Press Parameter Knob to confirm. 5.3 Power off 1. Use Function wheel to select Power when the corresponding sign starts to blink. 2. Press Parameter Knob to switch the pipette off. Dosypette will self switch off in 15 minutes being unused. -
Page 31: Storage
4. Storage Recommend storing Dosypette electronic pipette on the stand in vertical position when not in use. Please every month to charging for Dosypette if being unused in long time make sure there are 50% power in battery at least. During storage periods at constant temperature and humidity, the recommended temperature range is from 0-40℃... -
Page 32: Disassembly Procedures
Note! The unidentified parts can never be autoclaved or disassembled prior to authorization. 7.3 Disassembly Procedures 1. Unscrew the tip ejector collar anticlockwise and remove it. NOTE! THIS PART CANNOT BE AUTOCLAVED. 2. Remove the ejector spring. Unscrew the piston cover anticlockwise and remove... - Page 33 3. Separate the seal gasket and O ring from piston cover. NOTE! MINOR PARTS FOR SAFE KEEPING PLEASE. 4. Separate the remaining piston from piston spring. 5. Clean the above-mentioned parts with 75% ethanol, or sterilize the parts at 121℃, 1 bar overpressure for 20 minutes.
-
Page 34: Calibration And Performance Tests
Note! After autoclaving and reassembling, leave Dosypette to rest for 12 hours before reuse. Calibration is needed after each inner-part sterilization. For more information, please refer to section ”Calibration and Performance Tests”. 8. Calibration and Performance Tests Calibration should take place at 20-25℃, kept constant within ±0.5℃. A dedicated calibration software will write calibration values in your Dosypette, after the distilled water has been repeatedly weighed at least five times. -
Page 35: Troubleshooting Guide
9. Troubleshooting Guide Problem Possible cause Solution Incompatible tip Remaining droplets Use original tip Plastic self-lubrication of the tip is not even Tip is loose Attach the tip firmly Foreign objects between tip and Clean the tip cone and replace the connector Clean and grease O ring, piston Pipette is contaminated... -
Page 36: Warranty
Warranty Dosypette electronic pipettes are covered by one-year warranty against defects in workmanship and materials. Please contact your nearest distributor. ANY WARRANTY WILL, HOWEVER, BE DEEMED AS VOID DUE TO NORMAL WEAR AND TEAR OR FOR OPERATIONS CONTRARY TO THE INSTRUCTIONS GIVEN IN THIS MANUAL. Each and every Dosypette has been calibrated and tested in compliance with ISO8655- 6 / DIN12650 (calibration card included in the contents of delivery package) when manufactured, ensuring safe and comfortable pipetting.
Need help?
Do you have a question about the MGM039 and is the answer not in the manual?
Questions and answers