
Related Manuals for Leisure Time Products 5010


Summary of Contents for Leisure Time Products 5010
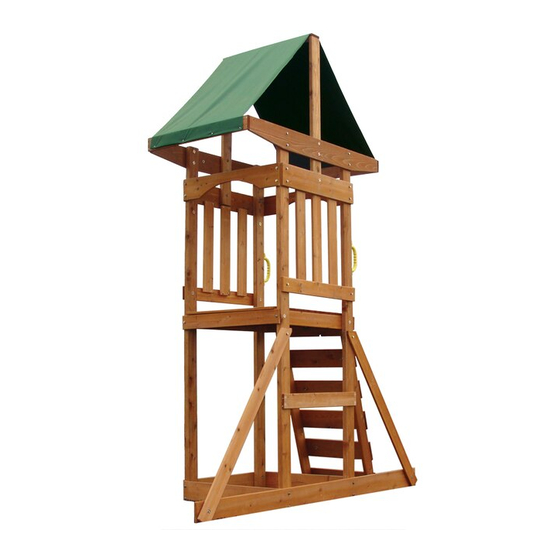
- Page 1 Owner’s Manual FAQ’s Assembly Instructions Warranty Information Play Deck Wooden Playcenter - 2010 Model: 5010 Manufacturer: Backyard Discovery 3001 North Rouse Pittsburg, KS 66762 Made in China INS-5010-01 Rev. 11/17/2009...
- Page 2 Owner’s Manual Play Set Dear Customer: Please read entire booklet completely before beginning the assembly process. Equipment is recommended for use by children 3 to 10 years of age. Structures are not intended for public use. The Company does not warranty any of its residential structures subjected to commercial use such as: Daycare, Preschool, Nursery School, Recreational Park, or any similar Commercial Application.
- Page 3 Owner’s Manual Play Set Please refer to the Assembly section of the Assembly Manual for Maximum Fall Height. Positioning Your Playcenter 1. The Playcenter is designed to be installed on a level surface by an Adult with an Adult helper. Place in a flat area of your yard to minimize ground preparation.
- Page 4 Owner’s Manual Play Set The following chart explains the fall height in feet from which a life threatening head injury would not be expected Critical Heights in feet (m) of Tested Materials Material Uncompressed Depth Compressed Depth 6" (152mm) 9" (228mm) 12"...
- Page 5 Owner’s Manual Play Set 17. Instruct children to never crawl on top of a fort roof. 18. Verify that any suspended climbing ropes, chain, or cable are secured at both ends and that they cannot be looped back on it. 19.
- Page 6 Owner’s Manual Play Set APPENDIX A Information on Playground Surfacing Materials: The following information is from the United States Consumer Product Safety Commission’s Information Sheet for playground surfacing material Also see the following website for additional information: www.cpsc.gov/cpscpub/pubs/323.html. X3. CONSUMER INFORMATION SHEET FOR PLAYGROUND SURFACING MATERIALS X3.1 The U.S.
- Page 7 Play Set Assembly Manual FAQs: 1. Does the area for the playset need to be level? Yes. Backyard Discovery recommends the playset be positioned on a flat level area for maximum safety and durability. The stakes provided should be used to secure it firmly to the ground.
- Page 8 Basic Setup Dimensions Place the set on level ground, not less than 6 ft [2 M] from any structure or obstruction such as a fence, garage, house, overhanging branches, laundry lines or electrical wires. 7'-5" [2.26] 9'-4" [2.85] 2'-8" [.81] Recommended "Saftey Zone"...
- Page 9 Tools Required for Installation: (These are the tools that are generally required for assembly of our playsets. These tools are not included in the playset purchase.) (Level 24”) (Open end Wrenches (Nut drivers ½” & 7/16” ) ½” & 9/16” ) (Tape Measure) (3/8”...
-
Page 10: Table Of Contents
Phase 13: Stake Assembly......20 Phase 14: ID Plate Assembly ......21 Play Deck Model 5010 • 09-1209... -
Page 11: Board Identifi Cation Diagrams
Parts Not Shown Front Right Left Back Play Deck Model 5010 • 09-1209... -
Page 12: Materials List
W100011 * Base Board * 5/8 x 5-1/2 x 29-7/8 [16 x 134 x 758 mm] N8 ——––——— –––––––––– 2 Req W100012 * Floor Board * 5/8 x 5-1/2 x 27-1/8 [16 x 134 x 690 mm] Play Deck Model 5010 • 09-1209... - Page 13 W100021 * Wall Board * 5/8 x 3-1/2 x 24-1/2 [16 x 86 x 624 mm] P10 ——––———–– –––––––––––– 1 Req W100971 * Floor Rail * 5/8 x 3-1/2 x 30 [16 x 86 x 762 mm] Play Deck Model 5010 • 09-1209...
- Page 14 NOTE: QUANTITIES INCLUDE EXTRA HARDWARE X35-Y Hand Grip ZWS1/8 A100007 2 Req Tent Top 85-1/2" x 30" 1/8" 1 Req Allen Wrench Y50-LTP X21-G Metal Stake Rock Leisure Time ID Plate 4 Req 4 Req 1 Req Play Deck Model 5010 • 09-1209...
- Page 15 #8 x 1-1/8" Washer Head Screw Wood Screw ZWS11/2 ZWS14-11/2 #8 x 1-1/2" #14 x 1-1/2" Wood Screw Wood Screw ZLS2 DRAWINGS ARE TO SCALE BUT SMALL VARIATIONS ARE NORMAL. 15/16" x 2" Lag Screw Play Deck Model 5010 • 09-1209...
-
Page 16: Hardware
How to use Hex Head Bolts and Spike T-Nuts should be on Spike T-Nut Internal Tooth Lock Washer outside. Hex Head Bolt Fender Washer Correct Incorrect Assembly Assembly Failure to replace this bolt with a shorter one could result in personal injury. Play Deck Model 5010 • 09-1209... -
Page 17: Phase 2: Frame Assembly
• It is important that the tops of all screws are fl ush with the surface of the wood and there are no protruding sharp edges. 27" Pilot holes should be on the outside. Do not drive too deep and cause splintering. Play Deck Model 5010 • 09-1209... -
Page 18: Phase 3: Frame Assembly
Step 12: Insert 2 spike T-nuts into each K2. Attach the K2s to the inside of the E2s and E1s with 2-1/4" hex bolts, lock washers, and fender washers. Note: Attach the K2 to the top hole of the E1s. Play Deck Model 5010 • 09-1209... -
Page 19: Phase 4: Frame Assembly
• Tap the head of the lag screw with a hammer to start the threads into the wood, and then use a 1/2" socket to tighten. Lag Screw Internal Fender Tooth Lock Washer Washer Do not over-tighten. Play Deck Model 5010 • 09-1209... -
Page 20: Phase 5: Floor Assembly
Step 17: Attach the remaining N8 fl ush to the top of P4 and the K2s with 1-1/2" wood screws. Step 18: Attach P6 to the underside of the N8s and P8s with 1-1/8" wood screws. Center P6 with the N8s and P8s as illustrated. Play Deck Model 5010 • 09-1209... -
Page 21: Phase 6: Angle Brace Assembly
Step 19: Attach the P1s, angle end, to the E1s with 2" hex bolts, lock washers, and fender washers. The angle end should point towards P5. Attach the P1s, fl at end, to N1 with 1-1/4" hex bolts, lock washers, and fender washers. Play Deck Model 5010 • 09-1209 Deck Model 5010 • 09-1209... -
Page 22: Phase 7: Wall Assembly
Step 21: Attach the N4s fl ush to the E1s and the E2s with 2" lag screws, lock washers, and fender washers. The N4s should be aligned with the N6s. The N4s should be aligned with the N6s. 1-1/4" 3-3/16" Play Deck Model 5010 • 09-1209... -
Page 23: Phase 8: Tent Assembly
Insert 2 spike T-nuts into the outside of N2. Attach one K1 to N3 and N6 with 1-1/2" hex bolts, lock washers, and fender washers. Attach the remaining K1 to N2 and N6 with 1-1/2" hex bolts, lock washers, and fender washers. Play Deck Model 5010 • 09-1209... -
Page 24: Phase 9: Tent Assembly
Step 26: Attach the tent top to the inside of a P2 with 3/4" truss screws. Pull the tent top tight, and then attach it to the inside of the remaining P2 with 3/4" truss screws. Play Deck Model 5010 • 09-1209... -
Page 25: Phase 10: Hand Grip Assembly
Step 27: Pre-drill the holes for the hand grips with a 1/8" drill bit. The holes should be 56" and 64" from the ground. Attach the hand grips to the right E1 and right E2 with 1-1/2" button-head wood screws, lock washers, and fl at washers. 64" 56" Front Right Play Deck Model 5010 • 09-1209... -
Page 26: Phase 11: Ladder Assembly
Step 30: Insert one spike T-nut into each of the N10s. Attach one rock to each N10 with a 1-1/4" hex bolt, lock washer, and fender washer, and a 1-1/8" wood screw. wood screw. 1 1/2" Wood Screw 1 1/8" Wood Screw Play Deck Model 5010 • 09-1209... -
Page 27: Phase 12: Ladder Assembly
3/16” drill bit. Attach the ladder to the inside of P10 with 2" lag screws, lock washers, and fender washers.The ladder should be centered on P4, fl ush with the deck boards. Right Front Play Deck Model 5010 • 09-1209... -
Page 28: Phase 13: Stake Assembly
Step 33: Pre-drill the holes for the stakes with a 5/16" drill bit. Attach the metal stakes to N7 and N1 with 1" Phillips truss head bolts, lock washers, fender washers, and 3/4" Phillips barrel nuts. Phillips Barrel Nut Lock Washer Phillips Fender Fender Truss Washer Washer Head Bolt Play Deck Model 5010 • 09-1209... -
Page 29: Phase 14: Id Plate Assembly
Modifi ed Truss Washer Head Screw * #8 x 3/4" * 4 Req Step 34: Attach the ID Plate to N6 with 3/4" truss screws. NOTE: KEEP THE STEP BOLTS TO USE WITH THE SLIDE. Play Deck Model 5010 • 09-1209... - Page 30 This Limited Warranty by Backyard Discovery applies to products manufactured under the Backyard Discovery brand or its other brands including but not limited to Backyard Botanical, Adventure Playsets, and Leisure Time Products. Backyard Discovery warrants that this product is free from defect in materials and workmanship for a period of one (1) year from the original date of purchase.
- Page 61 © Copyright Playground Inc © Copyright Playground Inc If you need assistance with parts or have assembly questions, please call Customer Service at 866-362-1123. Our regular office hours are LEISURE TIME PRODUCTS Monday through Friday, 7:00 a.m. to 4:00 p.m. Central Time...
- Page 62 ( E1 ) Long Angle Brace * 1 Hole * 30° - 60° * 1-1/2 x 3-1/2 x 85 ( B1 ) Beam End Post * 3 Holes * 3-1/4 x 3-1/4 x 47 METAL TRIANGLE STEP 2 5/16 X 4" Attach the two Metal Triangles HEAD Y1 to the Swing Beam as shown...
- Page 63 (G1 ) Beam Ground Board * 4 Holes * 1 x 5-1/2 x 89 ( E2 ) Beam End Support * 4 Hole * 1-1/2 x 3-1/2 x 40-3/4 STEP 5 Pilot drill with 3/16" bit using holes in G1 as guide and attach the G1 Beam Ground Board to the assembly using four 2"...
- Page 64 STEP 7 Attach the support assembly to the Swing Beam with the Metal Triangles Y1 using two 4” Hex Head Bolts, Lock Washers, Flat Washers and Lock Nut. 5/16 X 4" HEX HEAD BOLT 5/16" X 2018 NYLOCK LOCK NUT 5/16"...
- Page 65 5/16” x 2” HEX HEAD BOLT STEP 9 Using the pre-drilled holes in the G4 Club House Wall Rail as a guide, drill thru the Wall Boards using a 3/8” drill bit. Install four 5/16” Spiked T Nuts, from the inside of the Tower, into these holes. Turn over the Swing Beam Assembly, stand it up, and line up the holes in the Y16 Swing Beam Mount to the holes in the G4 Club House Wall Rail.
- Page 66 Part e # 50 3 7 Última Generación BARRA PARA COLUMPIO INSTRUCCIONES DE ENSAMBLAJE COLGADOR DEL COLUMPIO ( A1 ) Barra para columpio * 15 agujeros * 3-1/4 x 5-1/4 x 94 A RANDELA DE SEGURIDAD DE 3/8 PASO 1 in.
- Page 67 ( E1 ) Refuerzo largo en ángulo * 1 agujero * 30° - 60° * 1-1/2 x 3-1/2 x 85 ( B1 ) Poste para extremo de barra * 3 agujeros * 3-1/4 x 3-1/4 x 47 TRIÁNGULO DE METAL PASO 2 PERNO CABEZA HEXAGONAL DE...
- Page 68 (G1 ) Tabla de apoyo A tierra * 4 agujeros * 1 x 5-1/2 x 89 ( E2 ) Soporte de extremo para la barra * 4 agujeros * 1-1/2 x 3-1/2 x 40-3/4 PASO 5 Haga un agujero piloto con la broca de 3/16 in.
- Page 69 PASO 7 Fije el ensamble del soporte a la barra para columpio con los triángulos de metal Y1 utilizando dos pernos cabeza hexagonal de 4 in. (10 cm), arandelas de seguridad, arandelas planas y tuerca de seguridad. TUERCA P E R N O C A B E Z A H E X A G O N A L D E 5 / 1 6 x 4 in. MECÁNICA DE (8 mm x 10 cm) SEGURIDAD DE...
- Page 70 PERNO CABEZA HEXAGONAL DE 2 in. (5 cm), ARANDELA DE SEGURIDAD DE 5/16 in. (8 mm) TUERCA EN T DE 5/16 in. (8 mm) CON ESPIGA ARANDELA PLANA DE PASO 9 5/16 in. (8 mm) Utilizando los agujeros pre-taladrados en el larguero para pared de la casa club G4 como guía, taladre a través de las tablas de pared utilizando una broca de 3/8 in.
- Page 71 Joint Connectors just snug. Outside © Copyright Playground Inc If you need assistance with parts or have assembly questions, please call Customer Service at 866-362-1123. Our regular office hours are LEISURE TIME PRODUCTS Monday through Friday, 7:00 a.m. to 4:00 p.m. Central Time...
- Page 72 STEP 3 Attach the Y40 Bracket to the ends of both Monkey Bar Rails using 2” Hex Head Bolts, Lock Washers, Washers and 5/16” Bracket Lock Nut. Tighten securely but do not over tighten. 5/16 X 2018 NYLOCK LOCK NUT STEP 4 Pound the Metal End Ladder Rungs Y15 into one of the End Ladder Rails E1.
- Page 73 STEP 5 Drill 3/16” pilot hole using the pre-drilled holes in the Monkey Bar Ground Board G1 as guide and attach it to the End Ladder assembly using two 2-1/2” Lag Screws, Lock Washers and Flat Washers. Tighten the screws securely but do not over tighten.
- Page 74 STEP 7 Lay the Monkey Bar assembly and the End 6”Metal Ladder Triangle Brace assembly end to end as shown. Then Connect them with 6” Metal Triangle Brace between them as shown with 3” Hex Head Bolts, Lock Washers, Flat Washers and Spike Tee Nuts and 1- 1/2”...
- Page 75 STEP 9 Turn the Monkey Bar assembly Lag Bolt Hex Bolt Hex Bolt over and put into position. Secure Lag Bolt the Monkey Bar assembly to Sculptured Rail G2 with 1-1/4” Hex Head Bolts, Lock Washers, Flat Washers and Spike T Nuts according to the bolting diagram Drill 3/8”...
- Page 76 Part e # 50 47 Última Generación PASAMANOS INSTRUCCIONES DE ENSAMBLAJE PASO 1 Deberá retirar la pared para crear una abertura. El Pasamanos se fija a un larguero tallado G2 el cual será un larguero superior en la parte posterior izquierda de la casa club. Este espacio es la ubicación que se recomienda.
- Page 77 PASO 3 Fije los soportes Y40 a los extremos de ambos largueros para el pasamanos utilizando pernos cabeza hexagonal de 2 in. (5,1 cm), Soporte arandelas de seguridad, arandelas y la tuerca de seguridad de 5/16 in. (8 mm). Apriete de forma segura pero no demasiado.
- Page 78 DEBE MEDIR 22-1/2in. DE BORDE INTERNO A BORDE INTERNO TORNILLO TIRAFONDO DE 5/16 X 2-1/2 in. (8 mm x 6,3 cm) ARANDELA DE SEGURIDAD DE 5/16 in. (8 mm) ARANDELA PLANA DE 5/16 in. (8 mm) PASO 5 Taladre agujero piloto de 3/16” in. (4,8 mm) utilizando los agujeros pre-taladrados en la tabla de tierra G1 para el pasamanos como guía y fíjela al ensamble de escalera terminal utilizando tornillos tirafondo de 2-1/2 in.
- Page 79 PASO 7 Coloque el ensamble del pasamanos y el ensamble de la escalera terminal hacia el extremo Abrazadera triangular como se ilustra. Luego conéctelos metálica de 6in. (15,2 cm) con la abrazadera triangular de metal de 15,2 cm entre ellos como se ilustra con pernos cabeza hexagonal de 7,6 cm, arandelas de seguridad, arandelas planas y...
- Page 80 PASO 9 Déle vuelta al ensamble del pasamanos y PERNO CABEZA TORNILLO HEXAGONAL PERNO CABEZA colóquelo en posición. Asegure el TIRAFONDO HEXAGONAL TORNILLO ensamble del pasamano al larguero TIRAFONDO tallado G2 con pernos cabeza hexagonal de 3,2 cm, arandelas de seguridad, arandelas planas y tuerca en T con espigas de acuerdo al diagrama que se ilustra más abajo.
Need help?
Do you have a question about the 5010 and is the answer not in the manual?
Questions and answers
How do I order missing parts
How do I order parts