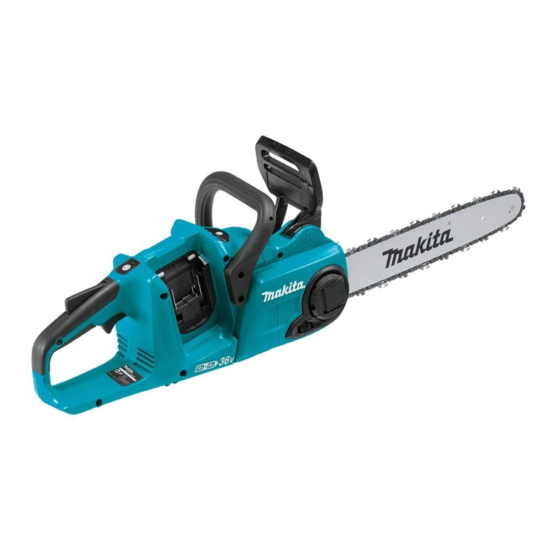
Makita XCU03 Instruction Manual
Cordless chain saw
Hide thumbs
Also See for XCU03:
- Instruction manual (41 pages) ,
- Instruction manual (41 pages) ,
- Instruction manual (41 pages)

Related Manuals for Makita XCU03


Summary of Contents for Makita XCU03
- Page 1 INSTRUCTION MANUAL MANUAL DE INSTRUCCIONES Cordless Chain Saw Electrosierra Inalámbrica XCU03 XCU04 IMPORTANT: Read Before Using. IMPORTANTE: Lea antes de usar.
- Page 2 ENGLISH (Original instructions) SPECIFICATIONS Model: XCU03 XCU04 Overall length (without guide bar) 443 mm Rated voltage D.C. 36 V Standard battery cartridge BL1815N, BL1820B, BL1830, BL1830B, BL1840B, BL1850B, BL1860B Net weight with 90PX 4.7 kg 4.8 kg (when using BL1815N) (10.4 lbs)
-
Page 3: General Power Tool Safety Warnings
Prevent unintentional starting. Ensure the SAFETY WARNINGS switch is in the off-position before connecting to power source and/or battery pack, picking up or carrying the tool. Carrying power tools with General power tool safety warnings that have the switch on invites accidents. WARNING: Remove any adjusting key or wrench before Read all safety warnings and... - Page 4 When battery pack is not in use, keep it away Carry the chain saw by the front handle with from other metal objects, like paper clips, the chain saw switched off and away from your coins, keys, nails, screws or other small metal body.
- Page 5 Use of non-genuine Makita batteries, or batteries that have been altered, may result in the battery bursting direct current also void the Makita warranty for the Makita tool and charger. feet per minute Tips for maintaining maximum battery life...
- Page 6 PARTS DESCRIPTION Battery cartridge Front hand guard Guide bar Saw chain Lever Check button Capacity indicator Main power lamp Main power switch Lock-off lever Rear handle Switch trigger Front handle Oil tank cap Chain catcher Guide bar cover 6 ENGLISH...
-
Page 7: Functional Description
Tool / battery protection system FUNCTIONAL DESCRIPTION The tool is equipped with a tool/battery protection sys- tem. This system automatically cuts off power to the motor to extend tool and battery life. The tool will auto- CAUTION: matically stop during operation if the tool or battery is Always be sure that the tool is placed under one of the following conditions. -
Page 8: Main Power Switch
Capacity indicator status Remaining NOTE: Depending on the conditions of use and the battery ambient temperature, the indication may differ slightly capacity from the actual capacity. Blinking Main power switch 50% to 100% WARNING: Always turn off the main power 20% to 50% switch when not in use. -
Page 9: Adjusting The Chain Lubrication
To prevent the switch trigger from being accidentally pulled, a lock- Checking the run-down brake off lever is provided. To start the tool, depress the lock-off lever and pull the switch trigger. Release the switch trigger to stop. CAUTION: If the saw chain does not stop within one second in this test, stop using the chain saw and consult our authorized service center. - Page 10 1. Lever 1. Sprocket the saw chain tension. Rest the guide bar in place on the chain saw. Turn the lever counterclockwise until the sprocket cover comes off. Place the sprocket cover on the chain saw so that guide bar. 1.
-
Page 11: Adjusting Saw Chain Tension
1. Lever 2. Sprocket cover 2. Guide bar 3. Saw chain Keep holding the guide bar lightly and tighten the Adjusting saw chain tension sprocket cover. Make sure that the saw chain does not loose at the lower side. CAUTION: Carry out the procedure of install- Return the lever to the original position. - Page 12 NOTICE: The oil delivery may otherwise be impaired. NOTICE: Use the saw chain oil exclusively for Makita chain saws or equivalent oil available in the market. NOTICE: Never use oil including dust and parti- cles or volatile oil.
- Page 13 Burrowing and parallel-to-grain cuts while using the rear handle to raise the saw and the front one to guide it. Use the spike bumper as a pivot. CAUTION: Burrowing and parallel-to-grain cuts Continue the cut by applying slight pressure to may only be carried out by persons with special train- the front handle, easing the saw back slightly.
-
Page 14: Maintenance
— Consider the wind speed and direction. Do not carry out felling work if the wind is gusting strongly. — Trimming of root swellings: Begin with the largest horizontal cut. — Stand to the side of the falling tree. Keep an area clear to the rear of the falling tree up to an angle of 45°... -
Page 15: Sharpening The Saw Chain
— The sharpening angle of 30° must be the same on all cut- Sharpening the saw chain ters. Different cutter angles cause the chain to run roughly and unevenly, accelerate wear, and lead to chain breaks. Sharpen the saw chain when: ening angle is kept against the teeth. -
Page 16: Cleaning The Guide Bar
Cleaning the oil discharge hole Small dust or particles may be built up in the oil dis- charge hole during operation. These dust or particles oil delivery occurs at the top of guide bar, clean the oil discharge hole as follows. Remove the sprocket cover and saw chain from the tool. -
Page 17: Storing The Tool
Check the oil lubrication feed rate. Switch trigger Inspection. Lock-off lever Inspection. Oil tank cap Check tightness. Chain catcher Inspection. Screws and Inspection. nuts be performed by Makita Authorized or Factory Service Centers, always using Makita replacement parts. 17 ENGLISH... -
Page 18: Troubleshooting
TROUBLESHOOTING do not attempt to dismantle the tool. Instead, ask Makita Authorized Service Centers, always using Makita replace- ment parts for repairs. Malfunction status Cause Action The chain saw does not start. Two battery cartridges are not installed. Install two charged battery cartridges. -
Page 19: Optional Accessories
Should any trouble develop during this one year period, inspection shows the trouble is caused by defective workmanship or material, Makita will repair (or at our option, replace) without charge. tear: maintained:... -
Page 20: Especificaciones
ESPAÑOL (Instrucciones originales) ESPECIFICACIONES Modelo: XCU03 XCU04 Longitud total (sin la barra de guía) 443 mm Tensión nominal 36 V c.c. Batería estándar BL1815N, BL1820B, BL1830, BL1830B, BL1840B, BL1850B, BL1860B Peso neto con la 90PX 4,7 kg 4,8 kg (al utilizar el BL1815N) -
Page 21: Advertencias De Seguridad
ADVERTENCIA: Utilice una combinación apropiada de la barra de guía y cadena de la sierra. De lo contra- rio, esto podría ocasionar una lesión personal. No maltrate el cable. Nunca utilice el cable ADVERTENCIAS DE para transportar, jalar o desconectar la herra- mienta eléctrica. - Page 22 En condiciones abusivas, podrá escapar Mantenimiento y uso de la herramienta eléctrica líquido de la batería; evite tocarlo. Si lo toca No fuerce la herramienta eléctrica. Utilice la accidentalmente, enjuague con agua. Si hay herramienta eléctrica correcta para su aplica- contacto del líquido con los ojos, busque asis- ción.
- Page 23 Tenga extrema precaución al cortar matorra- les y árboles jóvenes. quedar atascado en la cadena de la sierra y ser lanzado hacia usted o hacerle perder el equilibrio. Cargue la sierra eléctrica del mango delantero estando apagada y lejos de su cuerpo. Cuando vaya a transportar o almacenar la sierra eléc- trica, coloque siempre la cubierta de la barra de guía.
- Page 24 Asimismo, esto inva- seguridad para el cartucho de lidará la garantía de Makita para la herramienta y el batería cargador Makita. Antes de utilizar el cartucho de batería, lea Consejos para alargar al máximo...
-
Page 25: Descripción De Las Piezas
DESCRIPCIÓN DE LAS PIEZAS Cartucho de batería Protector de mano delantero Barra de guía Cadena de la sierra Palanca Indicador de capacidad Lámpara de alimentación principal Interruptor de alimentación principal Palanca de desbloqueo Mango trasero Gatillo interruptor Mango delantero Tapa del tanque de aceite Receptor de la cadena Cubierta de la barra de guía aceite) -
Page 26: Descripción Del Funcionamiento
Sistema de protección para la DESCRIPCIÓN DEL herramienta/batería FUNCIONAMIENTO La herramienta está equipada con un sistema de protección PRECAUCIÓN: Asegúrese siempre de que la mática el suministro de energía al motor para prolongar la vida herramienta esté apagada y el cartucho de batería útil de la herramienta y la batería. - Page 27 La capacidad restante de la batería es mostrada mien- Luces indicadoras Capacidad restante capacidad corresponden a cada batería. Iluminadas Apagadas Parpadeando Estado del indicador de capacidad Capacidad restante de la La batería batería pudo haber Encendido Apagado Parpadeando funcionado mal. 50% a 100% NOTA: Dependiendo de las condiciones de uso y 20% a 50%...
-
Page 28: Ajuste De La Lubricación De La Cadena
Accionamiento del interruptor adelante con el dorso de su mano. Asegúrese de que la sierra eléctrica se detenga de inmediato. ADVERTENCIA: Por su seguridad, esta herramienta está equipada con una palanca de desbloqueo para prevenir un arranque no inten- cional de la herramienta. NUNCA use la herra- mienta si se activa simplemente al jalar el gatillo interruptor sin presionar la palanca de desblo- queo. -
Page 29: Montaje
MONTAJE PRECAUCIÓN: Asegúrese siempre de que la herramienta esté apagada y el cartucho de batería haya sido extraído antes de realizar cualquier trabajo en la misma. PRECAUCIÓN: No toque la cadena de la sierra con las manos descubiertas. Siempre use guantes al manipular la cadena de la sierra. - Page 30 Coloque la cubierta de la pieza dentada en la sierra Presione y abra completamente la palanca hasta que se escuche un clic. Gírela ligeramente en sentido poco la cubierta de la pieza dentada. 1. Cubierta de la pieza dentada 2. Barra de guía 1.
-
Page 31: Operación
Si no es posible cortar la madera completamente con AVISO: Utilice el aceite para la cadena de la sie- una sola pasada: rra exclusivamente para sierras eléctricas Makita Presione levemente sobre el mango y continúe cor- o un aceite equivalente disponible en el mercado. AVISO: Nunca use aceite que tenga polvo y partí-... - Page 32 primero el lado presionado (A). Luego realice el corte barra quede atascada. Aserrado Apoye el borde inferior del cuerpo de la sierra eléctrica sobre la madera que va a cortar. Desmembrado PRECAUCIÓN: El desmembrado solo deberá ser realizado por personas capacitadas. Puede presentarse algún peligro debido al riesgo de un retroceso brusco.
- Page 33 Talado PRECAUCIÓN: El talado solo deberá ser realizado por personas capacitadas. es peligroso. Cumpla con los reglamentos locales si desea talar un árbol. 1. Dirección de talado 2. Zona de peligro 3. Ruta de escape Cuando realice el talado de árboles, siga los procedi- mientos a continuación: Corte la hendidura tan cerca del suelo como sea posible.
-
Page 34: Mantenimiento
ADVERTENCIA: No corte directamente a tra- poco cada vez. Por lo general sólo dos o tres pasadas De lo contrario, el árbol caerá desenfrenadamente. AVISO: Sólo se deben usar cuñas de plástico o autorizado. aluminio para mantener el corte trasero abierto. El uso de cuñas de hierro está... - Page 35 en todas las partes cortadoras. Las diferencias de ángulos en las partes cortadoras causan que la cadena corra de forma brusca e irregular, acelera el desgaste y provocan la rotura de la cadena. — Utilice una lima redonda adecuada de manera que el diente.
- Page 36 Limpieza de la cubierta de la pieza Reemplazo de la pieza dentada dentada PRECAUCIÓN: Una pieza dentada desgas- tada dañará una cadena nueva de la sierra. En mularán astillas y aserrín. Retire la cubierta de la pieza este caso, reemplace la pieza dentada. dentada y la cadena de la sierra de la herramienta y luego limpie las astillas y el aserrín.
-
Page 37: Instrucciones Para El Mantenimiento Periódico
Tapa del Revisar que tanque de esté bien aceite apretado. Receptor de la Inspección. cadena Tornillos y Inspección. tuercas ducto, las reparaciones, y cualquier otra tarea de man- de servicio autorizados o de fábrica Makita, empleando siempre repuestos Makita. 37 ESPAÑOL... -
Page 38: Resolución De Problemas
RESOLUCIÓN DE PROBLEMAS Antes de solicitar alguna reparación, primero realice una inspección por su cuenta. Si detecta algún problema que centro de servicio autorizado de Makita, usando siempre piezas de repuesto Makita. Estado de la avería Causa Solución La sierra eléctrica no arranca. -
Page 39: Accesorios Opcionales
Makita. Si la inspección muestra que el problema ha sido a causa de un defecto de mano de obra o material, Makita hará la reparación (o a su discreción, el reemplazo) sin ningún cargo. un mal uso o haya recibido un mantenimiento... - Page 40 Para reducir la exposición a estos productos químicos: trabaje en un área bien ventilada y póngase el equipo de seguridad indicado, tal como las máscaras contra polvo que están especialmente Makita Corporation Anjo, 885537B943 XCU03-2...
- Page 41 INSTRUCTION MANUAL MANUAL DE INSTRUCCIONES Cordless Hedge Trimmer Cortasetos Inalámbrico XHU06 XHU07 XHU08 IMPORTANT: Read Before Using. IMPORTANTE: Lea antes de usar.
-
Page 42: Specifications
ENGLISH (Original instructions) SPECIFICATIONS Model: XHU06 XHU07 XHU08 Blade length 500 mm (19-3/4") 600 mm (23-5/8") 750 mm (29-1/2") Strokes per minute 0 - 2,000 / 0 - 3,600 / 0 - 4,400/min Overall length 1,009 mm (39-3/4") 1,113 mm (43-3/4") 1,269 mm (50") Rated voltage D.C. - Page 43 Use personal protective equipment. Always Use the power tool, accessories and tool bits wear eye protection. Protective equipment such etc. in accordance with these instructions, tak- ing into account the working conditions and hearing protection used for appropriate conditions the work to be performed. Use of the power tool for operations different from those intended could result in a hazardous situation.
- Page 44 18. When moving the hedge trimmer to another Cordless Hedge Trimmer Safety location, including during work, always Warnings remove the battery cartridge and put the blade cover on the cutter blades. Never carry or Keep all parts of the body away from the cut- transport the trimmer with the cutter running.
- Page 45 Symbols CAUTION: Only use genuine Makita batteries. Use of non-genuine Makita batteries, or batteries that volts Tips for maintaining maximum direct current battery life no load speed Charge the battery cartridge before completely dis- charged. Always stop tool operation and charge the battery cartridge when you notice less tool power.
- Page 46 Tool / battery protection system CAUTION: Always install the battery cartridge fully until the red indicator cannot be seen. If not, CAUTION: Do not install the battery cartridge forcibly. placed under one of the following conditions: Status Indicator lamps Indicating the remaining battery Blinking capacity Overload...
- Page 47 Press and hold the main power button to turn on the tool. Angle setting of the handle The power lamp lights up when the tool is turned on. To turn off the tool, press and hold the main power button CAUTION: again.
-
Page 48: Electric Brake
Electric brake 1. Cover 2. Plate This tool is equipped with an electric brake. If the tool NOTE: released, have the tool serviced at a Makita service center. 8 ENGLISH... - Page 49 Remove the rod. at the same position. 1. Rod 1. Protrusion NOTE: Attach the felt pad to the shear blades. Remove 2 screws, the felt pad, the washers, and the sleeves, and then remove the shear blades. 1. Felt pad 1.
- Page 50 Insert the protrusion on the shear blades to the Attach the rod. hole on the rod, then align the position of the felt pad with the holes on the tool, and then attach new sleeves and washers. 1. Rod 2. Small hole NOTICE: Apply a small amount of grease to the inner periphery of the small hole of the rod.
- Page 51 Install the shear blades again. NOTICE: If the parts other than the shear blades such as the rods are worn out, ask Makita Authorized Service Centers for parts replacement or repairs. Installing or removing the chip receiver...
- Page 52 For basic operation, tilt the shear blades toward the CAUTION: Avoid operating the tool in very hot weather as much as practicable. When operat- speed rate of 3 to 4 seconds per meter. ing the tool, be careful of your physical condition. CAUTION: Be careful not to accidentally contact a metal fence or other hard objects while...
-
Page 53: Cleaning The Tool
Shear blade maintenance Before the operation or once per hour during operation, cating oil) to the shear blades. When trimming to make a round shape (trimming box- wood or rhododendron, etc.), trim from the root to the After operation, remove dust from both sides of the shear blades with a wired brush, wipe it off with a cloth MAINTENANCE CAUTION:... - Page 54 Storage The hook hole in the tool bottom is convenient for hang- ing the tool from a nail or screw on the wall. Attach the blade cover to the shear blades so that the blades are not exposed. Store the tool out of the reach of children. Store the tool in a place not exposed to moisture or rain.
-
Page 55: Grease Lubrication
Remove the grease vessel. Attach the bottom cover, and then tighten 3 screws. OPTIONAL ACCESSORIES CAUTION: These accessories or attachments are recommended for use with your Makita tool accessories or attachments might present a risk of for its stated purpose. Center. •... -
Page 56: Especificaciones
ESPAÑOL (Instrucciones originales) ESPECIFICACIONES Modelo: XHU06 XHU07 XHU08 Longitud de la cuchilla Carreras por minuto 0 cpm - 2 000 cpm / 0 cpm - 3 600 cpm / 0 cpm - 4 400 cpm Longitud total Tensión nominal 18 V c.c. Peso neto 3,7 kg - 4,4 kg (8,2 lbs - 9,7 lbs) Cartucho de batería y cargador aplicables... - Page 57 Utilice siempre gafas protectoras para prote- Si no es posible evitar usar una herramienta eléctrica en condiciones húmedas, utilice un ger sus ojos de lesiones al usar herramientas alimentador protegido con interruptor de cir- eléctricas. Las gafas deben cumplir con la cuito de falla a tierra (ICFT).
- Page 58 Uso y cuidado de la herramienta a batería Sostenga el cortasetos por el mango cuando la cuchilla de corte se encuentre detenida. La por el fabricante. Un cargador que es adecuado posibilidad de lesiones personales ocasionadas por las cuchillas de corte. Sujete la herramienta solamente por las Utilice las herramientas eléctricas solamente cuchilla de corte podría entrar en contacto...
- Page 59 16. Siempre apague el cortasetos y retire el car- ADVERTENCIA: El uso de este producto tucho de batería antes de revisar la cortadora, puede producir polvo que contenga sustancias enmendar fallas o retirar algún material ato- químicas que podrían causar enfermedades rado en la cortadora.
- Page 60 GUARDE ESTAS INSTRUCCIONES. PRECAUCIÓN: Utilice únicamente baterías originales de Makita. 2. Botón 3. mienta mientras desliza el botón sobre la parte delan- cargador Makita. tera del cartucho. Consejos para alargar al máximo la vida útil de la batería...
- Page 61 Indicación de la capacidad restante Estado Luces indicadoras de la batería Encendido Apagado Parpadeando Únicamente para cartuchos de batería con el Sobrecarga indicador Sobrecalenta- miento Sobredescarga Protección contra sobrecarga 1. Luces indicadoras 2. Si la herramienta se sobrecarga al enredarse ramas u otros residuos, el indicador nos segundos.
- Page 62 Ajuste del ángulo del mango PRECAUCIÓN: Nunca coloque su dedo en el interruptor cuando transporte la herramienta. La PRECAUCIÓN: Asegúrese siempre de que el mango esté bloqueado en la posición deseada antes de la operación. AVISO: No jale fuerte el gatillo interruptor sin PRECAUCIÓN: No jale hacia abajo la palanca presionar la palanca de desbloqueo.
-
Page 63: Ajuste De Velocidad
Freno eléctrico Medio 3 600 cpm la herramienta falla constantemente en detenerse tras soltar el gatillo interruptor, lleve la herramienta a mante- nimiento a un centro de servicio Makita. 2 000 cpm MONTAJE PRECAUCIÓN: Asegúrese siempre de que la Botón de inversión para la herramienta esté... - Page 64 los 6 tornillos. llas de cizalla. 1. Tornillo 2. Tornillo 3. Arandela 4. Manguito 5. Cuchillas de cizalla quela en las nuevas cuchillas de cizalla. 1. Cubierta 2. Placa NOTA: La placa puede permanecer en la cubierta. Retire la barra. Alinee las protuberancias en las cuchillas de cizalla verticalmente en la misma posición.
- Page 65 de cizalla. 1. Tornillo 2. Inserte la protuberancia en las cuchillas de cizalla Coloque la barra. 1. Barra 2. AVISO: Aplique una pequeña cantidad de grasa a AVISO: Asegúrese de que la protuberancia en las cuchi- 12. Coloque la placa. 1.
- Page 66 AVISO: Si aparte de las cuchillas de cizalla otras piezas, tales como las barras, muestran signos de desgaste, solicite su reparación o reemplazo a los centros de servicio autorizados Makita. Instalación o extracción del colector de residuos Accesorio opcional PRECAUCIÓN: Siempre utilice guantes 1.
- Page 67 Para extraer el colector de residuos, presione las palan- cas en ambos lados para liberar los ganchos. (1) Altura de corte (2) 1. Palanca AVISO: No corte árboles muertos ni otros obje- AVISO: Nunca intente extraer el colector de tos duros similares. residuos aplicando una fuerza excesiva con sus herramienta.
- Page 68 Makita. Limpieza de la herramienta Quite el polvo de la herramienta con un paño seco o Para cortar la parte lateral de un seto de manera uni- limpiarla.
- Page 69 Después de la operación, elimine el polvo en ambos lados de las cuchillas de cizalla con un cepillo de alam- manera que las cuchillas superior e inferior estén posi- cionadas alternativamente. aerosol) a las cuchillas de cizalla. AVISO: No lave las cuchillas de cizalla con agua.
- Page 70 Recipiente para grasa Intervalo de lubricación: Cada 100 horas de operación NOTA: incluirse en el paquete de la herramienta como acce- GARANTÍA LIMITADA DE MAKITA Ésta Garantía no aplica para México a continuación. Estados Unidos de América: www.makitatools.com 1. Tornillo 2. Cubierta inferior 1.
- Page 72 Makita Corporation 3-11-8, Sumiyoshi-cho, 885633A947 Anjo, Aichi 446-8502 Japan XHU06-1 EN, ESMX 20181023 www.makita.com...
- Page 73 DC18RD Two Port Multi Fast Charger Chargeur Rapide 2 Batteries Multi-Cargador Rápido de Dos Puertos IMPORTANT: Read Before Using. IMPORTANT : Lire ce qui suit avant d’utiliser cet outil. IMPORTANTE: Leer antes de usar. Symbols The followings show the symbols used for the charger and battery. Be sure that you understand their meaning before use.
- Page 74 • Cooling abnormality • Problème de refroidissement • Anormalidad en la carga • Do not short batteries. • Ne jamais court-circuiter les bornes d’une batterie. • No provoque un cortocircuito en las baterías.
-
Page 75: Important Safety Instructions
10. Make sure cord is located so that it will not be stepped on, tripped over, or otherwise subjected to damage or stress. 11. Do not operate charger with damaged cord or plug. If the cord or plug is damaged, ask Makita authorized service center to replace it in order to avoid a hazard. - Page 76 Preset melody sound remains stored even when the charger is unplugged. NOTE: • The battery charger is for charging Makita-battery cartridge. Never use it for other purposes or for other manufacturer’s batteries. • When you charge a battery cartridge which is new or has not been used for a long period of time, it may not accept a full charge until after discharging it completely and recharging a couple of times.
- Page 77 Using with USB device This charger works as an external power supply for USB device. Open the cover of the USB power supply port. Connect the USB cable to the USB power supply port and USB device. Plug the charger into a power source. After charging, unplug the charger.
- Page 78 (1) le chargeur de batterie, sur (2) la batterie et sur (3) le produit utilisant la batterie. ATTENTION — Pour réduire le risque de blessure, ne chargez que les batteries rechargeables MAKITA qui figurent sur l’étiquette du chargeur. Les autres types de batteries peuvent causer des blessures et entraîner des dommages en explosant.
- Page 79 La mélodie préréglée demeure en mémoire même lorsque vous débranchez le chargeur. NOTE : • Le chargeur de batterie est conçu pour les batteries Makita. Ne jamais l’utiliser à d’autres fins ou avec les batteries d’autres fabricants. • Lorsque vous chargez une cartouche de batterie neuve ou restée inutilisée pendant une période prolongée, il se peut que vous deviez la recharger et la décharger à...
- Page 80 Charge de remise en condition La charge de remise en condition peut faire augmenter la durée de vie de la batterie en effectuant automatiquement une recherche du niveau de charge optimale des batteries dans toute situation. Une batterie utilisée à plusieurs reprises dans les conditions suivantes nécessitera une “charge de remise en condi- tion”...
-
Page 81: Instrucciones De Seguridad Importantes
(1) el cargador de baterías, (2) la batería, y (3) el producto con el que se utilice la batería. PRECAUCION — Para reducir el riesgo de sufrir heridas, cargue solamente las baterías recargables MAKITA marcadas en la etiqueta de cargador. Otros tipos de baterías podrán explotar y ocasionar heridas personales y daños. - Page 82 El sonido de melodía permanecerá almacenado aunque desenchufe el cargador. NOTAS: • El cargador de baterías es sólo para cargar cartuchos de batería Makita. No lo utilice nunca con otros fines ni para baterías de otros fabricantes. • Cuando cargue un cartucho de batería que sea nuevo o que no haya sido utilizado durante un largo periodo de tiempo, es posible que no acepte una carga completa hasta después de haberlo descargado completamente y...
- Page 83 Carga de acondicionamiento La carga de acondicionamiento puede alargar la vida útil de la batería buscando automáticamente la condición óptima para la carga de la batería en cualquier situación. La batería empleada en las siguientes condiciones repetidamente requerirá una “carga de acondicionamiento” para evitar que su vida de servicio no se acorte rápidamente.
- Page 84 Makita Corporation 3-11-8, Sumiyoshi-cho, Anjo, Aichi 446-8502 Japan 885372-949 www.makita.com...
Need help?
Do you have a question about the XCU03 and is the answer not in the manual?
Questions and answers
what size replacement chain xcu03