
Related Manuals for Makita XCU07


Summary of Contents for Makita XCU07
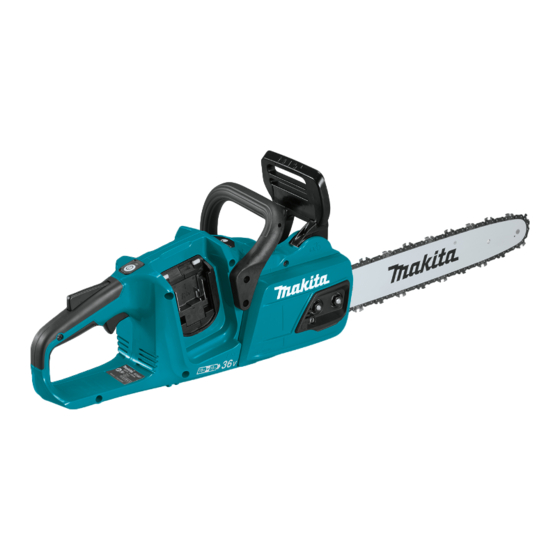
- Page 1 INSTRUCTION MANUAL MANUAL DE INSTRUCCIONES Cordless Chain Saw Electrosierra Inalámbrica XCU07 IMPORTANT: Read Before Using. IMPORTANTE: Lea antes de usar.
-
Page 2: Specifications
ENGLISH (Original instructions) SPECIFICATIONS Model: XCU07 Overall length (without guide bar) 443 mm (17-1/2″) Rated voltage D.C. 36 V Net weight 4.6 - 5.5 kg (10.1 - 12.1 lbs) Standard guide bar length 350 mm (14″) Recommended guide bar with 90PX, 91PX... -
Page 3: General Power Tool Safety Warnings
Saw chain type 91PX Number of drive links Guide bar Guide bar length 300 mm 350 mm 400 mm (12″) (14″) (16″) Cutting length 275 mm 330 mm 370 mm (10-7/8″) (13″) (14-1/2″) Part No. 165200-0 165201-8 165202-6 Pitch 3/8″ Gauge 1.3 mm (0.050″) - Page 4 Personal Safety Maintain power tools and accessories. Check for misalignment or binding of moving parts, Stay alert, watch what you are doing and use breakage of parts and any other condition that common sense when operating a power tool. may affect the power tool’s operation. If dam- Do not use a power tool while you are tired or aged, have the power tool repaired before use.
- Page 5 Never service damaged battery packs. Service 12. Cut wood only. Do not use chain saw for pur- of battery packs should only be performed by the poses not intended. For example: do not use manufacturer or authorized service providers. chain saw for cutting plastic, masonry or non- wood building materials.
- Page 6 It will parts number of applicable saw chain and also void the Makita warranty for the Makita tool and guide bar charger. Tips for maintaining maximum...
-
Page 7: Parts Description
PARTS DESCRIPTION Battery cartridge Front hand guard Guide bar Saw chain Retaining nut Chain adjusting screw Check button Capacity indicator Main power lamp Main power switch Lock-off lever Rear handle Switch trigger Front handle Oil tank cap Box wrench Chain catcher Adjusting screw (for oil pump) Guide bar cover 7 ENGLISH... -
Page 8: Functional Description
Tool / battery protection system FUNCTIONAL DESCRIPTION The tool is equipped with a tool/battery protection sys- tem. This system automatically cuts off power to the motor to extend tool and battery life. The tool will auto- CAUTION: matically stop during operation if the tool or battery is Always be sure that the tool is placed under one of the following conditions. -
Page 9: Main Power Switch
Main power switch Capacity indicator status Remaining battery capacity WARNING: Always turn off the main power Blinking switch when not in use. 50% to 100% To stand by the chain saw, press the main power switch until the main power lamp lights up. To turn off, press the main power switch again. -
Page 10: Adjusting The Chain Lubrication
Checking the run-down brake CAUTION: If the saw chain does not stop within one second in this test, stop using the chain saw and consult our authorized service center. Run the chain saw then release the switch trigger com- pletely. The saw chain must come to a standstill within one second. -
Page 11: Adjusting Saw Chain Tension
Loosen the chain adjusting screw, then the retain- Tighten the retaining nuts to secure the sprocket ing nuts. cover, then loosen it a bit for tension adjustment. ► 1. Chain adjusting screw 2. Retaining nut ► 1. Retaining nut 3. Sprocket cover Adjusting saw chain tension Remove the sprocket cover then remove the saw chain and guide bar from the chain saw body. -
Page 12: Operation
Make sure the saw chain fits snugly against the lower side of the bar. NOTICE: Use the saw chain oil exclusively for Makita chain saws or equivalent oil available in For chain blade 25AP: the market. Make sure that the gap between the center of the lower... - Page 13 Bucking WORKING WITH THE CHAIN SAW Rest the bottom edge of the chain saw body on the wood to be cut. CAUTION: The first time user should, as a minimum practice, do cutting logs on a saw-horse or cradle. CAUTION: When sawing precut timber, use a safe support (saw horse or cradle).
- Page 14 Limbing • The base of the trunk is free of foreign objects, roots and ranches; • No persons or objects are present over a CAUTION: Limbing may only be performed by distance of 2 1/2 tree lengths in the direction trained persons.
-
Page 15: Sharpening The Saw Chain
To maintain product SAFETY and RELIABILITY, into the back cut in time. repairs, any other maintenance or adjustment should be performed by Makita Authorized or Factory Service Centers, always using Makita replacement parts. Sharpening the saw chain Sharpen the saw chain when: •... -
Page 16: Cleaning The Guide Bar
► 1. File holder — The sharpening angle of 30° must be the same on all cutters. Different cutter angles cause the chain — After sharpening the chain, check the height of the to run roughly and unevenly, accelerate wear, and depth gauge using the chain gauge tool (optional lead to chain breaks. -
Page 17: Replacing The Sprocket
Cleaning the sprocket cover Replacing the sprocket Chips and saw dust will accumulate inside of the CAUTION: A worn sprocket will damage a sprocket cover. Remove the sprocket cover and saw new saw chain. Have the sprocket replaced in this chain from the tool then clean the chips and saw dust. -
Page 18: Instructions For Periodic Maintenance
Instructions for periodic maintenance To ensure long life, prevent damage and ensure the full functioning of the safety features, the following maintenance must be performed regularly. Warranty claims can be recognized only if this work is performed regularly and prop- erly. -
Page 19: Troubleshooting
Before asking for repairs, conduct your own inspection first. If you find a problem that is not explained in the manual, do not attempt to dismantle the tool. Instead, ask Makita Authorized Service Centers, always using Makita replace- ment parts for repairs. -
Page 20: Especificaciones
ESPAÑOL (Instrucciones originales) ESPECIFICACIONES Modelo: XCU07 Longitud total (sin la barra de guía) 443 mm (17-1/2″) Tensión nominal 36 V c.c. Peso neto 4,6 kg - 5,5 kg (10,1 lbs - 12,1 lbs) Longitud de la barra de guía estándar 350 mm (14″) -
Page 21: Advertencias De Seguridad
Tipo de cadena de la sierra 91PX Número de eslabones motorices Barra de guía Longitud de la barra de guía 300 mm 350 mm 400 mm (12″) (14″) (16″) Longitud de corte 275 mm 330 mm 370 mm (10-7/8″) (13″) (14-1/2″) No. - Page 22 No exponga las herramientas eléctricas a la Si dispone de dispositivos para la conexión de lluvia ni a condiciones húmedas. La entrada de equipos de extracción y recolección de polvo, agua en una herramienta eléctrica aumentará el asegúrese de conectarlos y utilizarlos debida- riesgo de que se produzca una descarga eléctrica.
- Page 23 Mantenga los mangos y superficies de asi- Advertencias de seguridad para la miento secos, limpios y libres de aceite o electrosierra inalámbrica grasa. Los mangos y superficies de asimiento resbalosos no permiten una manipulación segura Mantenga todas las partes del cuerpo aleja- ni el control de la herramienta en situaciones das de la cadena de la sierra cuando la sierra inesperadas.
- Page 24 Mantenga los mangos secos, limpios, y libres • No exceda su alcance ni corte por encima de aceite y grasa. Los mangos grasosos y de la altura de su hombro. Esto le ayudará aceitosos son resbalosos y causan la pérdida de a prevenir que la punta haga contacto de control.
- Page 25 (1) el cargador de batería, (2) lesiones personales y daños. Asimismo, esto inva- la batería, y (3) el producto con el que se utiliza lidará la garantía de Makita para la herramienta y el la batería. cargador Makita.
-
Page 26: Descripción De Las Piezas
DESCRIPCIÓN DE LAS PIEZAS Cartucho de batería Protector de mano delantero Barra de guía Cadena de la sierra Tuerca de retención Tornillo de ajuste de la cadena Botón de verificación Indicador de capacidad Lámpara de alimentación principal Interruptor de alimentación principal Palanca de desbloqueo Mango trasero Gatillo interruptor... -
Page 27: Descripción Del Funcionamiento
Sistema de protección para la DESCRIPCIÓN DEL herramienta/batería FUNCIONAMIENTO La herramienta está equipada con un sistema de protección para la herramienta/batería. Este sistema corta en forma auto- PRECAUCIÓN: Asegúrese siempre de que la mática el suministro de energía al motor para prolongar la vida herramienta esté... - Page 28 NOTA: Dependiendo de las condiciones de uso y Estado del indicador de capacidad Capacidad restante de la la temperatura ambiente, la indicación podrá diferir batería ligeramente de la capacidad real. Encendido Apagado Parpadeando Interruptor de alimentación principal 50% a 100% ADVERTENCIA: Siempre apague el interruptor 20% a 50%...
-
Page 29: Ajuste De La Lubricación De La Cadena
Empuje el protector de mano delantero hacia PRECAUCIÓN: Antes de insertar el cartucho adelante con el dorso de su mano. Asegúrese de que la de batería en la herramienta, compruebe siem- sierra eléctrica se detenga de inmediato. pre y cerciórese de que el gatillo interruptor se acciona debidamente y que vuelve a la posición “OFF”... -
Page 30: Montaje
Coloque un extremo de la cadena de la sierra en MONTAJE la parte superior de la barra de guía y el otro extremo alrededor de la pieza dentada. PRECAUCIÓN: Asegúrese siempre de que la herramienta esté apagada y el cartucho de batería haya sido extraído antes de realizar cualquier trabajo en la misma. -
Page 31: Operación
Para la cuchilla de la cadena 25AP: Ajuste de la tensión de la cadena de la sierra Apriete la cadena de la sierra de manera que el espacio entre el centro del lado inferior de la barra de guía y la PRECAUCIÓN: Realice el procedimiento de cadena de la sierra sea aproximadamente de 1 mm a 2 mm. - Page 32 AVISO: Utilice el aceite para la cadena de la sie- Presione levemente sobre el mango y continúe cor- rra exclusivamente para sierras eléctricas Makita tando haciendo retroceder la sierra eléctrica un poco; o un aceite equivalente disponible en el mercado.
- Page 33 Excavación y cortes en paralelo al Continúe el corte aplicando una leve presión sobre el mango delantero, alivianando ligeramente grano la parte trasera de la sierra. Mueva el tope de picos todavía más abajo en la madera y vuelva a levantar el PRECAUCIÓN: La excavación y los cortes en mango delantero.
- Page 34 — Considere lo siguiente en lo que respecta a cada NOTA: La hendidura determina la dirección en la cual árbol: el árbol caerá, sirviendo de guía. Se realiza sobre el • Dirección de inclinación; lado hacia el cual el árbol caerá. •...
-
Page 35: Mantenimiento
• Cuchilla de la cadena 91PX: 0,65 mm tenimiento o ajuste deberán ser realizadas en centros (0,025″) de servicio autorizados o de fábrica Makita, empleando • Cuchilla de la cadena 25AP: 0,65 mm siempre repuestos Makita. (0,025″) - Page 36 — Guíe la lima tal como se muestra en la ilustración. Limpieza de la barra de guía En la ranura de la barra de guía se acumularán astillas y aserrín. Éstas pueden obstruir la ranura de la barra y afectar el flujo de aceite. Limpie las astillas y el aserrín cada vez que afile o reemplace la cadena de la sierra.
- Page 37 Elimine el polvo y las pequeñas partículas usando Instale siempre un anillo de bloqueo nuevo cuando un destornillador plano con un eje delgado o similar. reemplace la pieza dentada. ► 1. Destornillador plano 2. Orificio de descarga de ► 1. Anillo de bloqueo 2. Pieza dentada aceite AVISO: Asegúrese de que la pieza dentada sea...
-
Page 38: Instrucciones Para El Mantenimiento Periódico
Instrucciones para el mantenimiento periódico Para asegurar una vida útil prolongada, prevenga el daño y asegure un funcionamiento total de las funciones de seguridad, efectuando el siguiente programa de mantenimiento de forma periódica. Las reclamaciones de garantía podrán ser reconocidas solamente si este programa de mantenimiento es realizado periódicamente y como corres- ponde. -
Page 39: Resolución De Problemas
Antes de solicitar alguna reparación, primero realice una inspección por su cuenta. Si detecta algún problema que no esté explicado en el manual, no intente desensamblar la herramienta. En vez de esto, solicite la reparación a un centro de servicio autorizado de Makita, usando siempre piezas de repuesto Makita. Estado de la avería Causa Solución... - Page 40 Para reducir la exposición a estos productos químicos: trabaje en un área bien ventilada y póngase el equipo de seguridad indicado, tal como las máscaras contra polvo que están especialmente diseñadas para filtrar partículas microscópicas. Makita Corporation 3-11-8, Sumiyoshi-cho, Anjo, Aichi 446-8502 Japan 885663A948...
Need help?
Do you have a question about the XCU07 and is the answer not in the manual?
Questions and answers