Advertisement
Quick Links
Advertisement

Related Manuals for FYC furniture 239DCr-Synchro-3


Summary of Contents for FYC furniture 239DCr-Synchro-3
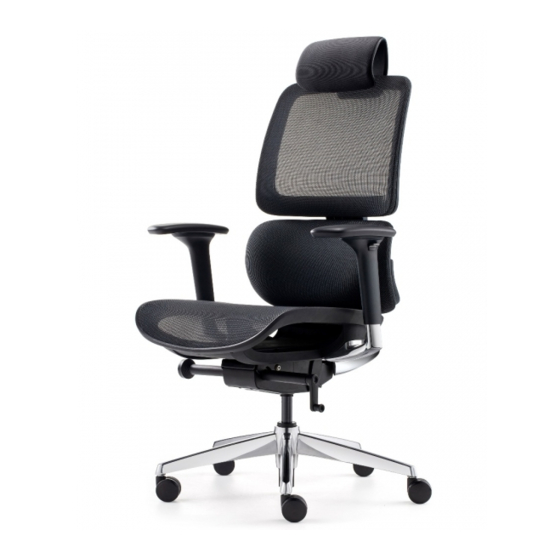
- Page 1 FYC 239DCr-Synchro-3 Model: FYC 239DHCr-Synchro-3...
- Page 2 Assembly Steps, Montage stappen, Montageschritte, Montage du produit : Eng. Assemble the Backrest A to the Mechanism Eng. Attach the armrests D to the seat B, with C with the 3 bolts J and wrench I 2 x 3pcs bolts K Bevestig de rug A aan het mechaniek C.
- Page 3 Eng. Insert the castor G (this requires some strength) and the gas lift E into the base F, and put the chair top part on the gas lift E Druk de wieltjes G (enige kracht is hiervoor nodig) in het voetenkruis F. Laat daarna de gaslift E in het voetenkruis zakken en zet het bovenste van de stoel op de gaslift E.
- Page 4 User manual, Gebruiksaanwijzing, Gebrauchsanweisung, Mode d’emploi...
- Page 5 Eng. Mechanism knob at left side is to control the Eng. Use the handle to adjust the tilting. Rotate the knob to unlock or lock (9 seat height locking positions) Met de hendel kunt u de D.m.v. de knop aan de linkerkant bepaalt u de zithoogte instellen stand van de rugleuning.
- Page 6 Eng. You can adjust the height of the backrest and of the Eng. 3D armrest: armrest height adjustable, arm Pad forward/backward lumbar support by moving it up or down adjustable and width adjustable. U kunt de hoogte van de rugleuning en van de lende steun instellen door hem omhoog en omlaag te 3D armleuning: in hoogte verstelbaar, het armdekje is naar voor en bewegen.
Need help?
Do you have a question about the 239DCr-Synchro-3 and is the answer not in the manual?
Questions and answers