Table of Contents
Advertisement
Quick Links
MODEL
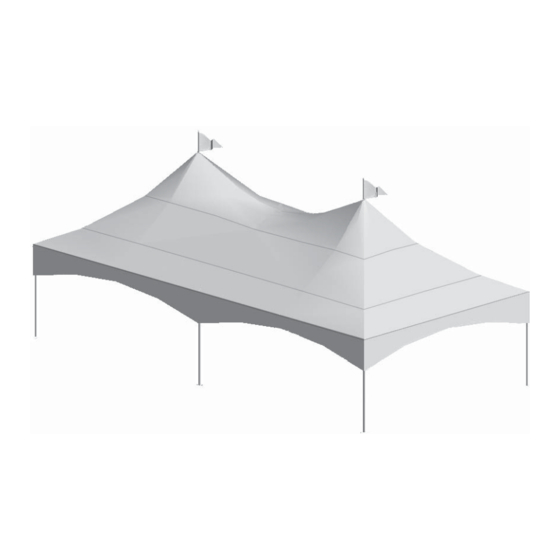
PEAK MARQUEE TENT
ASSEMBLY INSTRUCTIONS
PLEASE READ INSTRUCTIONS PRIOR TO ERECTING THE TENT.
PROPER INSTALLATION WILL ENSURE MAXIMUM USAGE AND
IF FURTHER INFORMATION OR CLARIFICATION OF ANY PART OF
THE ENCLOSED INSTRUCTION IS REQUIRED, PLEASE CONTACT:
1-800-661-6155 OR E-MAIL: warner@wssl.com
1. Each installation site must be evaluated and the proper securing method determined by the
installer. Some soils require staking or securing different from that which was provided with the
tent.
2. Good judgment and common sense must be used along with installation guidelines. It is the
responsibility of the tent installer/maintainer to anticipate the severity of the weather along with
the proper time and method of setup and take down. Evacuation of the tent is recommended
before weather becomes extreme. A successful event is a safe event.
3. Proper safety equipment, such as hard hats, steel toe shoes, and safety glasses, should be used
to ensure a safe setup and take down.
..\graphicshome\Marquee\Manuals\MQ2040T\MQ2040T Manual 2007.FH11
MQ2040T
IMPORTANT:
STABILITY OF THIS STRUCTURE.
WARNER SHELTER SYSTEMS LIMITED
CAUTION
Advertisement
Table of Contents

Subscribe to Our Youtube Channel
Related Manuals for Warner Shelter Systems Limited MQ2040T

Summary of Contents for Warner Shelter Systems Limited MQ2040T
- Page 1 STABILITY OF THIS STRUCTURE. IF FURTHER INFORMATION OR CLARIFICATION OF ANY PART OF THE ENCLOSED INSTRUCTION IS REQUIRED, PLEASE CONTACT: WARNER SHELTER SYSTEMS LIMITED 1-800-661-6155 OR E-MAIL: warner@wssl.com CAUTION 1. Each installation site must be evaluated and the proper securing method determined by the installer.
-
Page 2: Table Of Contents
Warner Shelter Systems Limited Table of Contents PAGES TENT LOCATION....................2 PARTS LIST....................3 - 4 FRAME ASSEMBLY ..................4 - 5 Post & Centrepole Assembly ....Step 2....... PAGE Upper Frame Assembly ......Step 3 - 4 ....PAGE Cross Cable Installation ...... - Page 3 Warner Shelter Systems Limited MQ2040T MODEL PEAK MARQUEE TENT FLAG NOT INCLUDED OPTIONAL FLAG POLE FOR 3'x5' FLAG 10 11 ASSEMBLY # 11964 10605 ALUMINUM STEEL PART ITEM FRAME FRAME TENT TOP MQ2040T 11565 WALLS POST 8' 10591 10590 CORNER 90°...
-
Page 4: Frame Assembly
Warner Shelter Systems Limited Step 1 • Check all the parts before BASES (6) EVE TUBE 9’3” (14) assembling the tent. • Refer to assembly drawing POST 8’ (6) on page 3 for part quantities and part numbers. * Bolts, Nuts, and Lockpins not shown. -
Page 5: Cross Cable Installation
Warner Shelter Systems Limited Step 5 Corner Pin Cross Cables • Install first (bottom) Cross Cable 4 diagonally in square frame. • Hook the cable end loop over the corner pin. Step 6 • Install second (top) Cross Cable. • To install last loop, lift last corner to shorten the distance and hook the cable in place. -
Page 6: Unfolding Tent Top
Warner Shelter Systems Limited ERECTING THE TENT Step 9 UNFOLDING THE TENT TOP NOTE: The corners are numbered here for explanation only. • Place the Tent Top midway along one side and unfold fabric toward the corners. • Ensure that the valences are against the outside edge of the frame. -
Page 7: Installing Posts
Warner Shelter Systems Limited Step 10 • Insert each T-Plus hook through corresponding grommet on the Tent Top. • Temporarily hold in place with S-hook of the tension strap. Grommets T-joint Hook T-joint Hook S-hook Grommet Tension strap ERECTING THE TENT... - Page 8 Warner Shelter Systems Limited Step 12 CENTREPOLE INSTALLATION • After raising one side, move Drop Sheet towards the lower half of the frame to expose the Cable intersection. DROP SHEET Step 13 Flag • Insert the Centrepole 9 through the centre socket of the Tent Top.
- Page 9 Warner Shelter Systems Limited Step 17 • Straighten Posts and drive Stakes 10 at each Post Base. IMPORTANT Each installation site must be evaluated by installer to determine proper securing method. Site conditions may require guying and anchorage different from what was provided with the tent.
-
Page 10: Guy Rope Installation
Warner Shelter Systems Limited Summary 1. Check parts. 10. Insert Centrepole through the centre socket. 2. Assemble Corner 90°, 9’ 3” and 5’ Eve Tubes, 11. Install Flag from outside. T-plus and Midjoints to form upper frame. 12. Slide Centrepole over the Cross Cable inter- secting point. -
Page 11: Wall Installation
Warner Shelter Systems Limited Wall Installation * Before installing walls, make sure toggle ropes Turnbuckle are evenly tensioned and the Tent Top is evenly Cable: Slide Wall positioned on the frame. Check that Cable for Slide Wall is properly tensioned. Tighten with turnbuckle if needed. -
Page 12: Care For Your Vinyl Tops
Warner Shelter Systems Limited Care for your Vinyl Tops Care for your vinyl tops as you would to any vinyl surface. Use mild detergent industrial cleaner with no chlorox. To clean, spread tent top on clean surface. Try laying fabric on astro turf to wash. Dirt and tiny sharp particles tend to fall into the carpet pile, away from the fabric. - Page 13 Warner Shelter Systems Limited Notes PAGE 13 ..\graphicshome\Marquee\Manuals\MQ2040T\MQ2040T Manual 2007.FH11...
- Page 14 Warner Shelter Systems Limited Notes PAGE 14 ..\graphicshome\Marquee\Manuals\MQ2040T\MQ2040T Manual 2007.FH11...
- Page 15 Warner Shelter Systems Limited Notes PAGE 15 ..\graphicshome\Marquee\Manuals\MQ2040T\MQ2040T Manual 2007.FH11...
- Page 16 WSSL TENTS Warner Shelter Systems Limited creates fabric-clad structures to suit virtually every purpose, from special events, trade shows, catering and outdoor concerts to warehousing and industrial use. Our award-winning tents are user-friendly, durable and set-up quickly. We have earned a reputation for providing a high level of service to customers since 1970.
Need help?
Do you have a question about the MQ2040T and is the answer not in the manual?
Questions and answers