Leisegang 1E LED Service Manual
Hide thumbs
Also See for 1E LED:
- Instructions for use manual (46 pages) ,
- Instructions for use manual (44 pages)

Subscribe to Our Youtube Channel
Related Manuals for Leisegang 1E LED


Summary of Contents for Leisegang 1E LED
- Page 1 Colposcopes, stands, additional equipment 1E LED 1D LED 1DW LED 1DS LED 3MVC LED USB 3MVCS LED USB 3MVCW LED USB 3ML LED 3MLW LED 3MLS LED 1" 3MLS LED 1/2" Service Manual Assembly Repair Spare parts English...
- Page 2 Publication details Copyright ©LEISEGANG Feinmechanik-Optik GmbH 2013-2021. All rights, delivery availability and technical changes reserved. Issued by: LEISEGANG Feinmechanik-Optik GmbH Leibnizstrasse 32 D-10625 Berlin Phone: +49 30 319 009-0 Fax: +49 30 313 5992 E-Mail: info@leisegang.de www.leisegang.de Please read the instructions and information in the Instructions for Use carefully before...
-
Page 3: Table Of Contents
C o n t e n t s Contents Purpose ......................5 Intended use ........................5 Indications and field of application..................5 Users and application environment ..................6 Patient population ......................6 Contraindications ....................... 6 Side-effects......................... 6 Clinical benefits ........................6 Performance characteristics .................... - Page 4 C o n t e n t s 4.8.7 Cameras ........................29 4.8.8 Tubes ........................30 Model number ......................... 31 4.10 Electromagnetic compatibility ..................32 Transport and storage ..................36 Storage ..........................36 Disposal of packaging material ..................36 Assembly......................37 Mounting on spider base ....................
-
Page 5: Purpose
Leisegang photo/video colposcopes with an integrated or externally connected camera can also be used to document the findings. Leisegang colposcopes are only used to aid in the diagnosis. In any case, further findings are to be consulted. Indications and field of application Leisegang colposcopes are used in gynecological examinations for magnified, non-contacting viewing of the external female genitalia (vulva, vagina, portio). -
Page 6: Users And Application Environment
There are no known side-effects for the use of Leisegang colposcopes. Clinical benefits Leisegang colposcopes aid in the viewing of the outer female genitalia (vulva, vagina, portio) for abnormalities or further examination from inconclusive cervical cancer screening tests. Leisegang colposcopes provide for non-contact view of the outer female genitalia or other external organs with no invasiveness and allow mobility or minimal interaction with physician. -
Page 7: Performance Characteristics
Performance characteristics When used according to the manufacturer’s instructions for use, Leisegang colposcopes are intended to provide enlarged, non-contact view of the outer female genitalia (vulva, vagina, portio) or other external organs in the visible area with no invasiveness and allow mobility or minimal interaction with the physician. -
Page 8: Meaning Of Symbols On The Device And Outer Packaging
Observe the practically-oriented safety instructions in the relevant sections. • • Only use the colposcope with Leisegang stands and Leisegang accessories. • Dirt and dust can impair the functionality of the device. Therefore protect the device when not in use with the dust protection cover supplied. Before covering the device, check that it is switched off. - Page 9 Contact your supplier in this regard. • Do not undertake any modifications, as otherwise safe operation of the device is not guaranteed and all guarantee and warranty claims towards Leisegang Feinmechanik- Optik GmbH are void. • Always unplug the device before changing the fuse and before cleaning the device.
-
Page 10: Marketability
Fax: +49 30 313 599-2 E-Mail: sales.leisegang@coopersurgical.com Medical device and market placement Leisegang colposcopes are class I medical devices according to Annex VIII, Chapter III of Regulation (EU) 2017/745 of 5 April 2017. Leisegang Feinmechanik-Optik GmbH has demonstrated in a conformity assessment... -
Page 11: Reporting Of Serious Incidents
Reporting of serious incidents PLEASE NOTE: If there is any suspicion that the use of the Leisegang colposcope is or could be causally related to a serious incident, details of the incident must be provided to CooperSurgical by telephone on +49 30 319009-0 or via the Email complaint- group.leisegang@coopersurgical.com and to the local Health Authority in your country. -
Page 12: Device Description
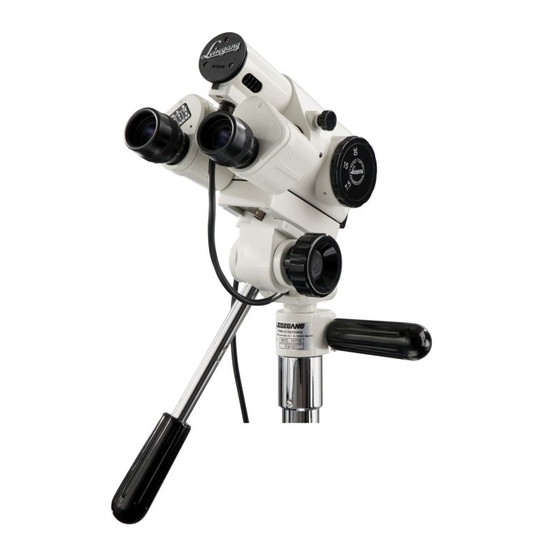
Compensation of refractive errors through adjustable eyepieces • LED lighting with an illumination intensity of 45,000-52,000 lx and a colour temperature between 5,700-6,000 K, • Leisegang colposcopes are designed for a service life of 10 years. Colposcope Front Rear Magnification changer LED illumination unit... - Page 13 D e v i c e d e s c r i p t i o n Colposcope Colposcope type plate Model number Device designation CE mark Serial number Date of manufacture Input Manufacturer Separate disposal of waste electrical equipment Power supply WARNING...
- Page 14 D e v i c e d e s c r i p t i o n Colposcope Power supply type plate Device designation Model number CE mark Serial number Date of manufacture Input Output Protection class II Manufacturer UL mark Protection type Separate disposal of...
-
Page 15: Stand
D e v i c e d e s c r i p t i o n Stand Stand Swing-o-matic stand Balance-o-matic stand Star knob screw Circular spirit level Spider base column Column for balance-o-matic stand Clamp flange Spring shaft Supporting ring with latch pin Clamp pair Conical insert... - Page 16 D e v i c e d e s c r i p t i o n Stand Upright stand Clamp nut for clamp head Power supply Cable outlet Stand column 5-wheeled spider base 16 / 74...
-
Page 17: Technical Data
T e c h n i c a l d a t a General information Technical data General information Operational data Usage type Not suitable for use in an oxygen-enriched environment Operating mode Suitable for continuous operation Applied parts The device has no applied parts that come into direct contact with the patient Working distance... -
Page 18: Standard Colposcope
T e c h n i c a l d a t a Standard colposcope Standard colposcope 1E LED Model 1E LED Mechanical data Weight 2.75 kg Dimensions 605 x 135 x 205 mm H x W x D... - Page 19 T e c h n i c a l d a t a Standard colposcope 1D LED 1DW LED Model 1DW LED 1D LED Mechanical data Weight 3.00 kg 3.10 kg Dimensions 605 x 135 x 205 mm 640 x 135 x 245 mm H x W x D Configuration Magnification...
-
Page 20: Photo/Video Colposcope
T e c h n i c a l d a t a Photo/video colposcope Photo/video colposcope 3ML LED 3MLW LED Model 3MLW LED 3ML LED Mechanical data Weight 3.90 kg 4.05 kg Dimensions 660 x 135 x 210 mm 675 x 135 x 240 mm H x W x D Configuration... - Page 21 T e c h n i c a l d a t a Photo/video colposcope 3MVC LED USB 3MVCW LED USB Model 3MVCW LED USB 3MVC LED USB Mechanical data Weight 3.25 kg 3.60 kg Dimensions 625 x 135 x 195 mm 630 x 135 x 245 mm H x W x D Configuration...
-
Page 22: Stand
T e c h n i c a l d a t a Stand Stand Upright stand Swing-o-matic stand Balance-o-matic stand Model Upright stand Swing-o-matic stand Balance-o-matic stand Mechanical data Weight (without spider 1.75 kg 5.00 kg 7.90 kg base) Dimensions 670 x 120 mm... -
Page 23: 5-Wheeled Spider Base
T e c h n i c a l d a t a 5-wheeled spider base 5-wheeled spider base Model Heavy 5-wheeled spider base Weight 25.00 kg (incl. counterweight) Diameter 650 mm Castors Universal castors for all floors, 5 lockable castors 23 / 74... -
Page 24: Special Mounts
T e c h n i c a l d a t a Special mounts Special mounts Maquet (for swing-o-matic) Maquet (for balance-o-matic) Atmos Chair Gyne (Baisch) (for swing-o-matic or balance-o-matic) Model Maquet Maquet Atmos Chair Gyne (Baisch) (for swing-o-matic) (for balance-o-matic) (for swing-o-matic or balance-o- matic) -
Page 25: Additional Equipment
T e c h n i c a l d a t a Additional equipment4F Additional equipment 4.8.1 Tray Tray with 2-joint articulated arm Tray with 3-joint articulated arm Model Tray 2-joint Tray 3-joint Weight 4.70 kg 7.50 kg Dimensions of 370 x 290 mm 289 x 366 mm... -
Page 26: Support Arm For Panel Pc Mws
T e c h n i c a l d a t a Additional equipment4F 4.8.2 Support arm for panel PC MWS Support arm for mounting on spider base Support arm for chair mounting Model Support arm for mounting on spider Support arm for chair mounting, base, for swing-o-matic or balance-o-matic... -
Page 27: Panel Pc Mws
T e c h n i c a l d a t a Additional equipment4F Additional mounting of a keyboard holder is not possible when mounting the support arm on a Swing-o-matic stand on a spider base. 4.8.4 Panel PC MWS Panel PC MWS Model Panel PC MWS... -
Page 28: Footswitch
T e c h n i c a l d a t a Additional equipment4F 4.8.5 Footswitch Footswitch for LeiseCap and ColpoSoft Footswitch for MWS software Model Footswitch for LeiseCap and ColpoSoft Footswitch for MWS software Weight 309 g 642 g Dimensions 196 x 100.5 x 45.5 mm... -
Page 29: Cameras
T e c h n i c a l d a t a Additional equipment4F 4.8.7 Cameras Digital single lens reflex camera Video camera Model Canon EOS digital single lens reflex Video camera camera Weight 530 g (only housing) 37 g Dimensions 128.8 x 97.3 x 62 mm... -
Page 30: Tubes
T e c h n i c a l d a t a Additional equipment4F 4.8.8 Tubes Photo tube Video tube Model Photo tube C-mount video tube Weight 65 g 87 g Dimensions 41 mm 41 mm (∅) Threaded connection Bayonet C-mount 30 / 74... -
Page 31: Model Number
Model number The model number ( ) comprises the following categories: Eyepiece view Magnification Head adjustment Illumination Camera interface Chip size Digit Model designation Straight 45° Fine Only tilt Y/C NTSC 1/3ʺ 1/2ʺ 1ʺ tilted ʺ 7.5/15/30x 3.75/7.5/15x Code XXX – Example: 1D-121100 The example shown reflects the model designation for a model 1D LED device with the following features:... -
Page 32: Electromagnetic Compatibility
Table 1: Guidance and manufacturer's declaration - electromagnetic radiation Leisegang colposcopes are intended for use in the electromagnetic environment specified below. The user of a Leisegang colposcope must ensure that the device is being operated in such an environment. Emissions test... - Page 33 Table 2: Guidance and manufacturer's declaration - electromagnetic immunity Leisegang colposcopes are intended for use in the electromagnetic environment specified below. The user of a Leisegang colposcope must ensure that the device is being operated in such an environment. Immunity test...
- Page 34 Table 3: Guidance and manufacturer's declaration - electromagnetic immunity Leisegang colposcopes are intended for use in the electromagneticenvironment specified below. The user of a Leisegang colposcope must ensure that the device is being operated in such an environment. Immunity test...
- Page 35 Leisegang colposcope - valid for equipment and systems not intended for life-sustaining applications Leisegang colposcopes are for use in an electromagnetic environment in which radiated RF interference is monitored. The user of a Leisegang colposcope can help prevent electromagnetic interference by maintaining a minimum distance between the portable/mobile RF communications device (transmitter) and the Leisegang colposcope as recommended below;...
-
Page 36: Transport And Storage
T r a n s p o r t a n d s t o r a g e Storage Transport and storage Storage • If the boxes are stored for a longer period of time, attention needs to be paid that the environmental conditions are dry, cool and non-condensing. -
Page 37: Assembly
A s s e m b l y Mounting on spider base Assembly Always start with assembling the stand and only then insert the colposcope. This way the colposcope remains protected against unnecessary stresses. Mounting on spider base 6.1.1 Upright stand •... - Page 38 A s s e m b l y Mounting on spider base 6. First of all, pass the colposcope lamp cable through the opening in the stand (1) and then insert the connecting tube. Ensure that the cable is fed out of the lower outlet (2): 7.
-
Page 39: Swing-O-Matic Stand
A s s e m b l y Mounting on spider base 6.1.2 Swing-o-matic stand CAUTION Risk of crushing through counterweight The counterweight is heavy and can cause crushing injuries. Always work in pairs to assemble the Swing-o-matic stand! ... - Page 40 A s s e m b l y Mounting on spider base 5. Pass the colposcope lamp cable through the opening in the stand (3). Insert the connecting tube and hold the colposcope at roughly the height required as the working height. Then tighten the clamp nut on the clamp head (4): 6.
- Page 41 A s s e m b l y Mounting on spider base CAUTION Risk of crushing through weight The stand is heavy and can cause crushing injuries if dropped. Hold the stand frame when adjusting the working height until the ...
-
Page 42: Balance-O-Matic Stand
A s s e m b l y Mounting on spider base 6.1.3 Balance-o-matic stand CAUTION Risk of crushing through counterweight The counterweight is heavy and can cause crushing injuries. Always work in pairs to assemble the balance-o-matic stand! ... - Page 43 A s s e m b l y Mounting on spider base 5. Pass the colposcope lamp cable through the opening in the stand (3). Insert the connecting tube and hold the colposcope at roughly the height required as the working height. Then tighten the clamp nut on the clamp head (4): 6.
- Page 44 A s s e m b l y Mounting on spider base The tension of the tension springs is preset at the factory for weight compensation. Check the final tension nevertheless. The tension is set correctly if the stand frame remains in a balanced state after removing the spacer block.
- Page 45 A s s e m b l y Mounting on spider base 12. Turn the hex key anticlockwise slightly (8), hold the key in this position and pull out the latch pin (9): 13. Now turn the adjusting collar about half a turn counter- clockwise or clockwise: Anticlockwise: ...
-
Page 46: Left Assembly
A s s e m b l y Mounting on spider base 6.1.4 Left assembly Both the swing-o-matic and the balance-o-matic stands are factory prepared for right assembly. However, both stands may be left assembled as required. Left assembly is described for the swing-o-matic stand. But the description applies analogously for the swing-o-matic stand. - Page 47 A s s e m b l y Mounting on spider base 3. Pull out the clamp with bolts (1) and re-insert it the other way round (2): 4. In doing so, ensure that the flat side points towards the opening in the stand (3).
- Page 48 A s s e m b l y Mounting on spider base 6. Screw the two halves back together. Make sure to position the power supply centred in the frame: 7. Unscrew the ball knob from the clamping lever (5) and pull down the protective sleeve (6): 8.
- Page 49 A s s e m b l y Mounting on spider base Ensure that the clamping lever is now locked upwards! 10. Now continue assembling the stand as described in sections 6.1.2 Swing-o-matic stand or 6.1.3 Balance-o-matic stand 11. Set the height of the colposcope such that the handle for the vertical drive passes freely over the upper frame: The left assembly is complete.
-
Page 50: Chair Mounting
Chair mounting • Examination chairs from the companies Atmos (Baisch) and Maquet require special mounts, which are available from Leisegang. Please contact our customer service team in this regard (see section 11 Customer service). • The chair mounting for examination chairs from other companies, such as Schmitz, Aga, Medifa-Hesse, Eron, Promotal/Midmark etc. - Page 51 A s s e m b l y Chair mounting 3. Carefully release the clamping lever again, lock it in the uppermost position (3) and remove the lower clamp pair (4): 4. Pass the spring shaft tube through the two clamping jaws of the chair mounting.
- Page 52 A s s e m b l y Chair mounting CAUTION Risk of entrapment due to insufficient clearance If the distance between the balance-o-matic stand and the floor is too low, feet can be trapped and crushed. Mount the stand in such a way that a distance of at least 5 cm ...
- Page 53 A s s e m b l y Chair mounting 10. Fasten the lamp cable at the rear of the power supply using the cable ties. Bear in mind that you allow the cable sufficient play for height adjustment: Swing-o-matic assembly: The height adjustment depends on the chair manufacturer and model.
- Page 54 A s s e m b l y Chair mounting The tension of the tension springs is preset at the factory for weight compensation. Check the final tension nevertheless. The tension is set correctly if the stand frame remains in a balanced state after removing the spacer block.
-
Page 55: Chair Mounting - Left Assembly
Vertical movement may only be undertaken in the extended state. Chair mounting – left assembly Leisegang colposcopes can generally be mounted left or right on an examination chair; this does depend on the model of chair, however. For clarification, please contact your chair manufacturer. -
Page 56: Special Mounts
A s s e m b l y Special mounts 3. Stick in the conical insert and leave the stand for at least 12 h: 4. Proceed as described in section 6.1.2 Swing-o-matic stand or 6.1.3 Balance-o-matic stand. Special mounts Please refer to the accompanying brief description for assembling special mounts. -
Page 57: Tray
A s s e m b l y Tray Tray • The tray is only mountable on the swing-o-matic or balance-o-matic stands, not on the upright stand. • The tray can only be mounted on a swivel-o-mount stand on a chair under certain circumstances. -
Page 58: Keyboard Holder For Panel Pc
A s s e m b l y Keyboard holder for panel PC Keyboard holder for panel PC Additional mounting of a keyboard holder is not possible when mounting the support • arm on a Swing-o-matic stand on a spider base. •... -
Page 59: Canon Eos Digital Single Lens Reflex Camera
A s s e m b l y Cameras for 3ML LED 4. Connect the camera with the laptop using the Mini-USB cable. 5. Check whether the video image is horizontal on the screen. If necessary, check the position of the camera by releasing the knurled screw. - Page 60 A s s e m b l y Cameras for 3ML LED Mounting the spacer Prerequisite: The colposcope is attached to the stand. 1. Using a screwdriver, release the M4x16 countersunk screw which is screwed into the guide piece: 2.
- Page 61 A s s e m b l y Cameras for 3ML LED Mounting the SLR camera 4. Screw the T2 adapter onto the photo tube (1). Attach the photo tube to the camera bayonet (2). Ensure that the two red marking points coincide at the top.
-
Page 62: Care, Maintenance, Inspection
C a r e , m a i n t e n a n c e , i n s p e c t i o n Care Care, maintenance, inspection Care WARNING Injury through electric shock The power supply is not protected against ingress of water. The ingress of liquid can cause an electric shock. - Page 63 C a r e , m a i n t e n a n c e , i n s p e c t i o n Care Optics CAUTION Damage to the optics Cleaning and disinfection is carried out as with the colposcope and stand.
-
Page 64: Maintenance
Maintenance Maintenance Leisegang colposcopes are easy to care for, contain no wearing parts and require no preventive maintenance within the defined expected service life. Inspection Before use, the devices should be checked by the user for visible damage. An inspection of... -
Page 65: Repair
R e p a i r Replacing the tension wire (cable pull) on the spider base Repair Replacing the tension wire (cable pull) on the spider base Prerequisite: The balance-o-matic stand is mounted on a spider base or an ... - Page 66 R e p a i r Replacing the tension wire (cable pull) on the spider base 4. Reinsert the latching pin. 5. Unhook the tension wire hook from the mandrel (4): 6. Unscrew the cap (5) together with the cover of the circular spirit level (6).
- Page 67 R e p a i r Replacing the tension wire (cable pull) on the spider base 8. Remove the sticker (10) from the clamp and loosen the two screws (11): 9. Pull up the worm wheel and hold the tension spring (12) in place above the spring shaft (13) with pliers.
- Page 68 R e p a i r Replacing the tension wire (cable pull) on the spider base Inserting the new tension wire 12. Push the bent end of the new tension wire (14) into the hole. Press down slightly so the tension wire can run smoothly into the starting groove of the worm wheel: 13.
-
Page 69: Replacing The Eyepiece Cap Upper Parts
R e p a i r Replacing the eyepiece cap upper parts Replacing the eyepiece cap upper parts The upper parts of the eyepiece cap are easy to pull off and press on: Replacing the fuse in the power supply WARNING Injury through electric shock Reaching into the mains connector of the power supply can result in... -
Page 70: Spare Parts
S p a r e p a r t s Spare parts Item Art. no. Specification Power supply LED B0006300 100 V – 240 V, 50/60 Hz, 4 V, 20 W, CE marked, UL approved Power supply LED B0006400 For devices with magnification 3.75x/7.5x/15x 100 V –... -
Page 71: Customer Service
C u s t o m e r s e r v i c e Customer service In case of technical problems, questions or complaints, please contact our Customer Service. Leisegang Feinmechanik-Optik GmbH Leibnizstr. 32 10625 Berlin Tel: +49 30 319 009-0 Fax: +49 30 313 5992 E-mail: sales@leisegang.de... -
Page 72: Keyword Index
K e y w o r d i n d e x Keyword index special mounts ..........56 spider base........... 37 tray .............. 57 Assembly ............37 video camera ..........58 Left assembly ..........46 Patient population ..........6 Care ..............62 Performance characteristics ...... - Page 74 Issued by: LEISEGANG Feinmechanik-Optik GmbH Leibnizstrasse 32 D-10625 Berlin Phone: +49 30 319 009-0 Fax: +49 30 313 5992 E-Mail: info@leisegang.de www.leisegang.de Copyright ©LEISEGANG Feinmechanik-Optik GmbH 2013-2021. Doc. no. K0000761 Revision: 3.0 Issue date 05.2021...
Need help?
Do you have a question about the 1E LED and is the answer not in the manual?
Questions and answers