Table of Contents
Advertisement
For your continued safety and to reduce the risk of injury or electric shock,
please follow all the safety precautions listed below.
• Read all instructions carefully before using the unit and keep them for
future reference.
• Retain the manual. If you pass the unit onto a third party, make sure to
include this manual.
• This appliance is intended for indoor household use and similar
applications such as:
– farm houses and by clients in hotels, motels and other residential type
environment;
– bed and breakfast type environment;
– staff kitchen areas in shops, offices and other working environment;
– catering and similar non-retail applications.
• Ensure that the plug is easily accessible to enable disconnection from
the mains supply.
• If the mains cable is damaged, it must be replaced by the manufacturer,
its service agent or a qualified technician in order to avoid a hazard.
• Choose a location for your unit away from heat sources such as radiators
or fires as refrigerant and vesicant are burnable.
• The unit must be manoeuvred by a minimum of 2 persons.
• This appliance can be used by children aged from 8 years and above
and persons with reduced physical, sensory or mental capabilities or
lack of experience and knowledge if they have been given supervision
or instruction concerning use of the appliance in a safe way and
understand the hazards involved. Children shall not play with the
appliance. Cleaning and user maintenance shall not be made by
children without supervision.
• Children aged from 3 to 8 years are allowed to load and unload
refrigerating appliances.
• Children should be supervised to ensure that they do not play with the
unit.
SAFETY WARNINGS
REFRIGERATOR
1
Advertisement
Table of Contents

Related Manuals for Kenwood KIL60W18


Summary of Contents for Kenwood KIL60W18
- Page 1 SAFETY WARNINGS REFRIGERATOR For your continued safety and to reduce the risk of injury or electric shock, please follow all the safety precautions listed below. • Read all instructions carefully before using the unit and keep them for future reference. •...
- Page 2 • If your unit is fitted with a lock to prevent children being trapped inside, keep the key out of reach and not in the vicinity of the unit. • Do not store explosive substances such as aerosol cans with a flammable propellant in this appliance.
- Page 3 The table below contains general guidelines on the storage of food in the refrigerator (wherever applicable). Refrigerator location Type of food Fridge door • Foods with natural preservatives, such as jams, juices, drinks, condiments. • Do not store perishable foods. Crisper bin (salad bin) •...
- Page 4 The table below contains general guidelines on the storage temperature in each compartment type (wherever applicable). Compartment Storage temperature (°C) Unfrozen Pantry compartments Fresh food Wine storage Cellar Chill compartment Chiller bin Frozen compartments 0-star & ice-making 1-star 2-star 3-star freezer (4-star) •...
- Page 5 WARNING • Keep ventilation openings in the unit enclosure or in the built-in structure clear of obstructions. • Do not use mechanical devices or other means to accelerate the defrosting process, other than those recommended by the manufacturer. • Do not use electrical appliances inside the food storage compartments of the unit, unless they are of the type recommended by the manufacturer.
- Page 6 Need Help with your product? Your product is supported by Knowhow under a Trademark Licence from Fisher & Paykel Appliances Italy SpA. For help or spare parts please call us on: 0344 561 1234 The symbol on the product or its packaging indicates that this product must not be disposed of with your other household waste.
- Page 8 DSG Retail Ireland Ltd (259460) 3rd Floor Office Suite, Omni Park SC, Santry, Dublin 9, Republic of Ireland Manufactured for DSG Retail Limited under Licence from Fisher & Paykel Appliances Italy SpA. DSG Retail Limited is responsible for after sales service. IB safety-Refrigerator-UK-Kenwood-200420V1...
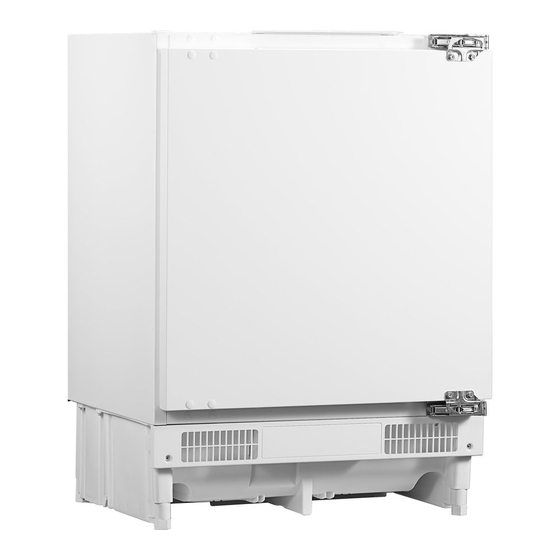
- Page 9 BUILT-IN 60CM WHITE UNDERCOUNTER FRIDGE KIL60W18 installation / instructions manual...
-
Page 10: Table Of Contents
Contents unpacking ..........................3 installation ........................... 4 location ..........................4 levelling the unit ....................... 4 free space requirements ....................4 reversing the door swing ....................5 height regulation ......................7 installation of the unit under the worktop ................. 8 fastening the unit under the worktop ................8 mounting the kitchen cabinet door .................. -
Page 11: Unpacking
Thank you for purchasing your new Kenwood Fridge. These operating instructions will help you use it properly and safely. We recommend that you spend some time reading this installation/instruction manual in order that you fully understand all the operational features it offers. -
Page 12: Installation
installation installation location When selecting a position for your unit you should make sure the floor is flat and firm, and the room is well ventilated with an average room temperature of between 16°C and 38°C. Avoid locating your unit near a heat source, e.g. cooker, boiler or radiator. Also avoid direct sunlight as it may increase the electrical consumption. -
Page 13: Reversing The Door Swing
installation reversing the door swing tools required: Philips style screwdriver / Flat bladed screwdriver / Hexagonal spanner • Ensure the unit is unplugged and empty. • To take the door off it is necessary to tilt the unit backwards. You should rest the unit on something solid, e.g. - Page 14 installation 4. Remove the door while supporting the bottom of the door. Be careful with the hinges. 5. With the hinges open, undo the screws holding them to the cabinet. Be careful with the hinges, use a long shafted screwdriver if you have one.
-
Page 15: Height Regulation
installation 8. With the door closed, check that the door is aligned horizontally and vertically and that the seals are closed on all sides before finally tightening the bottom hinge. Re-adjust the levelling feet as needed. • Do not lay the unit flat as this may damage the coolant system. •... -
Page 16: Installation Of The Unit Under The Worktop
installation installation of the unit under the worktop fastening the unit under the worktop Screw the unit to the worktop using the screws provided (3 x ST4.2 screws). Remember to drill the holes. If the appliance is placed under a continuous worktop, a ventilation grille of at least 200 cm (available from DIY shops or specialist retailers) should be installed (if applicable) to the worktop above the rear of the appliance to increase ventilation. -
Page 17: Mounting The Kitchen Cabinet Door
installation mounting the kitchen cabinet door 1. Fit both the double threaded bolts to the top of the fridge door. Leave a gap of 2mm between the double threaded bolt and the top of the fridge door. Double Double Threaded Bolt Threaded Bolt Fridge Door Fridge Door... - Page 18 installation 4. Fit the lower connecting blocks to the bottom of the fridge door. Fridge Door Lower Connecting Block Bolt 5. Hang the aesthetic door onto the fridge door. Aesthetic Door Fridge Door 6. Align the door by adjusting the double threaded bolts.
-
Page 19: Cleaning Before Use
installation 8. Fit the covers at the top of the domed headed nuts. Cover 9. Insert the washers, if the thickness of the aesthetic door is between 15-18mm. Fridge Door Washer Aesthetic Door Washer 10. Open the fridge door and screw the Aesthetic Fridge Door bottom of the aesthetic door to the... -
Page 20: Product Overview
product overview main unit Upper Fridge Door Balcony Temperature Regulator Cover Upper Fridge Door Balcony Adjustable Glass Shelf Lower Fridge Door Balcony Salad Bin Cover Salad Bin Bottom Wire Rack Egg Tray All accessories such as drawers, shelves and balconies should be kept like the diagram here for the most efficient use of energy. -
Page 21: Operation
operation switching on your unit 1. Connect the mains cable to the mains socket. The internal temperature of your unit is controlled by a thermostat. Position 7 is the coldest and position 0 turns the unit off. 2. Adjust the thermostat control dial to the desired position, bear in mind that the higher the number, the lower the temperature. -
Page 22: Cleaning
of the unit are kept cool. • To prevent transfer of flavours and drying out, pack or cover the food separately. Fruit and vegetables do not need to be wrapped. • Always let pre-cooked food cool down before you put in the unit. This will help to maintain the internal temperature of the unit. -
Page 23: Care When Handling / Moving Your Unit
care when handling / moving your unit Hold the unit around its sides or base when moving it. Under no circumstances should it be lifted by holding the edges of the top surface. servicing The unit should be serviced by an authorised engineer and only genuine spare parts should be used. - Page 24 IB-KIL60W18-200703V3...
Need help?
Do you have a question about the KIL60W18 and is the answer not in the manual?
Questions and answers