Table of Contents
Advertisement
Quick Links
USE AND CARE GUIDE
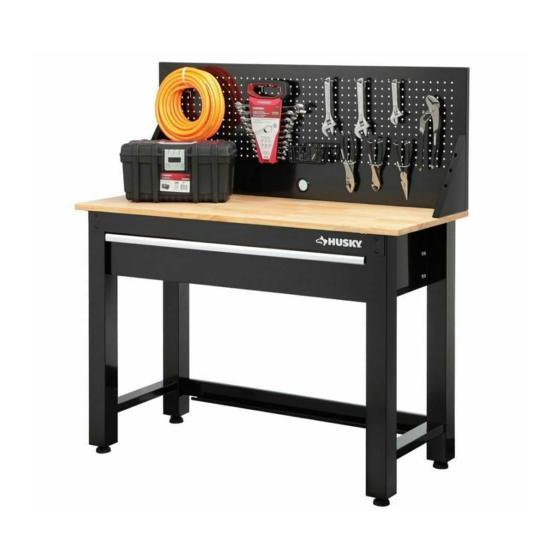
48 IN. WORKSTATION
Questions, problems, missing parts?
Before returning to the store, call
Husky Customer Service
8 a.m. - 5 p.m., EST, Monday - Friday
1-888-HD-HUSKY
WWW.HUSKYTOOLS.COM
Due to continuing improvements,
the actual product may differ slightly
from the product described herein.
We appreciate the trust and confidence you have placed in Husky through the purchase of this workstation. We strive to continually create
quality products designed to enhance your home. Visit us online to see our full line of products available for your home improvement needs.
THANK YOU
Thank you for choosing Husky!
Item # 1002 276 009
Model # G4801S-US
Advertisement
Table of Contents

Subscribe to Our Youtube Channel
Related Manuals for Husky G4801S-US


Summary of Contents for Husky G4801S-US
- Page 1 THANK YOU We appreciate the trust and confidence you have placed in Husky through the purchase of this workstation. We strive to continually create quality products designed to enhance your home. Visit us online to see our full line of products available for your home improvement needs.
-
Page 2: Table Of Contents
This full warranty gives you specific rights, and you may also have other rights, which vary state to state. Contact the customer service team at 1-888-HD-HUSKY or visit www.huskytools.com. Specifications Maximum load for wood top 1500 lbs. -
Page 3: Pre-Installation
PACKAGE CONTENTS Part Description Quantity Wood top Left bench leg Left slide Drawer front panel Drawer panel Right slide Front stiffener Back stiffener Right bench leg Right side bracket Pegboard Left side bracket WWW.HUSKYTOOLS.COM Please contact 1-888-HD-HUSKY for further assistance. -
Page 4: Assembly
Assembly NOTE: Assemble on a flat surface. A piece of cardboard is recommended to keep the product from being scratched during assembly. Please wear gloves during the whole assembly process. ATTACH THE BENCH LEGS AND BACK STIFFENERS NOTE: The back side of the bench leg is the side with four holes, two at the top part and two at the bottom part. - Page 5 Repeat the same procedure to install the other left slide (C) to the left bench leg (B) and two right slides (F) to □ the right bench leg (I). Front Back Left slide Front Back Right slide WWW.HUSKYTOOLS.COM Please contact 1-888-HD-HUSKY for further assistance.
- Page 6 Assembly (continued) ASSEMBLE THE DRAWER NOTE: Make sure your platform is free of debris or the drawer bottom is protected before laying the drawer on its bottom. Step 1 : Lay the drawer panel (E) on its bottom. The bottom side is the side with stiffeners. Bottom Step 2 Bend up the side panels upright to 90°...
- Page 7 : Fasten the drawer front panel (D) and side panels together by screwing six M4 x 6 Phillips pan head tapping bolts (CC) through the side panels to the drawer front panel (D). NOTE: At this step, DO NOT use power tool. Please use Phillips screwdriver by hand. Otherwise product damage may be caused. WWW.HUSKYTOOLS.COM Please contact 1-888-HD-HUSKY for further assistance.
- Page 8 Assembly (continued) Step 7 : Bend inwards all the clips at the bottom of the drawer front panel (D) by 90° with the help of a screwdriver. ATTACH THE DRAWER Attach the drawer to the slides by sliding the slots at the drawer’s side panels onto the upright clips of the slides. □...
- Page 9 (B & I) to the two bottom sides of the wood top. Tighten securely. back Back of wood top with eight rivet nuts on top surface front back bottom front WWW.HUSKYTOOLS.COM Please contact 1-888-HD-HUSKY for further assistance.
- Page 10 Assembly (continued) SECURE THE WOOD TOP □ Turn over the bench with a soft mat underneath for protection. Pull out the drawer completely. □ □ Secure the wood top to the bench frame with four M6 x 16 hex socket head screws head (AA). TURN OVER THE BENCH Close the drawer and turn over the bench.
- Page 11 Attach the pegboard (K) to the side brackets (J & L) and wood top (A) with eight M6 x 16 hex socket head screws (AA). □ Tighten securely. Tighten the screws for the side brackets securely. □ WWW.HUSKYTOOLS.COM Please contact 1-888-HD-HUSKY for further assistance.
-
Page 12: Drawer Removal
Drawer Removal □ Pull the drawer out until it is extended to the maximum. There are two black release levers: one on each side of the drawer. Pull one up while you push the other one down simultaneously. At the same time, pull the drawer out of the drawer slides. □... - Page 13 Questions, problems, missing parts? Before returning to the store, call Husky Customer Service 8 a.m.-5 p.m., EST, Monday-Friday 1-888-HD-HUSKY WWW.HUSKYTOOLS.COM Retain this manual for future use.
Need help?
Do you have a question about the G4801S-US and is the answer not in the manual?
Questions and answers