Table of Contents
Advertisement
Available languages
Available languages
Advertisement
Table of Contents

Related Manuals for HD Radio SANGEAN HDR-15


Summary of Contents for HD Radio SANGEAN HDR-15
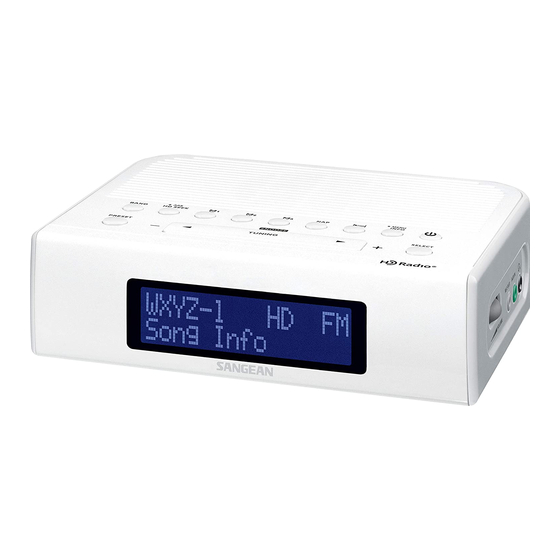
- Page 1 HDR-15 HD RADIO / FM RDS / AM Digital Radio 01 - 18 19 - 37 3A81d40S10030...
- Page 2 HD Radio technology manufactured under license from iBiquity Digital Corporation. U.S. and Foreign Patents. HD Radio™ and the HD, HD Radio and “Arc” logos are proprietary trademarks of iBiquity Digital Corp. For United States: Cautions to the user The changes or modifications not expressly approved by the party responsible for compliance could void the users authority to operate the equipment.
- Page 3 Please note not all AC adapters are alike. The AC adapter that is included with this radio is designed to be used exclusively with this device. Do not use an AC adapter that differs from the specifications on the AC adapter that is included. If an AC adapter is NOT included with your radio and in order not to damage the unit and void your warranty, specifications for the AC Adapter are stated on the final page of the manual, or please contact Sangean for the correct AC Adapter and specifications.
- Page 4 Controls Top view Speaker Band button Preset button HD Seek / APS button Alarm 1 button Alarm 2 button Tuning up / down / Snooze button Alarm 3 button Front view Nap timer button Sleep timer button Info / Menu button Select button Power button Right view...
-
Page 5: Using The Ac Power Adaptor
Using the AC power adaptor The AC power adaptor required for this unit should be 6 volts DC at 2A center pin positive. Insert the adaptor plug into the DC socket on the rear of the radio. Plug the adaptor into a standard AC outlet. -
Page 6: Setting The Clock Manually
Setting the clock manually When choosing manual setting as the clock time setting of your radio, the “RBDS Auto CT” function will be disabled. Press and hold the Menu button to enter the menu setting and then press the Tuning up / down button to select “Clock”. -
Page 7: Manual Tuning - Fm / Am
Tuning region Your radio can be configured for any one of the four international tuning regions. Press the Power button to switch on your radio. Press the Band button to select your required frequency band. Press and hold the Menu button to enter the menu setting and then press the Tuning up / down button to select “Region”. -
Page 8: Presetting Stations
“Force Mono”. Press the Select button to enter the setting. Press the Tuning up / down button to select the “Mono” or “Stereo”. Press the Select button to confirm the setting. NOTE FM stereo is only available via earphones or in HD Radio mode. - Page 9 Receiving HD Radio stations When the radio is tuned to an HD Radio station, the HD Radio logo will flash in the display, indicating that the signal is blending from analog to digital. Once the receiver acquires the HD Radio signal, the HD Radio logo will remain solid on the screen.
- Page 10 Emergency alert (EA) Emergency Alerts (EA) is a warning system used by broadcasters to notify listeners about potential hazardous situations related to extreme weather, floods, and infrastructure failures, amber alerts (child abductions), and more. Your Radio must be in a location that allows for adequate reception of audio and data services and tuned to a station that provides the Emergency Alerts.
- Page 11 Select button to change your setting. After completing your EA setting, it is necessary to tune to an HD Radio station (AM or FM) which supports Emergency alerts (it is indicated with a symbol “a” on the top of the screen), in order to receive an alert.
-
Page 12: Display Options
Indicators for Emergency alerts Your radio may display various EA indicators on the display. Emergency Alerts indicator Emergency Alerts feature is disabled Exclamation mark (!) Symbol (a) Current station supports Emergency Alerts Symbol (i) Emergency Alerts message “ignored” Symbol (s) Emergency Alerts message “snoozed”... -
Page 13: Setting The Alarm Clock
HD Radio status Press and release the Info button to cycle through the various options. Plus (+) indicator: additional HD Radio stations are available Current station supports Multicast set index Emergency Alerts HD Radio indicator Time Station name Preset number... -
Page 14: When The Alarm Sounds
Press the Tuning up / down button to select “On” or “Off”. If “Off” is selected any current setting for that alarm will be cancelled. With “On” selected, press and release the Select button to enter the “A1 time” (for example) setting. The alarm hour digits will flash on the display. Press the Tuning up / down button to choose the desired hour for the alarm and press the Select button to cause the minute digits to flash on the display. -
Page 15: Sleep Timer
Disabling / canceling alarm setting To cancel the alarm setting before the alarm sounds, press and release the corresponding alarm button to select “Off”. The alarm indicator will disappear from the screen and the chosen alarm will now be disabled. Snooze The buzzer or radio alarm can be silenced for 5 minutes by pressing tuning up / down button. -
Page 16: Dimmer Control
Dimmer control The brightness of the display may be adjusted. Press and hold the Menu button to enter the menu setting. To adjust the brightness level of the LCD display when the radio is in power on mode or standby mode, press the Tuning up / down button to select “Power On Dimmer”... -
Page 17: Auxiliary Input Socket
Auxiliary input socket A 3.5mm Auxiliary input socket is provided on the right hand side of your radio to permit an audio signal to be fed into the unit from an external audio device such as an iPod, MP3 or CD player. Press the Power button to switch on your radio. -
Page 18: Charging With Usb Socket
Charging with USB socket Your radio has a USB socket which is intended for charging an iPhone, smart phone or similar devices. Charge time may vary and in some cases may take longer to charge than when using the manufacturers charging unit supplied with the smart phone. The radio can charge the iPhone, smart phone or similar devices when the radio is in power on or standby mode. -
Page 19: Specifications
Specifications Power requirements AC 100~240 volts, 50Hz-60Hz,DC 6V 2A only Power Supply (switching adaptor) Frequency Coverage Region A (Most countries) Region A (Philippines, Romania) FM: 87.5-108, 100kHz AM: 522-1710, 9kHz Region B (US, Mexico, Canada) Region B (US, Mexico, Canada) FM: 87.5-107.9, 200kHz AM: 520-1710, 10kHz Region C (Most countries) - Page 20 Tecnología de HD Radio fabricada bajo licencia de iBiquity Digital Corporation. Patentes estadounidenses y extranjeras. HD Radio™ y los logos de HD, HD Radio y de los "arcos" son marcas registradas de iBiquity Digital Corp. Para usuarios de los EE.UU.:...
- Page 21 Tenga en cuenta que no todos los adaptadores de CA son iguales. El adaptador de CA incluido con esta radio está diseñado para ser usado exclusivamente con este dispositivo. No use un adaptador de CA que difiera de las especificaciones del adaptador de CA incluido.
- Page 22 Controles Vista superior Altavoz Botón de banda Botón de presintonía Botón de búsqueda HD / APS Botón de alarma 1 Botón de alarma 2 Botón de sintonizar hacia arriba / abajo / posponer Botón de alarma 3 Vista frontal Botón de siesta Botón de apagado automático Botón de información / menú...
- Page 23 Usando el adaptador de corriente de CA El adaptador de corriente de CA requerido para esta unidad debe ser de 6 voltios de CC en 2 A, pin central positivo. Inserte la clavija del adaptador en la toma de CC en la parte posterior de la radio.
- Page 24 Configurar el reloj de forma manual Cuando seleccione la configuración manual de la del reloj de su radio, la función “RBDS Auto CT” se desactivará. Mantenga presionado el Botón de menú para entrar al menú de configuración y a continuación, presione el Botón de sintonizar hacia arriba / abajo para seleccionar "Clock"...
- Page 25 Región de sintonización La radio se puede configurar para cualquiera de las cuatro regiones internacionales de sintonización. Presione el Botón de encendido para encender la radio. Presione el Botón de banda para seleccionar la frecuencia de banda deseada. Mantenga presionado el Botón de menú para entrar al menú de configuración y a continuación, presione el Botón de sintonizar hacia arriba / abajo para seleccionar "Region"...
- Page 26 Presione el Botón de sintonizar hacia arriba / abajo para seleccionar "Mono" o "Stereo" (estéreo). Presione el Botón de seleccionar para confirmar los ajustes. NOTA El modo estéreo solo está disponible a través de auriculares o en el modo HD Radio.
- Page 27 NOTA El número máximo de presintonías es de 20 para cada banda de HD Radio FM y AM. Si durante el uso de la función APS se encuentran más de 20 emisoras (HD Radio FM o AM), solo las 20 más fuertes se guardarán en las presintonías de memoria.
- Page 28 Alerta de emergencia (AE) Las Alertas de emergencia (AE) (Emergency Alerts (EA)) es un sistema advertencia usado por las emisoras para notificar a los oyentes acerca de posibles situaciones de riesgo relacionadas con condiciones meteorológicas extremas, inundaciones, fallos de infraestructura, alertas ámbar (secuestro de niños) y más.
- Page 29 Si desea recibir una AE en modo de espera, asegúrese de que la radio está en un entorno en el que pueda recibir señales de transmisión de HD Radio adecuadamente. Volumen de las alertas Para ajustar el volumen de las alertas, mantenga presionado el Botón de menú...
- Page 30 Posponer e ignorar una AE Una vez que la alarma se ha activado, la AE permanecerá en la pantalla hasta que el usuario la posponga o ignore pulsando cualquier botón. La Alerta de emergencia se mostrará en el “Emergency Alerts History” (historial de alertas de emergencia) tras ser pospuesta o ignorada. Posponer una AE: Presione y suelte cualquier botón que no sea el Botón de encendido para que la AE se posponga cada 10 minutos.
- Page 31 Indicador de la hora del reloj RDS Indicador de intensidad de la señal b. Estado de HD Radio Presione y suelte el Botón de información para desplazarse por las diferentes opciones. Indicador más (+): emisoras de HD Radio adicionales disponibles Índice de conjuntos...
- Page 32 Configurar la alarma del reloj La radio tiene 3 alarmas que pueden ser usadas para despertarle usando la radio FM, AM o un zumbador. Cada alarma puede ajustarse para que suene una vez, diariamente, de lunes a viernes o los fines de semana. Asegúrese de que la hora está ajustada correctamente antes de establecer las alarmas.
-
Page 33: Apagado Automático
Presione el Botón de sintonizar hacia arriba / abajo para seleccionar el volumen deseado y presione el Botón de seleccionar para confirmar los ajustes. La radio mostrará "Alarma 1 guardada" (por ejemplo) y saldrá de la pantalla de configuración de la alarma. -
Page 34: Control De Atenuación
Presione el Botón de seleccionar para confirmar los ajustes. Cuando el ajuste de apagado automático esté activo, en pantalla se mostrará "S". La radio se pondrá en modo de espera una vez transcurrido el tiempo preestablecido. Para ver el tiempo restante del ajuste de apagado automático, mantenga presionado el Botón de apagado automático. -
Page 35: Toma De Entrada Auxiliar
Contraste El contraste de la pantalla puede ajustarse. Mantenga presionado el Botón de Menú para entrar al menú de configuración. Presione el Botón de sintonizar hacia arriba / abajo para seleccionar "Set Contrast" (establecer contraste) y presione el Botón de seleccionar para entrar a la configuración. Presione el Botón de sintonizar hacia arriba / abajo para ajustar el contraste. -
Page 36: Versión Del Software
Presione el Botón de encendido para encender la radio. Conecte una fuente de audio estéreo o mono (por ejemplo, un iPod o un reproductor de MP3 o CD) a la toma de entrada auxiliar (marcada como "AUX IN"). Presione el Botón de banda para seleccionar el modo AUX IN (entrada auxiliar), en pantalla se mostrará... - Page 37 Carga con la toma USB La radio tiene una toma USB destinada a la carga de un iPhone, smartphone o dispositivos similares. El tiempo de carga puede variar y en algunos casos puede llevar más tiempo que cargar el dispositivo con la unidad de carga del fabricante que se suministra con el smartphone.
-
Page 38: Especificaciones
Especificaciones Requisitos de alimentación CA 100~240 voltios, 50Hz-60Hz, CC 6V 2A solo Fuente de alimentación (adaptador de conmutación) Cobertura de frecuencia Región A (la mayoría de los países) Región A (Filipinas, Rumanía) FM: 87.5-108, 100kHz AM: 522-1710, 9kHz Región B (EE.UU., México, Canadá) Región B (EE.UU., México, Canadá) FM: 87.5-107.9, 200kHz AM: 520-1710, 10kHz...
Need help?
Do you have a question about the SANGEAN HDR-15 and is the answer not in the manual?
Questions and answers
trouble figuring out how to set alarms...print too small for my old eyes.
To set alarms on the SANGEAN HDR-15 HD Radio:
1. Select "On" or "Off" for the alarm. Choosing "Off" cancels any current setting.
2. With "On" selected, press and release the Select button to set the alarm time.
3. The alarm hour digits will flash. Press the Tuning up/down button to choose the hour, then press Select.
4. The minute digits will flash. Press the Tuning up/down button to choose the minutes, then press Select.
5. Choose the alarm frequency: Daily, Weekends, Weekdays, or Once, using the Tuning up/down button, then press Select.
6. Choose the alarm source (Buzzer, FM, or AM) using the Tuning up/down button, then press Select to confirm.
This answer is automatically generated