
Subscribe to Our Youtube Channel
Related Manuals for Aqua Control AQUATIC 1HP FUSION Series

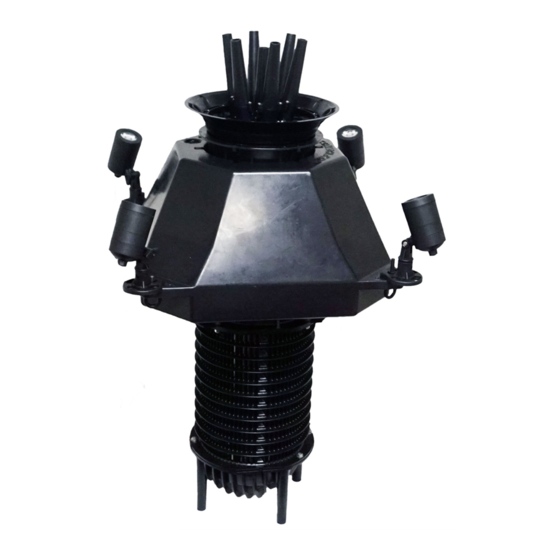
Summary of Contents for Aqua Control AQUATIC 1HP FUSION Series
- Page 1 1HP & 2HP FUSION Series Owner’s Manual Aquatic Technologies 41 Yazaki Way, Carrum Downs VIC 3201 Ph: (03) 9071 2442 aquatictechnologies.com.au 1HP & 2HP Fusion Series Owner’s Manual...
-
Page 2: Table Of Contents
Parts Included Optional Accessories Aerating Fountain (1) LED Lighting • • Standard Nozzle Package (1) Extended Nozzle Package • • Motor Cord with Quick Disconnect (1) Twister Nozzle Package • • Mooring Rope (30m) • Mooring Stakes (2) • Safety Instructions IMPORTANT: Reading and understanding the instructions and warranty disclaimer are necessary prior to product installation and operation. -
Page 3: Nozzle Build
NOZZLE BUILD TIPS AND W ARNINGS • All nozzle builds are in Appendix A • When building the Nozzle, it is best to work from inside out to provide room to work. • Center Nozzle will always be installed last. Im portant N otice on the FU SIO N Series M ulti-N ozzle Com ponents Carry No W arranty W hen Assem bled Im properly This Innovative Multi-Nozzle Casting was designed to offer you the flexibility to switch spray... - Page 4 M ooring R ope and O ptional L ight Set Installation Step #1 Fasten mooring rope to the large holes on two opposing sides of the float. Make sure to place the knot onthe bottom side of the float as to notinterfere with the light bracket.
- Page 5 1 - S t a g e or 2-Stage Fusion Pum p Parts L ist ITEM NO. PART NUMBER DESCRIPTION QTY. BOLT 1-STAGE 80BH-0.25X3.50 1/4-20x3.5” HEX HEAD 14 2-STAGE 80BH-0.25X6.00 1/4-20x6” HEX HEAD 16 80WL-0.25 1/4” LOCK WASHER 75 80WF-0.25-N 1/4”...
- Page 6 Vertical Parts List ITEM NO. PART NUMBER DESCRIPTION QTY. 41-FLARE FLARE 41-BASE MULTI NOZZLE BASE 41-OF OUTFLOW FLOAT FUSION FLOAT 0.5HP -1.0HP 41-FLOAT-S FUSION FLOAT - SMALL 1.5HP -2.0HP 41-FLOAT-L FUSION FLOAT - LARGE PUMP ASSEMBLY - SEE PAGE 6 MOTOR ASSEMBL 0.5HP 52MA2-0.511-L2...
-
Page 7: Troubleshooting Guide
Fusion Series T roubleshooting G uide TROUBLE CHECK POSSIBLE SOLUTIONS Cord must be plugged into a 3-wire outlet Not plugged in that is protected by a GFCI (Ground Fault Circuit Interrupter). Reset GFCI/RCD. If GFCI/RCD will not reset or trips immediately, unplug the pump &... - Page 8 A ppendix A Standard N ozzle Package: Cluster Arch ..............A1 Daffodil ................A2 Flare ................... A3 Lily ..................A4 Super Lily ................A5 Tornado ................A6 1HP & 2HP Fusion Series Owner’s Manual Page 8...
-
Page 9: Cluster Arch
Fusion Series: CLUSTER ARCH 10° Elbow .6 Nozzle Tip Parts Needed: .5 Nozzle Tip Flare Attachment Nozzle base Screw Center Bolt Rubber Plug x1 2. Install Flare: 1. Assemble Nozzle Groups: 2x Screw Make sure that the Flare .5 Nozzle Tip is installed in the down position(It should be shipped this way already) -
Page 10: Daffodil
Fusion Series: DAFFODIL Parts Needed: .6 Nozzle Tip Flow Stopper x12 Nozzle base 1x Flare Attachment (already installed) Screw 1.25 OD Washer Bolt 1. Attatch Flare to Nozzle Base: Remove the Flare(which is shipped upside down), flip it as shown and secure with 12 x screws 2. -
Page 11: Flare
Fusion Series: FLARE Parts Needed: .6 Nozzle Tip Flow Stopper x12 Nozzle base Rubber Plug x1 1x Flare Attachment (already installed) Screw 1.25 OD Washer Bolt 1. Attatch Flare to Nozzle Base: Remove the Flare(which is shipped upside down), flip it as shown and secure with 12 x screws 2. -
Page 12: Lily
Fusion Series: LILY 10° Elbow Parts Needed: .6 Nozzle Tip .5 Nozzle Tip 1.25 OD Washer Nozzle base Flow Stopper Flare Attachment Screw Center Bolt Rubber Plug x1 2. Install Flare: (flare is shipped upside 1. Assemble Nozzle Groups: down, remove first) 12x Screw 2x Screw Flare... -
Page 13: Super Lily
Fusion Series: SUPER LILY Parts Needed: .6 Nozzle Tip 10° Elbow .5 Nozzle Tip 1.25 OD Washer Nozzle base Flare Attachment Screw Center Bolt Rubber Plug x1 2. Install Flare: 1. Assemble Nozzle Groups: (flare is shipped upside down, remove first) 12x Screw 2x Screw Flare... -
Page 14: Tornado
Fusion Series: TORNADO Parts Needed: .6 Nozzle Tip Flow Stopper x12 Rubber Nozzle Base Plug x1 1.25 OD Washer Screw Bolt 1. Remove Flare from Nozzle Base: Remove the Flare from the Nozzle base, set aside. (Save for use with other patterns) 2.
Need help?
Do you have a question about the AQUATIC 1HP FUSION Series and is the answer not in the manual?
Questions and answers