Table of Contents
Advertisement
Quick Links
Advertisement
Table of Contents

Related Manuals for Oberheim Matrix-6R


Summary of Contents for Oberheim Matrix-6R
- Page 2 What other keyboards or related products do you plan on purchas- Oberheim? ing? What do you expect to spend on these purchases? What products would you like to see Oberheim produce in the Is music your primary source of income? OYes 1, 2, Please indicate in order of importance (i.e.,...
- Page 3 Oberheim warrants this Product, when purchased at an Authorized OF THE EXPRESS WARRANTY HEREIN. OBERHEIM HEREBY Oberheim Dealer, to be free of defects in materials or workmanship for a period of months from the date of purchase. Warranty service is...
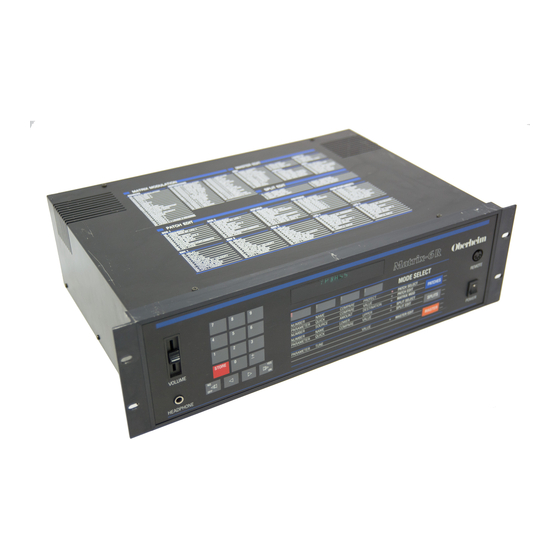
- Page 4 ITfi�=® fil Oberheim � MODE SELECT NUMBER NAME COMPARE PROTECT PATCH SELECT PARAMETER QUICK COMPARE VALUE PATCH EDIT NUMBER SOURCE AMOUNT DESTINATION MATRIX MOO NUMBER NAME LOWER UPPER SPLIT SELECT VOLUME PARAMETER QUICK COMPARE VALUE SPLIT EDIT...
- Page 5 © 1986 OBERHEIM - A Division of E.C.C. Development Corporation 11650 Olympic Boulevard, Los Angeles, California 90064 All Rights Reserved. Reproduction in Whole or in Part is Prohibited Without Permission.
-
Page 6: Table Of Contents
Modes of the MATRI X MOD Page SPLITS Modes of the S PLIT SELECT Page Modes of the SPLIT EDIT Page MASTER Part 3: USING THE EDIT PAGES PROGRAMMING THE MATRIX-6R PATCH EDIT Page The DCOs VCF / VCA FM / Track Ramp I Portamento... - Page 7 Using MATRIX MODULATION™ MASTER EDIT Page M IDI Cassette Vibrato M isc. SPLIT EDIT Page Part CREATING A PATCH IF YOU HAVE A PROBLEM Part 5: WARRANTY 1 05 Matrix-GR Owner's Manual...
-
Page 8: Welcome To The Matrix·6R
Congratulations! You are now the owner of a powerful and versatile G-Voice polyphonic synthesizer of outstanding features and value. Based upon the TO THE same revolutionary technology as the Oberheim MATRIX-G, the MATRIX MATRIX-GR GR utilizes all of its sound programming, performance and M IOI features in a low-cost, rack-mountable unit. -
Page 9: Playing The Matrix·6R
PLAYING THE MA TRIX-6R WHAT TO DO If you absolutely MUST start now, take the next five minutes and read the following: IF YOUR I N A HOOK IT UP Refer to the HOOK-UP diagram shown on Page 8. HURRY Make sure you use the right cables. - Page 10 PROGRAMMING If you want to change ("EDIT") a patch, you must turn M EMORY PROTECT on the back panel OFF o r permanent changes cannot take place. I n addition, patches can be protected individually. The PROTECT button in the MODE SELECT section of the front panel must also be turned OFF for each patch that you want to alter permanently.
- Page 11 MIDI IN IJDIJDIJO CCDCDO caaaao MIDI Sequencer ..•••• c:icc::ci CJCCJCI - MIDI • Matrix-6R TRIGGER Matrix-6R (Q)lbl�rrlln�D.rnm m Iii m mmum - 1111 11 1 - - MODE SELECT [fill •mm EJ[[IEJmfl RIGHT PEDAL AUDIO LEFT MONO CONNECTION •...
-
Page 12: Basic Hook-Up
PLAYING THE MA TRIX-6R RACK MOUNTING BASIC HOOK-U P The MATRIX-GR is designed primarily to be used in a standard 1 9" rack mount cabinet. All that you will need to install your MATRIX-GR is a Phillips Head screwdriver. All of the necessary mounting hardware is provided with your Owner's Packet. - Page 13 Should your MATR IX-GR need servicing , do not attempt repairs yourself. Refer to the section in the back of this manual titled IF YOU HAVE A PROBLEM and contact your nearest Oberheim Authorized Service Center. A current roster of Service Centers is included in the Owner's Packet along with this manual.
-
Page 14: Touring The Matrix·6R 1
TOURING THE MA TRIX-6R �(ID[lfr I n o rder to gain a better u nderstanding of the numerous capabilities of your � � MATRIX-GR, we've prepared a short tou r of Its general fu nctions that will [F�©[N]u � give you a good u nderstanding of what the synthesizer is able to accomplish and how Its front, top and back panels are laid out. -
Page 15: 2 Remote
This female receptacle is used to interface the MATR IX-SR with �s Remote Programmer. The Oberheim MATRIX-SR remote controller makes programming the MATRIX-6R much easier when it has been installed in a rack cabinet. The MATRIX-SR remote controller is available from your Authorized Oberheim Dealer as an optional accessory. -
Page 16: 3 Cassette
An important note in operation of PEDAL 1 is that in order to use the pedal properly, you must connect the footpedal and place its maximum OFF position each time before you power the MATR IX-GR ON. You must also place the pedal all the way OFF each time the MATRIX-GR is Tuned or Calibrated. -
Page 17: 4 Memory Protect
MIDI I N is used when the MATRIX-6R is being controlled as a Slave by another M IDI instrument or controller. I n order to play the MATRIX-6R at all, you must connect a M aster controller to the M I D l lN. -
Page 18: 5 Using The K Eypad
TOURING THE MA TRIX-6R �®rru �� The Keypad and MODE SELECT buttons are used in conjunction with each other to aid you in "getting around" the MATRIX-GR. The MODE SELECT ��W�i%[Q) section tells the Keypad what particular job it will do in enabling you to change from one patch to another, edit a patch, use the MATR IX lMJ©[Q)�... - Page 19 MATRIX-GR w het her you are ready to proceed or not. For functions t hat have ON or OFF c hoices, t hese buttons are used for t hat purpose as well. Matrix-6R Owner's Manual...
- Page 20 Pressing t he PATC HES button repeatedly will loop t hroug h t he t hree Pages from top to bottom. Sp lit Select SPLITS Split Edit Pressing t he SPLITS button repeatedly will switc h back and fort h between t he two modes. MASTER Master Edit Matrix-6R Owner's Manual...
-
Page 21: Buttons
Using the MODE SELECT Buttons In using t he MODE SELECT section, you may want to t hink of it as a "grid" w here all t he possible controls are located. T he t hree buttons to t he rig ht of t he grid titled PATCHES, SPLITS and MASTER select w hic h main Page of functions you are using, indicated by t he adjacent LED. -
Page 22: 9 Patches
Fu nctions of the MODE SELECT Section T he following descriptions explain t he various functions of t he MODE S ELECT section: PATCHES Modes of the PATCH SELECT Page 1 . N U M BER Typing in a 2-digit number or using t he < > or << >> buttons on t he Keypad will enable you c hange from one patc h to anot her from among t he MATRIX-GR' s 1 00 patc h memories, nu mbered 00 t hroug h 99. -
Page 23: Modes Of The Patch Edit Page
This mode allows you to select any one of the 96 fu nctions of the MATRIX-GR that deal with the basic sound of a patch. These PARAMETERS are printed on the MATRIX-6R's front panel for convenience u nder the heading PATCH EDIT and numbered 00 through 98. - Page 24 T he COM PARE button LED will lig ht to remind you t hat you are comparing. You can also listen to t he original patc h because t he MATRIX-6R will recall it from memory during t he COMPARE process. Playing notes from t heM aster controller allows you to hear t he patch in its original state.
- Page 25 assigned a negative amount, in order to invert t heir effect, so t hat t heir ranges go from -63 to +63. T he Keypad is used to select t he numerical VALUE. T he O t hroug h 9, < > or << >> buttons are used to c hange from one VALUE to anot her.
-
Page 26: Modes Of The Matrix Mod Page
SOURCE. Using the Keypad's 0-9, < > or << » buttons will permit changes from one SOURCE to another from among the MATRIX-6R's possible 20 modulation SOURCES, numbered 01 through 20. -
Page 27: Splits
Creating and editing a MATRIX MOD combination, as well as deleting modulation, has the same function for the DESTINATIONS as the SOU RCEs described above. SPLITS The MATRIX-GR allows you to take any two existing single patches and play them from the Master controller at the same time. This feature provides for some very interesting possibilities because SPLIT Mode permits splitting the Master controller's keyboard even the Master itself does not have this... -
Page 28: Modes Of The Split Edit Page
LOWER I UPPER Patch Assig nments The basic construction of a SPLIT program is in choosing two existing patches from among the MATRIX-6R's 1 00 single patch programs, using one as the LOWER and the other as the UPPER. This is accomplished as follows: 3. -
Page 29: Master
Keypad now operates differently so that the O through 9 buttons change the VALUE only and the < > and << >> buttons select the PARAMETER. 3. COMPARE The COMPARE Mode operates the same as in PATCH ED IT. It allows you to listen to the SPLIT in Its original state before it was edited. - Page 30 I MPORTANT NOTE: You should be careful not to use or disturb the Pedal connected to the PEDAL 1 jack on the MATRIX-6R's back panel during TUNE since it is being recalibrated while the synthesizer is being tuned. 3. VALUE...
-
Page 31: Programming The Matrix-6R
LFO's waveform 1 ao o out of phase. 02 SYNC (DC01 only) 1 2 D ETU N E (DC02 only) These two functions operate the opposite of each other and are described as follows : Matrix-6R Owner's Manual... - Page 32 SYNC, the abbreviation for "synchronize", places both DC Os in close tune with each other by electronically slaving the waveform of DC01 to that of DC02 using three varying degrees of Sync plus OFF : "O " : O F F - SYNC has no effect and the DCOs' waveforms are independent of each other.
- Page 33 05 & 15 WAVE SHAPE If WAVE is selected as the waveform output of the DCOs in 06 & 1 6 WAVE SELECT, this control varies the waveform between a Sawtooth wave (a bright sound used in creating strings and brass patches) and a Triangle wave (a mellower wave used for flutes, etc.).
-
Page 34: Vcf / Vca
08 & 1 8 KEY BOARD / PORTAMENTO Portamento routing to the DCOs is selected in these parameters. Portamento is described as a "sliding" between notes played on from the Master controller. The specific operating parameters of Portamento - its RATE, MOD BY VELOCITY, MODE, and LEGATO select - are programmed in the RAMP I PORTAMENTO Sub-Page discussed later in this section. - Page 35 VCF Parameters 20 BALANCE This is used to set the relative volumes of DC01 and DC02 just before they are sent to the VCF I VCA. VALUE range is from O to +63. You can think of this function as a mix control where a setting of 31 makes the outputs of the two DCOs equal.
- Page 36 22 FREQ MOD BY ENV 1 One of the characteristics of sound as we perceive it is the way in which the harmonics change as the sound occurs. Just listen to the different playing styles of a violin or those of a trumpet. All of the different "personalities"...
- Page 37 BEND permits you to route LEVER1 or the Pithch Wheel to the VCF Frequency so that if you're using LEVER1 to p�ch bend the DCOs, for example, the VC F will also change by a corresponding amount. This keeps the Filter level relative to the DCOs constant no matter what bend amount you're using and the sound of the patch remains the same.
- Page 38 27 VCA 1 VOLUME This first-stage VCA sets the initial output of the patch. VALUE range is O to +63 where O indicates no output or silence and 63 is maximum output. 28 VCA 1 MOD BY VELOCITY One of the more common applications of VELOC ITY is its use in creating loudness dynamics.
-
Page 39: Fm / Track
29 VCA 2 MOD BY ENV 2 This second-stage VCA is used to determine the final output of the patch. As you can see, there is no Volume parameter for VCA2 like there is for VCA 1 . The volume of VCA2 is pre-set to be because its output level is controlled exclusively by Envelope #2. - Page 40 STEP 1 : Perform the PATCH IN ITIALIZE function as described later in the MASTER EDIT MISC. section of the manual. We will need to use the MATRIX-6R's Basic Patch for this experiment. STEP 2 : Enter PATCH EDIT PARAM ETER mode.
- Page 41 The Tracking Generator, like other circuits, has an I N PUT and an OUTPUT. The IN PUT is any one of the MATRIX-6R's modulation sources that you want to change. The OUTPUT is the result of changing the five "Points" in the TRACKING GEN ERA TOR that form a "response curve"...
- Page 42 Thus, the Tracking Generator gives you virtually unlim�ed possibilities when using the MATRIX-6R's modulation sources. Each of the 20 modulation sources can be tailored in 1 ,073,744,824 ways using the five POINT parameters.
- Page 43 To hear exactly what the Tracking Generator can do STEP 1 : without interference from other modulations, set up the MATRIX-6R's Basic Patch from PATCH INITIALIZE. Refer to this function's procedu re in the MASTER EDIT I MISC. section of the manual, on Page 84.
- Page 44 STEP 20: Enter PARAM ETER Mode. STEP 21 : Type in the number "82" and the display reads "LF01 ". This indicates that we are ready to select a waveform that we will manipulate with TRACK. STEP 22: Select the VALUE Parameter. Matrix-6R Owner's Manual...
- Page 45 STEP 23: Press the > button twice to select the Positive-Sawtooth waveform. The display will read " UPSA W " . STEP 24: Go back to PARAM ETER mode. STEP 25: Select LF01 "80 SPEED". STEP 26: Select the VALUE Parameter. STEP 27: Set the LFO's SPEED to "30"...
- Page 46 : : l n p u ��;,;:l= ... . . Troe O O O O O O O O O H O O t H o o o o o o o o U G e n e ro t o r S e t t i ngs>...
- Page 47 ANSWER TO BONUS QUESTION Turning an U PSAW into a DNSAW means that we are intending to reverse or invert the direction of the UPSA W's waveform. To accomplish this, simply set the POINT Values so that the TRAC K's normally positive-linear output is inverted to a negative or inverse-linear output.
- Page 48 NOTE ON NOTE OFF MATR IX-GR is in UNISON (see PATCH Edit Parameter "48 KEYBOARD MODE") or using M I DI MONO (see MASTER Edit Parameter " 1 8 M I DI MONO") . Playing Staccato generates new triggers and playing Legato does not. MTRIG "Multiple Trigger'': The RAM P will be activated any time a new key is played.
- Page 49 Rates even though the RATE Value is set to the same number. This is because PORTAMENTO is calculated by the MATRIX-6R's processor in a slightly different way for each mode. 45 PORT MOD BY VELOCITY The PORTAMENTO RATE can be modulated by Velocity. When this parameter is used, the speed in which notes are played from the Master controller will change the RATE.
- Page 50 This abbreviation stands for "Constant Time" CONS T : Portamento. As with LINEAR, CONST Portamento provides an even transition between notes. The difference is that the MATRIX-GR's processor re-calculates the RA TE depending upon the interval between notes. As an example, n will take the same amount of time to glide between a Root note and ns Major 3rd as n does to glide between the Root and four octaves.
- Page 51 This mode takes the MATRIX-GR out of polyphonic UNISON : mode and makes the synthesizer monophonic. All six Voices play with one note and only one note can be played at a time. This mode has "Low Note Priority" meaning that you play two or more notes at the same time, only the lowest one is heard.
- Page 53 56, 66 & 76 AMP MOD BY VELOCITY The AMPLITU DE of the Envelopes can be increased or decreased by the speed that you play notes on the Master's keyboard assuming, of course, that your Master controller is velocity responsive. VALUE range is from -63 to +G3. O indicates no effect on the output level by VELOCITY.
- Page 54 External Triggers In the MATRIX-GR, External Triggering takes the place of the Master Controller when driving the Envelopes. The trigger source is plugged into the PEDAL 2 jack on the back panel using a standard guitar cord: a 2-conductor, sheilded cable with a 1 /4" plug on the end that goes into the MATRIX-GR.
- Page 55 This mode combines the action of DADR and FREE. If BOTH : BOTH is selected, a DADR mode will complete its cycle (DADR is Gated) even the keys are released before the D ECAY stage is finished. 59, 69 & 79 LFO 1 TRIGGER The Envelopes can also be triggered by a third source: LF01 .
- Page 56 80 & 90 SPEED This parameter sets the LFOs' frequency or rate. VALUE range is from O to +63 where O represents the LFOs' slowest speed and 63 the fastest. LFO 1 : 81 SPEED MOD BY PR ESSU RE LFO 2: 9 1 SPEED MOD BY KEYBOARD The initial speed of the LFOs can be increased or decreased by another source of modulation.
- Page 57 "Noise Moduration": This is also an irregular modulation NOISE signal in many respects similar to RAN DM but sounds like Random Modulation at a much higher speed. As a result, using this wave gives a noisy, harsh effect to the sound, hence the name. Special Modulation "Sampled Modulation": When this is selected, the LFO SAMPL...
- Page 58 84 & 94 AMPLITU D E This sets the output level of the LFO. "Output level" in this case refers to the "intensity" of the LFOs modulation. The higher the VALUE number, the wider the waveform's sweep or "depth" as also called.
- Page 59 The effect of LFO LAG is especially prominent when used to reshape the Square wave because it has two instantaneous transitions - a go o rising edge and a corresponding go o f alling edge. The diagram below shows a "before" and "after'' effect of LAG on a Square wave.
-
Page 60: Ramp I Portamento
That's why we created the MATRIX MOD ULATION™ System. This system permits taking any one of the MATRIX-6R's 20 modulation Sources (most of them we already discovered in the PATCH EDIT Sub-Pages) and routing it to any one of 32 destinations. - Page 61 With the 1 8 permanent and 1 custom modulation routings available, you have a total of 28 modulations per patch - and they're all programmable. You will soon find that the MATRIX-GR gives you incredible flexibility when programming modulation in a patch. What exactly is modulation? To modulate means to "change".
- Page 62 A wider interval can be achieved by modulating the DCO's Frequencies by LEVER1 twice. You will use four MATR IX MODs in this case, two for each DCO. An octave bend is created by setting one AMOUNT to a min 6th (63) and the other to a Maj 3rd (58) to equal an octave.
- Page 63 CONTROLLERS - LEVER1 (Pitch Wheel) and LEVER2 (Vibrato Wheel) , PEDAL 1 (Volume) and PEDAL2 (Sustain) , PATCH CHANGES and PRESSURE (After-Touch) used on one will modulate the others in the M I D I system. The main thing to keep in mind is that if the Master instrument is transmitting on a certain channel, the receiving instruments must also be set to that channel for these events to be recognized.
- Page 64 01 OMNI MODE As we mentioned before, OMNI MODE can be turned ON or OFF from this parameter. When OMN I is ON, the MATRIX-GR will receive M I D I Notes and Controllers from the Master instrument on all 1 G Channels plus special M I DI data such as TUNE, ACTIVE SENSE and SYSTEM EXCLUSIVE messages.
- Page 65 If you plan to store MATRIX-GR patches on your home computer, it must first be programmed with Oberheim's SYSTEM EXCLUSIVE code before this can take place. This parameter permits SYSTEM EXCLUSIVE to be turned ON or OFF.
- Page 66 We've provided a means to make use of this unused portion of LEVER2. We call it "LEVER3" which does not exist as a separate physical lever on Oberheim instruments but is controlled by LEVER2. LEVER3 increases its modulation amount when LEVER2 is pushed away from you .
- Page 67 Because the Oberheim LEVER2 can be used in two directions, you can set up a patch that uses both LEVER2 and LEVER3 at the same time. When the Lever is pulled toward you, the effect of LEVER2 is heard; when the Lever is pushed away from you, the effect of LEVER3 is heard.
- Page 68 Whe n executing a MASTER EDIT Parameter "1 1 SEND ALL" command, the d isplay will scroll the messages "SENDING PA TCHES ", "SENDING then " during the transfer instead of SPLITS " "SENDING MASTER continuing to show the message "READY? ".
- Page 69 REAROB Mode does not permit SPILLOVER due to its design. Since notes in excess of six being held on the Master controller at any one time are robbed from the MATRIX-6R's internal voices, SPILLOVER simply does not occur in this Mode. What actually happens when SPILLOVER occurs is that "excess"...
- Page 70 As an experiment, set up the following: 1 . Connect another M I DI synthesizer as a second Slave in the system to the MATRIX-GR (the MATRIX-GR, remember, is a Slave to the M aster controller to begin with). The M I DI OUT - not M IDI THAU - of the MATRIX-GR should be connected to the M IDI IN of the Slave.
- Page 71 Other Things to Keep in Mind . . • • 1 . If the MATRIX-6R is set to Basic M I D I Channel 1 5, the extra notes are spilled to M I D I Channel 1 . 2. If the MATRIX-6R is set to Basic M I D I Channel 1 6, the extra notes are spilled to M I D I Channel 2.
- Page 72 "Note On" command (when a key is played) to start a note playing on the MA TRIX-6R followed by a "Note Off" command (when the key is let go) to tell the MATRIX-6R to stop playing this note. Since a broken M I DI connection prevents the M IDI "Note Off"command from reaching the MATRIX-GR, notes being held at the moment of the M I DI connection break will continue to sound indefinitely.
- Page 73 sending the stream of Active Sense data to the other slaves in the system, keeping "the line busy". If any of the other slaves in the system have Active Sense, they will be able to use this stream of information coming from the MATRIX-GR, thus prevent their own notes from locking on.
- Page 74 1 5 PATCH MAI" This parameter simply turns the MATRIX-GR's Patch Mapping feature ON or OFF. When OFF, the synthesizer transmits and receives M I DI PATCH CHANGE commands normally. If, for example, M I D I Patch Number 23 is sent from the Master controller, the MATR IX-GR will respond to this command by simply recalling its own patch number 23.
- Page 75 2. The second part of the display reads This is the = XX MATRIX-GR's Patch Number that will be recalled when the Reference Patch Nu mber is received. is any desired "XX" Patch Number in the MATRIX-GR numbered 00 through 99. Pressing the second grey button under the display selects this parameter.
- Page 76 In this example, changing to Patch Number 23 on the Master controller causes the MATRIX-GR to recall Patch 35. Re-enter "1 G P MAP EDIT" and set up a few more Patch Maps. Try these: IN : 44 O U T = 15 IN : 3 1 O U T = 76 IN : 65...
- Page 77 IMPORTANT NOTE: The MATRIX-GR must also have MASTER Edit Parameter " 1 2 M I DI ECHO" turned ON for Patch Map Echoing to occur. If M I DI ECHO is disabled, Patch Map Echoing will not happen even if it is ON. Also, if "1 2 M I DI ECHO"...
- Page 78 MIDI MONO CHANNELS Voice 1 Voice 2 Voice 3 Voice 4 Voice 5 Voice 6 (BASIC CHANNEL) M I D I MONO also operates in SPLIT Mode and the M I DI Channel / Voice assignments conform to the values listed in the table above for 2 I 4 and 4 I 2 Splits.
- Page 79 4. M I D I MONO is a "M IDI Receive" function only . The MATRIX-GR will not transmit anything on six separate M I D I Channels. If MIDI MONO is ON, the MATRIX-GR will still transmit on the BASIC CHANNEL N when in Single Patch Mode and on Channel N and N+ 1 when in SPLIT Mode.
- Page 80 4. Record Level Control - It is equally important to be able to control the volume of the data signal while it is being recorded onto tape. Too high of a level will distort the signal and too low of a level will not provide enough playback volume to drive the CASSETTE circuit.
- Page 81 OPERATION 20 STORE ALL This parameter is used to save all of the MATRIX-6R's programs onto the cassette tape. The Patches and Splits are not removed from the MATRIX-6R, just copied onto the tape. The synthesizer will still have Its programs intact when this process is completed.
- Page 82 1 . When this mode is entered, the display will read "21 CHECK CASS ". Rewind the tape to the point where the data's leader tone just begins. This is where a tape counter on your recorder comes in handy, especially you have several banks of data in a row.
- Page 83 23 SELECTIVE LOAD This Parameter allows you to take a single Patch or a single Split from the tape and load it individually into the MATR IX-SR. This feature permits the loading of individual patches from several tapes in order to compile them into one bank of memory.
- Page 85 One other problem that cannot be listed by displaying an Error Message is if you record the data at too low a volume or play it back at too low a volume. The result would be no reaction or response from the MATRIX-GR at all. The display will read "...
-
Page 86: The Lfos
If OFF is selected, the SPEED will not be modulated and VIBRATO will run at the rate selected in MASTER EDIT Parameter "30 SPEED". If ON is selected, the SPEED of the Vibrato set in Parameter "30 SPEED" will increase as the LEVER2 Vibrato Wheel or PEDAL 1 is used. - Page 87 Creating new patches from scratch is actually one form of editing. The MATRIX-6R has a Basic Patch stored in its permanent memory that you can edit to create these new sounds. This "Basic Patch" can be recalled from memory at any time with the PATCH INITIALIZE parameter.
- Page 88 SELECT I Number Mode before STORE can take place. PATCH I NITIALIZE sets all the Basic Patch VALUES to settings called "defaults". A default is s imply a choice that the MATRIX-6R's computer makes for every Parameter VALUE when told to initialize a patch. Each of these Values represent a setting that you can most easily use as a starting point when creating a new patch.
- Page 89 The processor works according to a pre-programmed set of operating instructions called "software". Software can be altered at any time by Oberheim to reflect improvements or additions to these operating instructions. Everytime software is revised, a new index number is assigned to the revision.
- Page 90 M I DI Note Numbers, we are actually using M I D I to accomplish the keyboard splitting. If your Master does have its own split function, it can be further enhanced by the MATRIX-6R in the ability to construct a three-way split, as just one possibility.
- Page 91 1 27 1 26 1 25 1 24 1 23 1 22 1 2 1 1 20 1 1 9 1 1 a 1 1 7 1 1 0 1 1 5 1 1 4 1 1 3 1 1 2 1 1 1 1 1 0 1 09...
- Page 92 M I D I note numbers. Look at the illustration on the facing page. This will give you a visual idea of how the range of the Oberheim MATRIX-1 2's and MATRIX-G's keyboards (MIDI Notes 36 through 96), as just two examples, compare to that of a Grand Piano and then how they compare to M I DI.
- Page 93 Z O N E O n l y n o t e s w i t h i n t h e w i l l p l a y STEP 3 : S ET U P THE TRANSPOSITIONS While you are still in SPLIT ED IT, you are able to transpose either or both LOWER and UPPER keyboard parts to be in a different key signature.
- Page 94 Parameter "OO BASIC CHANN EL". 5 RI GHT MIDI OUTPUT The ability for the MATRIX-6R's UPPER Voices to transmit and receive M I D I is turned ON or OFF in this Parameter. When OFF, the UPPER will not output M I DI information and will ignore M I D I information coming in.
- Page 95 STEP 6: SET THE SPLIT'S VOICE ASSIGN MENTS The MATRIX-GR permits you to configure the voicing of the LOWER and UPPER sections to suit your playing needs. Another way of looking at the LOWER and UPPER Voice Assignments is to regard them as "ZONES"...
- Page 96 OVERLAPPING THE ZONES One other way of using the LIMITS ( Parameters and 3) is to set "O the MIDI Note Number for each ZONE so that the LEFT UPPER LIM IT" is set to a higher number than the "3 RIGHT LOWER LIMIT". an example, set the "O LEFT UPPER LIM IT"...
- Page 97 M at rix-G R Patc h Freq Fr/Lf1 Sync PW/Lf2 Wave Wsel Levers Keybd Click DC01 Freq Fr/Lf1 Detu n e PW/Lf2 Wave Wsel Levers Keybd Click DC02 Freq Fr/E 1 Fr/Prs Levers Keybd VA/VI VA/E2 FM/E 3 FM/Prs Trck l n Track1 Track2 Track3 Track4 Track5 R 1 Spd Trig R2 Spd...
- Page 98 PRO GRAMMING THE MA TRIX-6R Now that we have covered each of the MATRIX-6R's edit functions, we are [?)@� � � ready to put this information to practical use. I n this section of the manual, Li�[M@ ©lg]�� we will create an actual patch starting from the synthesizer's Basic Patch.
- Page 99 07 DC1 LEV - Default setting = ON. You may want to use LEVER1 and LEVER2 for Pitch Bend and Vibrato as you play the patch, so we will keep this setting. 08 DC1 KEY - Default setting = KEYBD . We want the Keyboard to control DC01 as normal, so keep this setting.
- Page 100 18 DC2 KEY Same as for DC01 . We'll keep the default setting: VALUE = KEYBD. 19 DC02 CLIK - Same as for DC01 . Key Click is not needed for this sound. VALUE = OFF. STEP 4: The VCF / VCA Sub-Page is programmed as follows: M i x F req Fr/E 1...
- Page 101 STEP 5 : P rogram the FM I TRACK Sub-Page as follows: FM/E3 FM/Prs Trckl n Track1 Track2 Track3 Track4 Tracks FM!fRC KY B D 30 VCF FM Default VALU E = O. 31 FMOD I EN3 Default VALUE = 0. 32 FMOD I PRS Default VALU E = O.
- Page 102 PORT RATE Default VALUE = 45 PORT / VEL Default VALUE = 46 PORT (Mode) Default VALU E = LIN EAR 47 LEG PORT Default VALUE = OFF Portamento is not used in this patch. Do not change their default VALUEs.
- Page 103 Release time by letting go of the keys quickly. VALUE = 45. 65 ENV2 AMP As with ENV1 , we will add VELOCITY dynamics in a MATRIX MOD combination. To allow for enough headroom, set VALU E to 40. Matrix-6R Owner's Manual 1 00...
- Page 104 66 ENV2 I VEL Default VALU E = +63 67 ENV2 (Trig) Default VALU E = SRESET 68 ENV2 (Mode) Default VALU E = NORM 69 ENV2 (LF01 Trig) Default VALUE = NO RMAL ENV2 dynamics and Trigger modes are set up to act the same as ENV1 , although their effect on the sound will naturally be different since ENV1 modulates the VCF and ENV2 modulates the VCA.
- Page 105 88 L Since we did not select SAM PL as a waveform (we're using TRI), this Parameter is ignored in this patch. STEP 1 1 : LF02 should be set up like this: S p e e d S p/Kbd Wave Retrig Ap/R2 Trig...
- Page 106 Matrix M od u l at io n D e st i n a t i o n S o u rc e A m ount - 50 V E L E 1 ATK V E L E2ATK RV E L E 2 R E L TRAK VCFFQ...
- Page 107 RVEL -55 E2REL Negative (inverted) R ELEASE VELOCITY is used to modulate the RELEASE time of ENV2 that is controlling the VCA. You can control how fast the sound will die out depending upon how quickly keys are let go. The sound will end abruptly with fast key release and fade out much slower with a slow key release.
- Page 108 Matrix- G R B as i c Patc h Fr/Lf1 Freq Sync PW/Lf2 Wave Wsel Levers Keybd Click WAVE B OTH KYB D DC01 Freq Fr/Lf 1 Detune PW/Lf2 Wave Wsel Levers Cl ick Keybd P U LS E B OTH KYBD DC02 Freq...
- Page 109 Oberheim to verify the Warranty status of the product. If the Warranty has been verified, Oberheim will, without charge for parts or labor, either repair or replace the defective part(s). If the Warranty cannot be verified, the entire cost of the repair in parts and labor is the responsibility of the product's owner.
- Page 110 PRICES AND SPECIFICATIONS ARE S U BJECT TO CHANGE WITHOUT N OTICE WHAT IS COVERED ECC I Oberheim warrants that it will make all necessary adjustments, repairs or replacements at no cost to the original owner within the first 1 2 months from the purchase date if: The product fails to perform its specified functions due to failure of one or moreof its components.
- Page 112 90064 Every attempt will be made to respond to your letter as quickly as possible. If you would prefer to contact the Oberheim factory by telephone, a Service Representative will be available to assist you. Our telephone hours are from...
- Page 113 5. The exact date of purchase. A complete description of the problem. Whe n writing to Oberheim, please also include your full address, telephone nu mber and the best time to call should it be necessary to call you rather than answer your letter.
- Page 114 NOTES Matrix-SR Owner's Manual 1 1 1...
- Page 115 • MATRIX MODU LATION • MASTER EDIT MIDI SOURCES DESTINATIONS DELETE MODULATION DELETE MODULATION AM PLITUDE BASIC CHANNEL SPILL OVER 20 STORE ALL ENVELOPE OMNI MODE FREQUENCY DELAY ACTIVE SENSE CHECK ALL LOAD ALL ENVELOPE PULSE WIDTH ATTACK CONTROLLERS PATCH MAP ENVELOPE WAVE SHAPE DECAY...
Need help?
Do you have a question about the Matrix-6R and is the answer not in the manual?
Questions and answers