Table of Contents
Advertisement
Advertisement
Table of Contents

Related Manuals for Oberheim OB-Mx


Summary of Contents for Oberheim OB-Mx
- Page 1 User's Guide Oberhefm.
- Page 2 OB-Mx User's Guide Credits ► Written By Warren Sirota ► Layout & Design By Denise Foret ► ob-mx is a product of oberheim, a division of Gibson ^ OB-Mx Designed By Don Buchla ^ For more information, contact Oberheim 2230 Livigston Street...
-
Page 3: Table Of Contents
Chapter 2 Quick Start 2.1 Basic Setup 2.2 Analog Synthesis Concepts Basic Analog Synthesis OB-Mx Analog Synthesis 2.3 Basic Operations Front Panel Operations Exercise 1: Deconstructing an Existing Sound Exercise 2: Tweaking Blind Exercise 3: Saving and Naming Your Work... - Page 4 OB-Mx User's Guide 3.3 Modulation & The Matrix OB-Mx Default Modulations Exploration 4: EG 4 and The VCA Exploration 5: Fixed-Pitch Sounds and Quartertone Keyboards...26 Exploration 6: Adding Vibrato Exploration 7: Pulse Width Modulation The Matrix Exploration: Pulsing Noise Section...
- Page 5 Table of Contents Chapter 8 Voltage Controlled Filters Module MM & OB Selection Buttons Parameter Toggles Continuous Parameter Knobs Chapter 9 Final Mix Module Disp Selection Button Continuous Parameter Knobs Chapter 10 Envelope Generators Module Envelope Selection Buttons 1-4 Parameter Toggles Continuous Parameter Knobs Chapter 11 low Frequency Oscillators Module...
- Page 6 OB-Mx User's Guide...
- Page 7 Joel Davel, Andrew Schlesinger, Mike Lee and Ezra. The support of Zeta, G-WIZ Labs and Gibson Guitars kept this development in high gear. Special thanks to Tom Oberheim, who pioneered many of the basic concepts, Keith McMillen, who masterfully coordinated the development scene, and Warren Sirota, who skillfully implemented this vital link between designer and performer.
- Page 8 OB-Mx User's Guide Section Introduction Oberheim...
-
Page 9: Chapter 1 How To Use This Manual
The Front Panel Instant Index, on the very last page of this manual, is a uniquely-convenient index into the Reference section made possible by the OB-Mx design philosophy of providing a dedicated button or knob for as many parameters and functions as possible. If you want... - Page 10 OB-Mx User's Guide We recommend that everyone go through the Quick Start and Explorations sections in detail—we think you'll find it fun and well worth the short investment of time. It's not necessary that you go through all of the Explorations before you explore on your own, but we believe that you'll find them quite useful.
-
Page 11: Chapter 2 Quick Start
MIDI Out port on your controller to the MIDI In port on the back of the OB-Mx. 3. In order to listen to the OB-Mx, either plug in a standard pair of stereo headphones (with a 1/4" stereo phone plug) into the Phones jack on the instrument's front panel, or connect the Main Outputs on the back panel to a mixer, amplifier, preamplifier or home stereo system using 1/4"... - Page 12 Before you start exploring the instrument, it's a good idea to make sure that everything is working properly. This is easy to do, as follows: 1. Turn on the power to the OB-Mx and then to your audio system. The display should light up and display some parameters, which we'll talk about shortly.
-
Page 13: 2.2 Analog Synthesis Concepts
Chapter 2 Quick Start Troubleshooting If you do not get sound from your OB-Mx at this point, check for the following: ■ A bad MIDI cable, or a cable not connected properly. Check the connection again. If it looks right, try substituting another cable. - Page 14 OB-Mx User's Guide would fade fairly quickly but not instantaneously when the key was released. For further information about envelopes, see the Envelope Generators chapter in the Reference section. Audio output Figure 2.1 The basic signal path for traditional subfradive synthesis.
-
Page 15: Ob-Mx Analog Synthesis
Frequency Oscillators and 4 Envelope Generators, as well as by external MIDI Continuous Controllers. We'll delve into all of this quite soon, and you'll begin to realize that OB-Mx sounds achieve complexity and interest by connecting many simple components in complex ways. -
Page 16: 2.3 Basic Operations
CONTROL module (see Chapter 6). It's Safe To Experiment Editing is completely safe on the OB-Mx. When you pick an Instrument, a copy of it is loaded into a temporary memory area called the Edit Buffer. Whenever there's a chance of losing your edit changes or overwriting... - Page 17 (okay, so we're a little biased). The first thing to get over, if you're used to working with other synthesizer panels, is the concept of hidden, hierarchical menus. On the OB-Mx, most parameters are accessed directly by pressing a front-panel button. The leftmost buttons in most modules will call a set of parameters into the display.
-
Page 18: Exercise 1: Deconstructing An Existing Sound
Selection Buttons are. It's perfectly permissible to have all, none or any combination of the waveform outputs active at once. One other button can be especially useful as you explore th OB-Mx—the Trigger button in the ENVELOPE GENERATORS module. Pressing this button has the same effect as sending a middle C (MIDI note 60) to the synthesizer from an external controller. - Page 19 D) Press the OB button. Note that the Noise level in the display is 0, so there's no noise leaking through that filter 5) You will still hear some sound from the OB-Mx. Turn the Master Level knob in the Final Mix module all the way off and then up to boost the sound.
-
Page 20: Exercise 2: Tweaking Blind
Where and how should you save it, to be sure of not overwriting any factory patches? The OB-Mx comes with 256 Single Instrument and 256 Multiple Instrument memory locations. Instrument locations 129-256 are factory patches stored in ROM, which cannot be overwritten.. -
Page 21: Exercise 4: Backing Up And Restoring Via Midi
6. Press Store and then Enter to save the new name. Exercise 4: Backing Up And Restoring Via MIDI If you have a MIDI sequencer, you can use it to record a MIDI System Exclusive dump of all or part of the data in your OB-Mx, as follows:... -
Page 22: The Back Panel
OB-Mx User's Guide 1 • Make sure that a MIDI cable is connected from the OB-Mx's MIDI Out port to the sequencer's MIDI In. 2. Press the MIDI button in the CONTROL module. It doesn't matter whether you're in Single or Multi mode. -
Page 23: Main Outputs
Main Outputs Connect these with 1/4" phone cords to your mixer, preamplifier or amplifier. If you will not be using the OB-Mx in stereo, you may use either one of the Main Outputs and still hear all the voices Individual Outputs/Insert Points Each voice has its own output. - Page 24 OB-Mx User's Guide...
-
Page 25: Chapter 3 Explorations
Explorations In this section, we'll explore the most common and useful OB-Mx operations and concepts with short hands-on examples. The different sections in this chapter are meant to be independent of each other, so you can take them in any order that appeals to you. -
Page 26: 3.2 Using Multiple Instruments
OB-Mx User's Guide 1. Load a Single Instrument that you like. Set the Al parameter to Rotate if it's not already there. Play and listen to the Instrument, and notice that as you play, a single button in the VOICE STATUS module lights for each note. -
Page 27: Exploration 2: Creating A Layered Split
Chapter 3 Explorations You can see the Single Instruments assigned to each Part by pressing the lit buttons in the VOICE STATUS module. You'll see the instrument names change in the display as you do so. To see exactly what goes into each Part, press the Parts button. Each part is set to respond only to a specific keyboard range (Zon—the default is the full range of 0 to 127) and to respond on one MIDI channel. - Page 28 OB-Mx User's Guide 3. Follow the directions in the following Key Point to active and deactivate Parts until only 1, 2 and 3 are activated: Key Point: To deactivate an active Part: A) Move the cursor into the Part field.
- Page 29 Chapter 3 Explorations 6. Press the Escape button to turn your keyboard back into a performance instrument instead of a data entry device. 7. Using the Cursor buttons and the Data Adj knob, set the MIDI Channel (Ch:) to 1. 8.
-
Page 30: Save The Multis
OB-Mx User's Guide Exploration 3: Creating a Balanced Performance Here's where we explore the ins and outs of creating and maintaining a good balance among the three parts in our Multi. First, let's try a little experiment: 1. Examine the Vol parameter of any active Part. Notice the value. -
Page 31: Multiple Instruments And Midi Program Change Messages
Figure 3.1. An envelope generator (source) is responsible for controlling the output level of the VCA (target). The envelope modulates the output level parameter of the VCA constantly (except during the Sustain phase) during each note. In the OB-Mx, the VCA is... - Page 32 The time scale of a source can vary from the near-instantaneous to the very gradual. The slowest rate on an OB-Mx UFO is 0.010 Hz, or 1/100 cycles per second. If you press the LFO 1 selection button and then twisting the Rate knob all the way counter-clockwise, the display will tell you that the Period of this LFO is 100 seconds.
-
Page 33: Ob-Mx Default Modulations
Chapter 3 Explorations Table 3.1 Default OB-Mx modulations. The Mod Amount column indicates how to scale, invert or shut off a given modulation. The default modulations are shown in Table 3.1. Each of the modulations in the table is explained in detail in the Reference section, but we'll examine a few of the key ones with hands-on explorations here. -
Page 34: Exploration 5: Fixed-Pitch Sounds And Quartertone Keyboards
OB-Mx User's Guide 2. Press the Envelope Generator 4 (vca) button. Turn the Attack button until the value shown in the display is about .3 seconds. Press the Trigger button again and listen—the initial impact of the note is softened considerably. -
Page 35: Exploration 6: Adding Vibrato
Chapter 3 Explorations having to be very careful about which note you play. We'll learn how to do this, and, along the way, how to get at some of the notes in between the black and white keys. 1. Load Single Instrument 256, InitialConditions. Turn off VCO 2's output by first pressing the VCO 2 selection button and then pressing the lit triangle wave button so that its LED goes off.. -
Page 36: Exploration 7: Pulse Width Modulation
OB-Mx User's Guide Exploration 7: Pulse Width Modulation One of the wave types that the VCOs can generate is called a Pulse Wave. This wave consists of alternating high and low outputs, connected by very brief transitions, as shown in Figure 3.2. -
Page 37: The Matrix
Chapter 3 Explorations 6. Set the PW parameter back to 0. 7. By twisting the P Width Env/LFO knob (below the pulse wave button) to about the 3:00 position, set the LF2>Pw parameter to about .70. Press and hold the Trigger button and listen to the sound. 8. - Page 38 OB-Mx Users Guide...
- Page 39 O B - Mx User's Guide Section Reference Oberheim...
-
Page 40: Chapter 4 Voice Allocation
Voice Allocation CHAPTER Voice Allocation Your OB-Mx synthesizer has between 2 and 12 voices, each containing 2 VCOs, a noise source and the other components that make up a note in a Single Instrument. Each note played uses at least one voice, but you may decide to stack more than one for a thicker sound. -
Page 41: Single Instrument Voice Allocation Algorithms
Using Repeat, however, causes only two voices to be used for the trill, and leaves the sustained chord intact. Another reason for using Repeat mode is that the OB-Mx is an analog instrument. Therefore, the states of the various oscillators and analog modulators in different voices is likely to be slightly different at any given time. -
Page 42: Multiple Instrument Voice Allocation Algorithms
Chapter 4 Voice Allocation Combo A curious combination of the above two algorithms. The first note sounded is assigned with the Repeat algorithm; successive notes are assigned with the Rotate algorithm until all notes are released. A succession of single notes (releases precede closures) will be assigned with the Repeat algorithm, while overlapping notes (legato) will activate the Rotate mode. - Page 43 OB-Mx User's Guide the voice allocation. For further information, see the CONTROL MODULE chapter. If you have one voice allocated per part, all the voice allocation algorithms will produce the same result—incoming notes will take the only voice in the part, stealing it from a sounding note if necessary.
-
Page 44: Chapter 5 Instruments Module
Chapter 5 Instruments Module CHAPTER Instruments Module Single Multiple INSTRUMENTS The buttons in this module select either Single Instrument or Multi mode. In Single Instrument mode, all incoming notes are played on the currently-loaded Instrument, while in Multi mode incoming notes are assigned to different Parts depending upon various parameters (explained in the CONTROL MODULE section following this one). - Page 45 OB-Mx User's Guide...
-
Page 46: Chapter 6 Control Module
Matrix Options Escape < Cursor > Enter This module controls most of the functions in the OB-Mx that are not directly related to sound creation, including storage, global parameter settings and Part assignments in Multis. Changing Values in the Display As you've no doubt already observed, many parameter values in the display are changed by first using the Cursor <... -
Page 47: Program Button
OB-Mx User's Guide Program Button This button brings the Instrument Name and some key parameters into the display. Its main functions are: ■ Loading Instruments, either Single or Multiple. ■ Changing Instrument names. ■ Changing the Single Instruments assigned to the Parts in a Multi. - Page 48 Chapter 6 Control Module 1. Position the cursor under the instrument name. 1. Press the Enter button. 3. Use the Data Adj knob to dial in a new character. 4. Use the Cursor < and > buttons to position the cursor under a new character.
-
Page 49: Prgrm Parameter Descriptions, Multiple Instrument Mode
OB-Mx User's Guide Mode Omni or Poly. When a Single Instrument is in Omni mode, it will respond to MIDI events coming in on any channel. In Poly mode, it will respond only to events on the Base Channel, which you can set by pressing the MIDI button. - Page 50 Chapter 6 Control Module 3. Use the Data Adj knob to dial in a new character. 4. Use the Cursor < and > buttons to position the cursor under a new character 5. Repeat steps 3 and 4 until the name is what you want it to be. 6.
-
Page 51: Voices Button
OB-Mx User's Guide Voices Button This button is used to enable and disable voices in Single Instrument mode. Most of the time you'll probably leave all the voices on. Its more significant function is in Multi mode, where it is also used to assign voices to Parts. -
Page 52: Midi Button
Pressing the Voices button a second time while in Multi mode brings up the display listed under Single Instrument mode above. It functions identically in Multi mode. MIDI Button Sends System Exclusive dumps and determines global MIDI settings for the OB-Mx. MIDI Send : Instr: 137 BaseCh:1 SysEx:O MPC:On... - Page 53 OB-Mx User's Guide Later on, when a sequencer sends one of these dumps back to the OB-Mx, the synthesizer will automatically load the new data if the SysEx parameter (which refers to System Exclusive reception only, and doesn't have any effect on your ability to send a dump) is set to On.
- Page 54 Chapter 6 Control Module ■ The Base Channel ■ Whether SysEx reception is turned On or Off ■ Whether the MPC parameter is On or Off (see page 46). ■ The numbers of the MIDI Continuous Controllers that are currently assigned to modulation sources MIDI A, MIDI B, MIDI C and MIDI D.
- Page 55 OB-Mx User's Guide can't overwrite the data in the OB-Mx with data from any other synthesizer model in any case; SysEx dumps from other instrument models will be ignored. Stands for "Multiple Program Change." When this is On, MIDI Program Change messages on the Base Channel will load a new Multi.
-
Page 56: Store Button
Chapter 6 Control Module Store Button Saves the currently-loaded Instrument to any RAM location, copy any Instrument to another location in RAM or swap any 2 RAM Instruments. ► Saving Edited Instruments Whenever you take an action that would cause any changes that you Ve made to a Single or Multiple Instrument to be lost, or if you press the Store button after you've made any edits, you'll be prompted as to whether you want to save your changes. -
Page 57: Copying And Swapping Instruments
OB-Mx User's Guide Enter Save Modified MultiProgram Number 4 to Multi:4 (name of MultiProgram) At this point, the Store button will be lit and the Escape and Enter buttons will be flashing. Turning the Data Adj knob will let you choose a different memory location to store the Multi. -
Page 58: Compare Button
Chapter 6 Control Module Store Copy Multi: 127 (24 char name of program) to Multi: 126 (24 char name of program) Store Swap Multi: 127 (24 char name of program) with Multi: 126 (24 char name of program) Store Copy Inst: 73 (24 char name of instrument) to Inst: 128 (24 char name of instrument) Store... -
Page 59: Parts Button
Useful for comparing the effects of changes youVe made with the original program. The OB-Mx controls are inactive in the Compare mode (Compare button lit). Press the Compare button a second time to return control of the OB-Mx. - Page 60 Chapter 6 Control Module If a Part is active, the word "PART" is displayed in all-capital letters. Also, the Esc button will flash when the cursor is positioned in the Part field of an active Part. Pressing Esc will deactivate the Part. If a Part is deactivated, the word "Part"...
-
Page 61: Matrix Button
OB-Mx User's Guide The overall output volume for the Part. The range is 0 to 127, and will change in response to incoming MIDI Volume (Continuous Controller 7) messages on the Part's MIDI channel. Also see the description of the Attn parameter below. -
Page 62: Parameters
Chapter 6 Control Module parameter to the edge (say, a Mod Wheel has pushed a filter frequency to its maximum or minimum), then any additional modulation in that direction will have no effect. Matrix Patch : 12 Source: ModWheel Multiplier: +1.00 Destination Module: OB VCF Param : Frequency ►... -
Page 63: Options Button
OB-Mx User's Guide Internal Modulation Sources ■ LFO 1,2 or 3: The output of LFO 1, 2 or 3 ■ EnvGen 1, 2,3 or 4: The output of envelope generator 1, 2,3 or 4 ■ Random: A random number generator that produces a new random number every time a Note In message is received for its voice. -
Page 64: Parameters
Part or for the current Single Instrument, and the Single Instrument's VCO's must have their tracking parameters set to "TT." There are 19 Tuning Tables in the OB-Mx. Tuning Tables 10-19 are stored in ROM and cannot be altered. Table 10 is the familiar equal temperament, with each octave divided into 12 equal parts, and is the Tuning Table for most of the ROM instruments. - Page 65 OB-Mx User's Guide Tuning Table: 1 <24 Character TT Name> MIDI Key #: 64 Pitch: C4 Cents Dev: 00 Tuning Table Tells you which table you're editing. You can dial in any number from 1-19 here, but tables 10-19 can only be examined, not edited.
- Page 66 Chapter 6 Control Module Pitch The base pitch that will be produced by an incoming MIDI note number. Think of this as a rough or coarse pitch, which can be fine- tuned by the Cents Dev parameter. ■ Unit: Note name and octave ■...
- Page 67 OB-Mx User's Guide...
-
Page 68: Voltage Controlled Oscillators Module
Chapter 7 VCO Module CHAPTER Voltage Controlled Oscillators Module Pitch Fine Track Port P Width Sync Source -> VCO Env 1 LF01 En2 LF2 VOLTAGE CONTROLLED OSCILLATORS I triangle wave, a sawtooth, and a pulse wave simultaneously. -
Page 69: Selection Buttons
OB-Mx User's Guide Selection Buttons The buttons numbered 1 and 2 select which VCO is being edited—in other words, the lit selection button determines which VCO will change as a result of turning a knob or pressing a Parameter Toggle button in the module. -
Page 70: Continuous Parameter Knobs
Chapter 7 VCO Module Either VCO can be the destination. You can even make them both destinations, but the results will be unpredictable. A/ Triangle Wave This turns the triangle wave output of the oscillator on and off. Triangle waves are rich in all harmonics. Sawtooth Wave This turns the sawtooth wave output of the oscillator on and off. - Page 71 Fine parameter will be added to the pitch read from the tuning table. There are 19 Tuning Tables in the OB-Mx. Editing instructions can be found in the Reference section relating to the Options button in Chapter 6.
-
Page 72: Modulation Section
Chapter 7 VCO Module allocated for it and the pitch glides from the previous pitch in that voice to the new pitch. Whether in a Single or Multi mode, you're best off using portamento with an assignment algorithm that allocates all the voices to each note. - Page 73 OB-Mx User's Guide Pitch/LFO 7 LFO 1 is automatically mapped to modulate oscillator pitch. If the value is 0, the envelope will have no effect. If the multiplier is 1, then the LFO can change the pitch over a range of approximately 4 octaves.
- Page 74 Chapter 8 VCF Module CHAPTER Voltage Controlled Filters (VCF) Module This module controls the behavior of the MM and OB filters. The MM Filter is a low-pass filter designed to recreate the sounds of the Mini- Moog® synthesizer. It's what's called a "4-pole filter," which means that it attenuates frequencies by 24 dB per octave (in other words, frequencies one octave above the cutoff frequency are 24 dB quieter when they leave than when they entered, and frequencies two octaves above...
-
Page 75: Mm & Ob Selection Buttons
OB-Mx User's Guide MM & OB Selection Buttons The MM and OB buttons select which VCF is being edited. The lit selection button determines which VCF will change as a result of turning a knob or pressing a Parameter Toggle button in the module. If the button is also flashing, its parameters are currently visible in the display. -
Page 76: Parameter Toggles
Chapter 8 VCF Module Parameter Toggles Kbrd Track Kbrd Track 1/3 and 2/3 Determines how the filter's cutoff or center frequency follows the keyboard. The buttons are additive—when they're both lit, the filter's frequency will be the frequency of the MIDI Note In value. When only one button is lit, the filter's frequency will track the input pitch proportionally. - Page 77 OB-Mx User's Guide VCO2 The percentage of VCO 2's output that is input to the selected filter. ■ Unit: Percentage ■ Default: for the MM filter, 0; for the OB filter, 100 ■ Range: 0 to 100 Noise The percentage of the Noise Generator's output that is input to the selected filter.
- Page 78 Chapter 8 VCFModule Env 1, 2 This scales the amount by which EG 1 (for the MM filter) or EG 2 (for the OB filter) will modulate the frequency of their respective filters. Among other applications, you can use this to create filter sweeps. ■...
- Page 79 OB-Mx User's Guide...
-
Page 80: Chapter 9 Final Mix Module
Chapter 9 Final Mix Module CHAPTER Final Mix Module Disp MM VCF OB VCF_ FINAL MIX Lopass Bandpass Hipass Offset This module mixes the outputs of the VCFs to a mono signal and pans the resultant signal in the stereo output field. It's also responsible for boosting the base output level of the VCA, a function particularly useful for self-playing patches. -
Page 81: Continuous Parameter Knobs
OB-Mx User's Guide ► Continuous Parameter Knobs MM VCF The percentage of the MM filter's output that is mixed into the final output signal. ■ Unit: Percentage ■ Default: 100 ■ Range: 0 to 100 OB VCF Lopass The percentage of the OB filter's lowpass output that is mixed into the final output signal. - Page 82 Chapter 9 Final Mix Module Pan L/R Positions the final output in stereo space by sending possibly different portions of it to each of the main output jacks. ■ Unit: -1 O=full pan left, 0=center, +1 O=full pan right ■ Default: 0 ■...
- Page 83 OB-Mx User's Guide Output Level 100% Sustain Level Note OK Figure 10.1 An OB'Mx envelope...
-
Page 84: Chapter 10 Envelope Generators Module
Envelope 4 is, by default, routed to control each voice's VCA (and hence its volume). Envelopes 1 and 2 also have default routings, which are indicated in Table 3.1 on page 25. Figure 10.1 shows an OB-Mx envelope with all its numeric parameters. We'll refer often to this diagram in this section. -
Page 85: Envelope Selection Buttons
OB-Mx User's Guide Envelope Selection Buttons These buttons select which envelope generator (EG) is being edited. The lit selection button determines which EG will change as a result of turning a knob or pressing a Parameter Toggle button in the module. If the button is also flashing, its parameters are currently visible in the display. - Page 86 Chapter 10 Envelope Generators has been entered, then the envelope proceeds immediately to the Release stage without completing the Attack and Decay. Reset _____^ Each new note restarts the envelope at the beginning of its cycle, from the value 0. If left off, each new note in a voice restarts the envelope from it's current level.
-
Page 87: Continuous Parameter Knobs
Trigger Pressing this button is equivalent to sending a MIDI Note On with pitch 60 (middle C) and velocity 64 to the OB-Mx on all channels with active Parts. Releasing the button is equivalent to sending the corresponding Note Offs. - Page 88 Chapter 10 Envelope Generators Decay Delay Time to wait after the end of the Attack portion before starting the Decay. See Figure 10.1. ■ Unit: Seconds ■ Default: .001 ■ Range: .001 to 30 Decay The time it takes from the envelope to go from its maximum value at the end of the Attack stage to 0 (See Figure 10.1).
- Page 89 None on EG 4, you'll produce a note that will sustain infinitely long. The only ways to shut the note off will be to turn off the OB-Mx, to load a new Instrument in place of the one that's sustaining or to steal the voice that's sounding with another Note On.
- Page 90 Chapter 11 Low Frequency Oscillators CHAPTER Low Frequency Oscillators (LFO) Module Delay Rate Offset Waveshape Random LOW FREQUENCY OSCILLATORS This module controls the 3 low frequency oscillators (LFOs) available to each voice. LFOs are extremely useful modulation sources. LFOs 1 and 2 have default modulation routings, which are indicated in Table 3.1 on page 25.
-
Page 91: Lfo Selection Buttons
OB-Mx User's Guide LFO Selection Buttons 1-3 These buttons select which LFO is being edited. The lit selection button determines which LFO will change as a result of turning a knob or pressing a Parameter Toggle button in the module. If the button is also flashing, its parameters are currently visible in the display. -
Page 92: Continuous Parameter Knobs
Chapter 11 Low Frequency Oscillators Reverse Sawtooth The reverse of the first waveform. The LFO output starts at 100, gradually descends to 0, and then abruptly resets to 100 for the start of a new cycle. Random Random The output of the LFO is constandy changing, buth with random direction and slope. - Page 93 Random waveform. Altering the Rate causes the OB-Mx to do a little math for you and display the Period, which is the time it takes for the LFO to complete a cycle (Period=l/Rate).
- Page 94 S/H parameter set to Off. S/H is named after a traditional analog synthesis technique called sample and hold. OB-Mx S/H produces effects similar to that of the traditional sample and hold circuits, but the way that it achieves them is quite different.
- Page 95 OB-Mx User's Guide...
-
Page 96: Voice Status Module
Chapter 12 Voice Status Module CHAPTER Voice Status Module VOICE STATUS Multi P8* timber —> Matrix patch number The buttons in this module serve multiple purposes, as follows: ■ To indicate voice usage by incoming MIDI notes ■ To bring the parameters for different Parts into the display for editing ■... -
Page 97: Voice Usage Indicators
OB-Mx User's Guide Voice Usage Indicators Whenever MIDI notes come into the OB-Mx or the Trigger button is pressed, the VOICE STATUS buttons show, not surprisingly, the status of the voices. That is, when a MIDI Note On message comes in, the numbered... -
Page 98: Index
Index 23, 45, 46 Pressure..Multiple Instruments 7, 18,40 Prgrm button Multiplier Program Change MultiProgram 7, 18,40 Program name MultiProgram Record Pulse wave Multis .7,18,40 Pulse width modulation Multiple ► Q ► N Quad Quartertone Noise Quick Start Noise source Note stealing ►... -
Page 99: Chapter 8 Voltage Controlled Filters Module
OB-Mx User's Guide Subtractive synthesis Velocity sensitivity Sustain Vibrato Sustain decay Voice Allocation Voice Status 87,18, 20, 31 Swap Sync Voice usage System Exclusive 13,45 Voices button 39,52 System size Voltage Controlled Filters Module ► r Voltage Controlled Oscillators 5, 59... - Page 100 Voltage Controlled Oscillators Low Frequency Oscillators Envelope Generators Attack Decay Sustain Release A Delay D Delay S Decay Vel Sens § OBMx Instrument § Definition Record 12...
-
Page 101: Multiprogram Record
C-2 OB-MX User's Guide: Multi-Program Record OB Mx MultiProgram Record... -
Page 102: Voice Architecture
P Width Pitch inputs Inputs Summed with signals from up to eleven additional voices Rear Panel Insertion Point SYMBOLS OB-Mx . VCA or _ Panel /O\_Switch or ^""Multiplier ' Multiplier "" Switch Voice Architecture Line indicates that controlled Signal connections . -
Page 103: Matrix Table
C-4 OB-Mx Matrix Table MATRIX SOURCES AND DESTINATIONS Patch 1-12... -
Page 104: Midi Implementation Chart
MIDI Implementation Chart... -
Page 105: Front Panel Instant Index
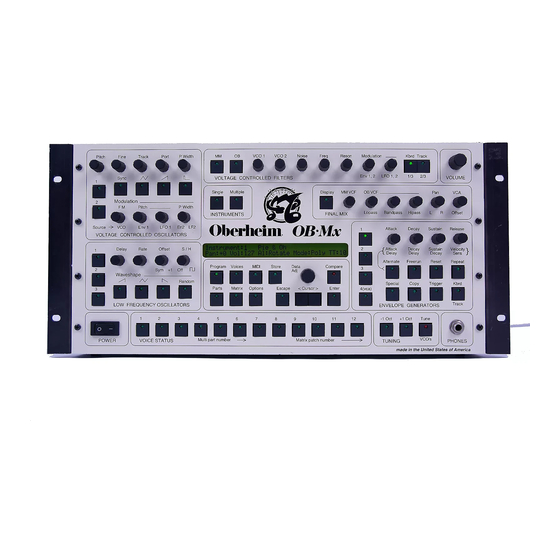
OB-MX Front Panel Instant Index Pitch Fine Track Port P Width VC01 VCO 2 Noise Freq Reson Modulation. Kbrd Track <^\ (59) ( 69; .68, Env1.2 LFO1.2 VOLTAGE CONTROLLED FILTERS Sync VOLUME Single Multiple INSTRUMENTS Source -> Env1 LF01 Attack... - Page 106 OB'Mx Two Voice Cards contain two complete synthesizer voices, identical to the voices that came in the OB'Mx. When properly installed, this Oberheim Two Voice Card will increase the number of available voices in your OB'Mx by two. Not only will you be able to enjoy increased polyphony, but the additional voices will also allow you to make greater use of the multi-timbral and voice-stacking capabilities of the Oberheim OB'Mx.
- Page 107 Before You Proceed: Be sure that the OB»Mx has been turned "OFF" before beginning the Two Voice Card installation procedure. It is also a good safety measure to disconnect the OB»Mx power cord at this point. Stepl Using your common screwdriver, remove all the screws holding down the top (do Opening the unit.
- Page 108 Step 3 Installing the Two Voice Card. Remove the Voice Card from its protective anti-static wrapper. Do not touch the gold contact "fingers" along the bottom edge. Hold A: Handle Up the Voice Card from the two white nylon handles at the top edge of the card, so that the handles are in the "up"...
- Page 109 Step 5 Turning the New Voices On. Now that the new Voices have been installed, Displays TuneA:44!t ase: +0 EditTuneTable:i Dbido:2 Size; 4v you must tell the OB»Mx to turn the new Voices On. Begin by changing the System Program Voices MIDI Store Size to include the new voices.
Need help?
Do you have a question about the OB-Mx and is the answer not in the manual?
Questions and answers