CESCO GlucCell User Instruction Manual
Hide thumbs
Also See for GlucCell:
- Quick reference card (2 pages) ,
- Quick reference card (2 pages) ,
- Quick reference card (2 pages)
Table of Contents
Advertisement
Quick Links
TM
GlucCell
Glucose Monitoring System
User Instruction Manual
Ver. 1.1
Caution
Read the User's Manual thoroughly before use.
This User's Manual is designed to guide you through the
TM
operation of the GlucCell
Glucose Monitoring System with
detailed directions and illustrations. Read the entire the User's
Manual before you begin test to ensure that you use this
system properly and receive accurate results.
TM
GlucCell
is a trade mark of CESCO Bioengineering Co., Ltd.
Advertisement
Table of Contents

Subscribe to Our Youtube Channel
Related Manuals for CESCO GlucCell

Summary of Contents for CESCO GlucCell
- Page 1 Glucose Monitoring System with detailed directions and illustrations. Read the entire the User’s Manual before you begin test to ensure that you use this system properly and receive accurate results. GlucCell is a trade mark of CESCO Bioengineering Co., Ltd.
-
Page 2: Table Of Contents
Contents Chapter 1 About the GlucCell System......3 1.1 Intended Use............3 1.2 Characteristics ...........3 1.3 Limitations of the system ........3 1.4 Component List..........4 1.5 About the Glucose Meter........4 1.5.1 Front-side of the Meter ......4 1.5.2 Backside of the Meter ......4 1.5.3 LCD Display..........5 1.6 About the Glucose Test Strip ......5... - Page 3 7.2 Memory Recall..........14 Chapter 8 Quality Control Test........15 8.1 Quality Control by using the Check Strip ..15 Chapter 9 Display Message and Solution ....15 Chapter10 Taking Care of your Glucose Meter...17 Chapter11 Specifications of the System .....18 Chapter12 Customer Service ........18...
-
Page 4: Chapter 1 About The Gluccell Tm System
1.3 Limitations of the system For in vitro research use only. Not for diagnostic testing. GlucCell Glucose Test Strips can be used only with GlucCell Glucose Meters. The meter must be coded only with the corresponding code on the vial of glucose test strips being used - the codes must match. -
Page 5: Component List
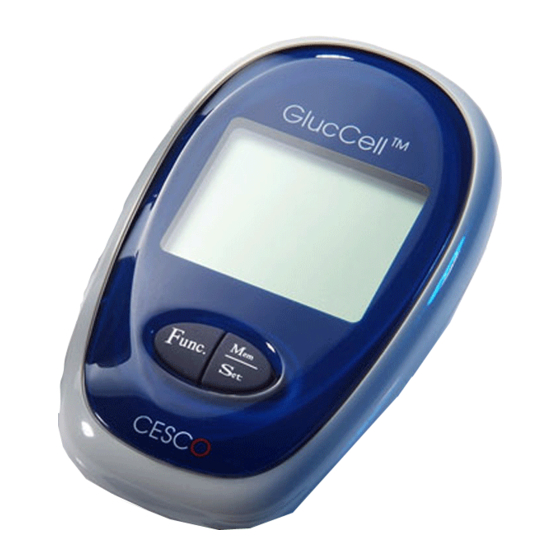
1.4 Component List These items are included in your starter kit of GlucCell Glucose Monitoring System: User’s Manual Quick Reference Card Glucose Meter Glucose Test Strip Check Strip Code Key 3V Li+ Battery (inside the meter) Carrying Bag * Quantity varies according to the order 1.5 About the Glucose Meter... -
Page 6: Lcd Display
1.5.3 LCD Display Numerical Display: Data display Battery symbol: Low battery indication. Thermometer symbol: Out-of-range temperature indication. droplet symbol: Ready for test indication. Strip symbol: Ready for strip insertion indication. M188: Memory number display. mg/dL; mmol/L: Selected unit display. DAYAVG: Number of days average display. -
Page 7: About The Check Strip
1.7 About the Check Strip The Check Strip is used to check the function of the meter 1 Connector End 1.8 About the Code Key 1 Connector End 2 Code Number: The code number on the Code Key must match with code number on the test strip vial being used. -
Page 8: Warning
Test results that are stored in memory will not be erased when you replace the battery., if the new battery is installed needed within 30 minutes WARNING Discard the used battery according to your local environmental regulations. -
Page 9: Chapter 3 Set The Glucose Meter
Chapter 3 Set the Glucose Meter 3.1 How to enter into Set Mode Press any buttons to turn on the meter Press the “Func. button” four times slowly and successively by following the rhythm of flashing symbols to enter into Set Mode. The year filed flashes will show up first. -
Page 10: Setting The Day
3.4 Setting the Day The Day field flashes. Press the “Mem/Set button” to change the Day. Press the “Func. button” to confirm the new setting and to cycle on to the next setting (i.e., Hour). 3.5 Setting the Hour The Hour field flashes. Press the “Mem/Set button”... -
Page 11: Chapter 4 Code The Glucose Meter
Chapter 4 Code the Glucose Meter 4.1 Why to code the meter A Code Key is provided in each box of GlucCell Glucose Test Strips. It is used to code the glucose meter to match the corresponding code on the test strip vial being used. -
Page 12: Chapter 5 Perform A Glucose Test
Chapter 5 Perform a Glucose Test Insert the glucose test strip fully into the strip slot; the meter will turn on automatically. RECAP THE STRIP VIAL IMMEDIATELY after taking out the glucose test strip. Check to make sure the code number matches the code number on the strip vial being used. - Page 13 Record the test results in your log book. Remove the test strip to turn off the meter. The test result has been stored in memory.
-
Page 14: Chapter 6 Test Results
Chapter 6 Test Results 6.1 What your results mean # Test results are displayed in either mg/dL or mmol/L depending on the unit setting ( The mmol/L refer to Section 3.7 for how to set the meter). results will always include a decimal point; mg/dL results do not include a decimal point. -
Page 15: Chapter 7 Memory Recall
Chapter 7 Memory Recall The glucose meter stores the most recent 180 test results, from the most recent “1” to the oldest “180”. Please set the time/date to ensure that the corresponding times of testing have been recorded. 7.1 How to enter into Memory Mode 1 Press any buttons to turn on the glucose meter. -
Page 16: Chapter 8 Quality Control Test
Chapter 8 Quality Control Test 8.1 Quality Control by using the Check Strip 1 Insert the Check Strip firmly into the strip slot with the label face-up to start the Meter Quality Control Test 2 “OK” will be displayed if your glucose meter is functioning properly. - Page 17 Display Message: “HI” reading Cause Solution Glucose Your glucose test result is higher than 600 mg/dL (33.3 concentration mmol/L). Note: In the situation, please dilute the sample with PBS to proper concentration for next test. Meter malfunction Check to see if Meter is properly coded Perform Check Strip Test (refer to Section 8.1) Test Strip Check expiration date...
-
Page 18: Chapter10 Taking Care Of Your Glucose Meter
Display Message: Cause Solution Meter electronics Perform Check Strip Test (refer to Section 8.1) failure Display Message: Cause Solution The test strip may Replace with a new glucose test strip. be moist The test strip may Replace with a new glucose test strip. have already been used Display... -
Page 19: Chapter11 Specifications Of The System
70 g included battery 14. Automatic Shut-off In 3 minutes Chapter 12 Customer Service If you have any questions about our products, please contact us: CESCO Bioengineering Co., Ltd. No. 36., 20th Rd., Taichung Industrial Park, Taichung, Taiwan, R.O.C. Tel: 886-3-5910121 Fax: 886-3-5910123 E-mail: info @cescobio.com.tw...
Need help?
Do you have a question about the GlucCell and is the answer not in the manual?
Questions and answers