Table of Contents
Advertisement
Advertisement
Table of Contents

Subscribe to Our Youtube Channel
Related Manuals for KORR CardioCoach PRO


Summary of Contents for KORR CardioCoach PRO
- Page 1 CardioCoach PRO User Manual 9AT0079-ENG | CC2.0 PRO...
- Page 2 CardioCoach PRO User Manual | Page 1...
-
Page 3: Table Of Contents
Initial Setup ...................... 13 CardioCoach Mobile App Registration ............13 CardioCoach PRO Connections ..............14 Connect CardioCoach PRO to PC/Tablet via Bluetooth ......14 Connect CardioCoach PRO to PC via USB ..........15 Connect the BLE Heart Rate Monitor via Bluetooth ........15 Connecting Exercise Equipment .............. - Page 4 Manage Groupings ..................254 Manage Locations ..................254 Manage Trainers ..................265 Setting Up Email ..................276 Section 3 CardioCoach PRO Operation ..............298 Powering On and Off ..................298 Max Exercise Testing ................298 Client Preparation Prior to Arrival .............. 298 Client Preparation upon Arrival ..............
- Page 5 Theory of Operation ..................80 Metabolic Testing ..................80 Oxygen Consumption .................. 81 Calorie Calculation ..................82 Anaerobic Threshold Detection ..............82 Zone Training ..................... 843 Estimated Values ..................843 References ....................865 CardioCoach PRO User Manual | Page 4...
- Page 6 Safety ......................98 EMC ........................ 98 Normative Data for VO Max ................99 Female (values in ml/kg/min) ............... 99 Male (values in ml/kg/min) ................99 Glossary of Terms ..................100 Forms ......................102 CardioCoach PRO User Manual | Page 5...
-
Page 7: Section 1 Product Overview
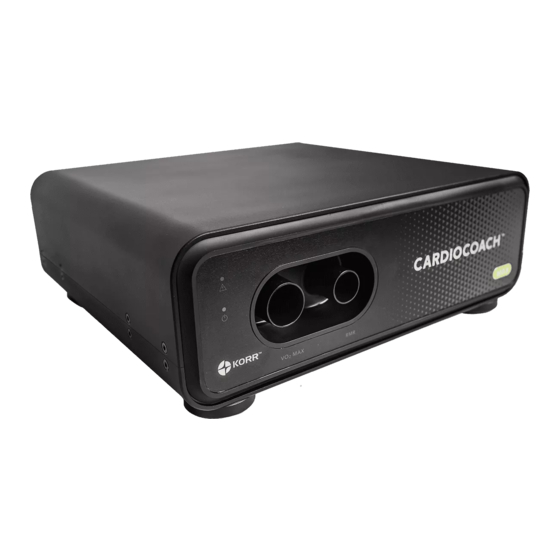
Section 1 Product Overview Introduction to the CardioCoach PRO Unit The CardioCoach PRO™ performs two kinds of fitness tests, using oxygen uptake measurements. One test is performed during exercise to evaluate VO max (maximal) oxygen consumption; the other test is performed during rest to evaluate the resting metabolic rate. - Page 8 Front of Unit Back of Unit CardioCoach PRO User Manual | Page 7...
-
Page 9: Accessories
The three most common sizes, Medium, Small, and Petite, are included in the Quick start package. Large and Extra Large sizes may be purchased separately. CardioCoach PRO User Manual | Page 8... -
Page 10: Headstrap
Headstrap The four-strap CardioCoach PRO headgear features quick-release strap clips. Y-Valve The Hans Rudolph Y valve is a two-way Non-Rebreathing Valve (NRBV) designed to separate the patient's inspiratory and expiratory flows at the high flow rates expected during an exercise test. The valve is reusable and can be disassembled for cleaning. -
Page 11: Vo 2 Hose
Hose The CardioCoach PRO has a 6-foot hose for VO testing. Heart Rate Monitor A Polar heart rate monitor chest strap with Bluetooth capabilities in included. The battery life is 400 hours of operation time. The battery is user- replaceable. The heart rate monitor fits chests measuring 22 to 34 inches. -
Page 12: Metabreather Valve And Tubing
MetaBreather Valve and Tubing The CardioCoach PRO MetaBreather valve is a two-way Non-Rebreathing Valve (NRBV) designed to separate the patient's inspiratory and expiratory flows at the low flow rates expected during a resting test. The valve is single-use only and must be discarded after testing. -
Page 13: Feature Matrix
Score to determine test quality SMART Trainer & ergometer interface Simplified printout Detailed results with multiple graphs Extended testing periods (1-2 hours) Incorporates SMO2 Data Analysis Tools CardioCoach PRO User Manual | Page 12... -
Page 14: Section 2 Installation And Settings
CardioCoach Mobile App Registration To register to use the CardioCoach App, follow the steps below. 1. If you don’t already have a CardioCoach mobile app subscription, see the App Registration section of this manual. CardioCoach PRO User Manual | Page 13... -
Page 15: Cardiocoach Pro Connections
4. Click Add Bluetooth or Other Device. 5. From the options that pop up, select Bluetooth. 6. When the CardioCoach PRO appears on the list of devices, select it. The device name will have the format KORR-[SERIAL NUMBER]-####. The serial number is found on a label on the back of the CardioCoach PRO and uses the format LL-NNNN (two letters, a dash, and four numbers). -
Page 16: Connect Cardiocoach Pro To Pc Via Usb
16. The message, “CardioCoach Not Connected” is displayed in the lower left corner of the CardioCoach software. 17. Use a USB cable to connect CardioCoach PRO to the PC or tablet. 18. Wait for Windows to recognize and configure the CardioCoach PRO. -
Page 17: Connecting Exercise Equipment
6. Select the COM port that you connected the equipment to in step Connecting ANT+ 1. ANT+ dongle needs to be plugged into USB port of computer. This will act as an antenna/receiver for your piece of equipment. CardioCoach PRO User Manual | Page 16... -
Page 18: Connecting A Moxy Device
USB device for specific drivers first. 3. ANT+ dongle needs to be plugged in before software is turned on. 4. Check that device is connected by going to KORR Ant+ service (see photo below) 5. In KORR CardioCoach software, go to equipment interface in SETTINGS, and have ANT+ selected. -
Page 19: Settings
Settings To adjust the settings of your CardioCoach PRO, follow the steps below. 1. Navigate to the main menu of the home screen. 2. Locate and click the Settings button. A Settings page similar to the one below, will display. -
Page 20: General Settings
These languages must also be supported by the computer. c) Theme. The background theme of the KORR software is dark. If desired, you can change the background to light. d) RMR Method. Several methods are available: •... -
Page 21: Equipment Interface
Any treadmill or ergometer can be used with the CardioCoach PRO by manually adjusting the resistance/speed/incline of the exercise equipment, as directed by the CardioCoach software. - Page 22 A screen similar to the one below displays. 2. Select the device type from the dropdown box and click the Add New button. A popup box, similar to the one below, gives you the set-up options for the device. CardioCoach PRO User Manual | Page 21...
- Page 23 (rpm) cycle only • min/mile treadmill only • min/km treadmill only • none e) Watts Unit. Indicate the units your cycle uses to communicate the increase in resistance: • watts • percent • level CardioCoach PRO User Manual | Page 22...
-
Page 24: Format Results
“trainer” or “client” version of the report. Click the boxes to select what you would like on that graph, or data point on the trend table visible. A blue check mark will appear over the selected boxes. CardioCoach PRO User Manual | Page 23... -
Page 25: Anaerobic Threshold Detection
Restore Defaults. Use this button to return ONLY the settings on this Format Results page to the factory default. Anaerobic Threshold Detection The anaerobic threshold can be detected using different methods. With the CardioCoach PRO model 9300, you can choose between two methods: • Ventilatory Threshold (Wasserman’s Theory)* •... -
Page 26: Manage Groupings
7. Use the Search option to locate a particular grouping from a long list. Manage Locations If you are using the CardioCoach PRO at multiple locations, you can enter various locations to help you organize and sort clients and their test results. -
Page 27: Manage Trainers
To sort the list for ease in finding a particular trainer, click on the header of any column (Last name, First name, Email, or Notes). CardioCoach PRO User Manual | Page 26... -
Page 28: Setting Up Email
Settings (search Windows 10 for “default apps”). 2. Under Email ensure the Windows 10 Mail app is selected. If it is not selected, select the default app, then select Mail on the Choose default apps popup message. CardioCoach PRO User Manual | Page 27... - Page 29 3. Launch the Windows 10 Mail app (search for Mail). 4. Follow the prompts to setup your email. See your network administrator for assistance. CardioCoach PRO User Manual | Page 28...
-
Page 30: Section 3 Cardiocoach Pro Operation
Section 3 CardioCoach PRO Operation Powering On and Off Turn the CardioCoach PRO unit on by flipping the switch on the back of the unit. The red power LED on the front panel of the CardioCoach PRO will verify the power connection of the CardioCoach PRO. - Page 31 If you detect significant air leaking out around the mask, adjust the Velcro straps for a better fit. d. Repeat the blow test. If significant leaks still occur, consider changing the size of the mask. CardioCoach PRO User Manual | Page 30...
- Page 32 2. Attach the connector to the strap. Adjust the strap length to fit tightly but comfortably around your client’s chest. 3. Tie the strap around the client’s chest, just below the chest muscles, and attach the hook to the other end of the strap. CardioCoach PRO User Manual | Page 31...
-
Page 33: Begin Testing
To begin testing, open the CardioCoach software. The software will open to the Main Menu, shown below. To begin testing, click the New Test icon on the Main Menu. The New Test menu will display New Client and Existing Clients options, as shown below. CardioCoach PRO User Manual | Page 32... - Page 34 You may also edit the list by using the Edit Locations option. • Grouping (optional) o Allows you to choose from the custom groupings created during set-up. You may also edit the list by using the Edit Groupings option. CardioCoach PRO User Manual | Page 33...
- Page 35 To begin testing, click the Start Test button. Testing Existing Clients 1. Select the Existing Clients option from the New Test screen to display a list of existing clients and select the client’s Account profile. CardioCoach PRO User Manual | Page 34...
-
Page 36: Test Administration
When connected, the message Connected appears. If you see the software message, CardioCoach Not Connected you have a connection problem. Refer to the Troubleshooting section of this User Manual. Connection difficulties must be resolved prior to testing. CardioCoach PRO User Manual | Page 35... - Page 37 To connect with a BLE heart rate monitor, click the Heart Rate Device button. Locate your heart rate monitor by name or model number from the list of visible signals. Click your heart rate CardioCoach PRO User Manual | Page 36...
- Page 38 (in approximately 1-2 minutes). One or two initial large breaths will help clear the mixing chamber and speed up this process. The client should not start exercising until the countdown is complete. CardioCoach PRO User Manual | Page 37...
- Page 39 12. Begin Testing. When the CardioCoach PRO detects a stable heart rate , it will prompt you to begin testing. Click the OK button to begin the test. 13. Start Client Walking or Pedaling Slowly. Begin the graded exercise test. A page similar to the following displays.
- Page 40 SubMax test. A submaximal test allows you to gather key information about a client without having to push them to a maximal effort. This is preferred for most non-clinical settings and is highly recommended. Once the AT has been detected, CardioCoach PRO will report the following cardio-respiratory data points: •...
-
Page 41: Results
Click No to return the CardioCoach PRO to test mode and continue testing. 20. Max Effort. Respond to the Max Effort Yes/No? prompt. a) Click Yes if client indicates they exerted a maximum effort. Peak heart rate will be used for Max measurement. - Page 42 Appendix. Quality Score CardioCoach PRO provides you with a test quality score that helps you ensure that your tests meet the minimum standards of a valid graded exercise test. A valid test will have a test quality score of 100. A lower score indicates that aspects of the test are inadequate.
- Page 43 This is an optional field for the trainer to enter any notes for the client to help explain the results shown in the table. Notes entered here will appear on the PDF report. CardioCoach PRO User Manual | Page 42...
-
Page 44: Test Results Options
% VO2 Max, % HR Max, % HR AT, or Manual Selection. o AT Threshold- select to use the fixed zones where: Zone1 is beginning heart rate to 85% of AT heart rate. CardioCoach PRO User Manual | Page 43... - Page 45 TO: field. Note: KORR highly recommends using the Windows 10 email app and not MS Outlook, which currently is not a Windows 10 app and will not attach the PDF. If Outlook is used, you will need to save the PDF to your PC and attach it manually.
-
Page 46: Resting Metabolic Rate (Rmr) Test
Note: KORR highly recommends using the Windows 10 email app and not MS Outlook, which currently is not a Windows 10 app and will not attach the PDF. If Outlook is used, you will need to save the PDF to your PC and attach it manually. - Page 47 2. When testing a client for the first time, you will need to create an account. The New Client option on the New Test screen allows you to create that account and enter test information, as described below. CardioCoach PRO User Manual | Page 46...
- Page 48 Test Type. Identify RMR as the Test Type when administering an RMR Test. j) Activity Level/Cardio Exercise Frequency & Intensity. This information is required in order to calculate estimated caloric burn through exercise. CardioCoach PRO User Manual | Page 47...
- Page 49 To begin testing, click the Start Test button. Testing Existing Clients 4. Select the Existing Clients option from the New Test screen to display a list of existing clients and select the client’s Account profile. CardioCoach PRO User Manual | Page 48...
-
Page 50: Test Administration
RMR port. a. A green light should appear over the RMR port. If not, check the center of the screen to make sure the Test Type indicated is RMR. CardioCoach PRO User Manual | Page 49... - Page 51 9. Start Test. Once stable data has been detected, the CardioCoach PRO will begin testing. 10. The RMR test will proceed for a minimum of ten minutes or until the minimum test time has been reached, based on the test time settings.
-
Page 52: Results
12. Test Complete. When the test has reached its minimum test length and has also gathered the required amount of steady state data, the CardioCoach PRO will indicate the test is complete with an audible alert. a. Dispose of the MetaBreatherMAX and nose clip. - Page 53 Resting Metabolic Rate is an effective way to lose weight. ● Weight Maintenance. Many experts believe that balancing caloric intake with Resting Metabolic Rate + Daily Activity Calories is an effective way to maintain weight. CardioCoach PRO User Manual | Page 52...
- Page 54 Test Quality Score CardioCoach PRO uses a unique algorithm to determine the quality of an RMR test. It scores how stable the breathing is, assures the client is in a resting state, and checks for over-breathing. The score ranges from 0 to 100.
- Page 55 ● Email Report. Send a PDF of results directly to client’s email. ● Attach Client. This button appears when an imported test does not match any client in the database and allows assigning the imported test to an existing client. CardioCoach PRO User Manual | Page 54...
-
Page 56: Browse Tests
Grouping. Locate all tests recorded under a particular grouping. o Trainer. Locate all tests performed by a particular trainer. o Location. Bring up all tests performed at a particular location. CardioCoach PRO User Manual | Page 55... -
Page 57: Compare Tests
1. Check the box next to the test results you wish to compare, as shown below. 2. Click the Compare Tests button at the bottom of the screen. A screen similar to the example below will display. You may need to scroll down to view all results. CardioCoach PRO User Manual | Page 56... -
Page 58: Accounts
Image (optional). A photo image of the client may be uploaded via the computer. To take a photo using your computer, simply: a. Select the Camera app on the Windows Start screen (NOT in the CardioCoach software). CardioCoach PRO User Manual | Page 57... -
Page 59: Edit Protocols
3. To delete a protocol, click on the protocol, then click the Delete button at the bottom of the protocol. 4. Clicking Cancel at any time while viewing or editing a protocol removes any changes made since the protocol was opened last. CardioCoach PRO User Manual | Page 58... -
Page 60: Utilize Published Protocols
You can change the incline, speed, incline, and/or duration of this stage. You can also enter a message. Click the Save button in the popup box to save your changes and return to the protocol screen. CardioCoach PRO User Manual | Page 59... -
Page 61: Create New Protocols
Incline Unit. Shown only when Treadmill is selected as the Equipment. Define the units of incline from the dropdown box. 4. Click the Save button. A screen similar to the following displays: CardioCoach PRO User Manual | Page 60... - Page 62 15. To a stage, click the trash icon to the right of the stage. 16. To edit a stage, click the pencil icon to the right of the stage. CardioCoach PRO User Manual | Page 61...
-
Page 63: Import/Export Protocols
1. Go to Edit Protocols and open the desired protocol. 2. From the bottom of the screen, click the Export button. 3. Select a location to save the protocol file. 4. Edit the name of the file if desired. Click Save. CardioCoach PRO User Manual | Page 62... -
Page 64: Help
Forms PARQ form. Physical Activity Readiness Questionnaire. This questionnaire is used to see if participants should check with their doctor before becoming much more physically active. CardioCoach PRO User Manual | Page 63... -
Page 65: App Registration
This option provides information about the CardioCoach software and devices in use. It may also be used to check app registration, send an error report to KORR, connect to a Heart Rate Device from a fitted heart rate monitor (if Bluetooth is enabled), or refresh the unit’s connection to the CardioCoach software. -
Page 66: Section 4 Quality Test Procedures
Section 4 Quality Test Procedures Test Quality Score A graded exercise test evaluates the subject’s fitness over a range of intensity levels. It is assumed that the intensity level will be increased at a reasonable rate and will cover a wide range of exercise intensity levels. A valid test includes measurements of VO , VCO and heart rate... -
Page 67: Maximum Versus Sub-Maximum Tests
Once the AT is detected, the test needs to continue for at least one test. more minute before stopping the test. Figure 2 demonstrates the relationship between the workload at the anaerobic threshold, maximum workload, and the ending workload in a sub-maximum effort test. CardioCoach PRO User Manual | Page 66... -
Page 68: Sample Testing Sequences
On average, the speed could be between four – seven mph. The following protocol provides a gradual heart rate increase that should provide optimal results. Time Speed Incline 1 minute 2.0 mph 2 minute 2.5 mph 3 minute 3.0 mph CardioCoach PRO User Manual | Page 67... -
Page 69: Cycle / Ergometer Test
Figure 3 shows a power increment test starting at 50 Watts and increasing at a rate of 25 Watts or 20 Watts every minute. This is the simplest way to perform a graded exercise test. CardioCoach PRO User Manual | Page 68... -
Page 70: Cycle Test, Manual Cycle
The CardioCoach test can be conducted on any piece of stationary equipment where you can control and monitor the cadence and workload during the test. Always remember the graded exercise test is designed to CardioCoach PRO User Manual | Page 69... -
Page 71: Consent
The test will automatically be saved onto the unit as long as it is ended successfully. • To retrieve the test from the CardioCoach unit, once the computer is up and running, contact KORR customer support at 1 (800) 895-4048 or (801) 483-2080 for assistance. Green Status Light Continues Flashing—USB Connection Note: If at any point during troubleshooting the green Status LED stops flashing, there is no need to continue troubleshooting. -
Page 72: Green Status Light Continues Flashing-Bluetooth Connection
PC/Tablet. Then try any of the following options (if desired, some options may be done simultaneously for quicker troubleshooting). If none of these options are successful, contract KORR. Ensure Bluetooth is Turned On. 1. Close the CardioCoach software. -
Page 73: Bluetooth Heart Rate Monitor Does Not Appear In Bluetooth Device List
1. Ensure your heart rate monitor is powered on and in range. 2. Ensure that Bluetooth devices are enumerated correctly: Done a. Wait until the word appears at the top of the list. CardioCoach PRO User Manual | Page 72... -
Page 74: Bluetooth Heart Rate Monitor Does Not Connect With Cardiocoach Software
4. f. Restart CardioCoach software and attempt to connect your heart rate device again. g. If device still does not appear, contact KORR. 4. Follow any troubleshooting steps in your heart rate monitor's user manual. 5. Follow instructions for... -
Page 75: Cardiocoach Indicates "Waiting" After Clicking "Start Test
Move away from other devices and/or shut off other devices to reduce interference. 7. If Bluetooth signal is unreliable at your location, it may necessary for you to use direct connection of heart rate pick up. KORR can provide a Polar coded heart rate pick up from www.korr.com/coded-heart- rate-pickup (KORR part number 9FG0190). -
Page 76: Error Messages
1. If applicable, ensure device heart rate monitor is powered on. 2. Ensure heart rate monitor is connected. Bluetooth Only: Connect the BLE Heart Rate Monitor via Bluetooth. This process needs to be repeated each time a test is started. CardioCoach PRO User Manual | Page 75... -
Page 77: Error Codes
CODE ERROR SOLUTION 1001 Flow port Remove hose, mask, or cap from the indicated port. obstructed. Unit beeps and flashes light above obstructed port. 1002 Flow port open Place cap on indicated port. CardioCoach PRO User Manual | Page 76... - Page 78 Barometric Cycle power on the unit. If error persists, contact Pressure Error. KORR at www.korr.com/support/service to arrange for service at the nearest KORR authorized service center. 1011 Relative Humidity Cycle power on the unit. If error persists, contact Error. KORR at www.korr.com/support/service...
- Page 79 1042 Oxygen sensor Allow unit to sit motionless for a time then try reading too high. running test again. If error persists, contact KORR at www.korr.com/support/service to arrange for service at the nearest KORR authorized service center. 1043...
- Page 80 ● If Bluetooth signal is unreliable at your location, it may necessary for you to use direct connection of heart rate pick up. KORR can provide a Polar coded heart rate pick up from www.korr.com/coded-heart- rate-pickup. KORR part number 9FG0190.
- Page 81 1055 Temperature Allow unit to reach room temperature, and then unstable. Unit’s restart the test. temperature reading has not stabilized during warmup period. 1056 New Oxygen No action necessary. sensor installed successfully CardioCoach PRO User Manual | Page 80...
-
Page 82: Section 5 Important Notes
Metabolism is the process of converting food into heat or energy. The rate with which the body converts food to energy is referred to as the metabolic rate. The most direct method of measuring metabolic rate is to measure CardioCoach PRO User Manual | Page 81... -
Page 83: Oxygen Consumption
CardioCoach, thereby eliminating the possibility of cross-contamination between users. When a mouthpiece is used, it is important to use a nose clip so that there is no leak through the nose and the CardioCoach analyzes all exhaled air. CardioCoach PRO User Manual | Page 82... -
Page 84: Calorie Calculation
AT. • Test duration of more than six minutes and less than 24 minutes. • Ventilation (volume of exhaled air) of at least 900 ml/Kg/minute at the time of AT detection. CardioCoach PRO User Manual | Page 83... -
Page 85: Zone Training
* If 105% AT is greater than 60% Max, Zone2 = 20% of (Max - AT) + AT Estimated Values CardioCoach PRO uses a number of estimated values within its results. Resting Metabolic Rate Results Calories Burned Through Exercise. If the client has not performed a Max test, this number must be estimated based on METS. - Page 86 Strenuous work (construction) (See Reference 3) Percent Body Fat CardioCoach PRO has the option of estimating body fat using the Cunningham equation. The Cunningham Equation uses the known factor of Resting Metabolic Rate to estimate Fat Mass. (See Reference 4)
-
Page 87: References
Extrapolated VO KORR uses an algorithm based on well-validated studies to calculate an extrapolated VO Max, when a Sub-Max test is performed. This algorithm utilizes both the trajectory of the heart rate measured during testing as well as age-predicted max to determine the predicted VO... -
Page 88: Warnings
Warning: Use of power sources not expressly recommended for this equipment may lead to overheating, fire, electrical shock or other hazards. Use only power sources provided by KORR Medical Technologies. Warning: CardioCoach should be operated on a hard, flat surface. -
Page 89: Section 6 Maintenance
3. To remove cover lock, grasp the vertical cover lock handle. Press in, and while pressing in, rotate the cover lock ¼ turn in a counterclockwise direction until the handle is horizontal (90 degrees to the left). CardioCoach PRO User Manual | Page 88... - Page 90 4. Pull the cover lock/spring assembly straight out of the back panel. 5. Locate the O Sensor Assembly. Grasp the stud on the O2 sensor and pull straight out of the housing. CardioCoach PRO User Manual | Page 89...
- Page 91 7. Push the O sensor assembly straight in until it comes to a stop. There will be a little resistance as the electrical contacts seat before the hard stop. CardioCoach PRO User Manual | Page 90...
- Page 92 Press in on the cover lock and then rotate ¼ turn in a clockwise direction until the handle is vertical (90 degrees to the right). Release the cover lock. CardioCoach PRO User Manual | Page 91...
-
Page 93: Cleaning And Storage
Masks and Y-valves These valves, such as those from Hans Rudolph, are heat sensitive to temperatures above 40 degrees C and are damaged by prolonged exposure to hypocholorite solutions. Dismantling, washing in hand-hot soapy water, CardioCoach PRO User Manual | Page 92... -
Page 94: Warranty Policy
TWO YEARS from the date of shipment. This warranty covers the repair or replacement, at KORR’s sole discretion, of the product or defective parts. KORR reserves the right, at its sole discretion, to perform warranty service at its factory, at an authorized repair station, or at the customer’s facility. -
Page 95: Service Policy
KORR; c) consequences caused by failure to follow KORR’s specific operating instructions; d) consequences caused by service performed by anyone other than a KORR representative or at a KORR authorized repair station;... -
Page 96: Appendix
Maximum Range 300 LPM (5000 ml/sec) Frequency Response > 12 Hz Sample Rate 60 Hz Dynamic Resistance < 2.0 cmH O @ 60 LPM Low Flow Drop Out 1.0 LPM Type Fixed Orifice CardioCoach PRO User Manual | Page 95... - Page 97 Maximum RH Value 90% non-condensing (absolute value) Operating Characteristics Accuracy ± 5% Relative Humidity Resolution 5% Relative Humidity Minimum Range 10% Relative Humidity Maximum Range 90% Relative Humidity Frequency Response < 10 sec 10-90 CardioCoach PRO User Manual | Page 96...
- Page 98 Minimum Range 10% O Maximum Range 30% O Tidal Volume Specifications Operating Characteristics Accuracy greater of ±5% of Reading or ±10 ml Resolution 1 ml Minimum Range 200 ml Maximum Range 4000 ml CardioCoach PRO User Manual | Page 97...
-
Page 99: Vco2 Specifications
10 min (typical) VCO2 Specifications Operating Characteristics Accuracy greater of ±10% Reading or ±10 ml/min CO Resolution 1 ml/min CO Minimum Range 70 ml/min CO Maximum Range 4000 ml/min CO FeCO2 Specifications Operating Characteristics CardioCoach PRO User Manual | Page 98... -
Page 100: Safety And Conformity Declaration
Equipment for Measurement, Control & Laboratory Use, including those for CE Mark. System meets the combined requirements for FCC and CE Mark: EN61326- 1:2013 - Electrical Equipment Measurement, Control, & Laboratory Use (normal environment). CardioCoach PRO User Manual | Page 99... -
Page 101: Normative Data For Vo Max
Table Reference: The Physical Fitness Specialist Certification Manual, The Cooper Institute for Aerobics Research, Dallas TX, revised 1997 printed in Advance Fitness Assessment & Exercise Prescription, 3rd Edition, Vivian H. Heyward, 1998. p48 CardioCoach PRO User Manual | Page 100... -
Page 102: Glossary Of Terms
The energy cost of an activity can be determined by dividing the relative oxygen cost of the activity (ml O2/kg/min) x by 3.5. (PubMed.gov) CardioCoach PRO User Manual | Page 101... - Page 103 - Volume of oxygen consumption, uptake, or utilization. Max - Maximal volume of oxygen consumption. Measured at the point of max exertion during a graded exercise test, which is a reflection of a client’s cardiorespiratory fitness level. CardioCoach PRO User Manual | Page 102...
-
Page 104: Forms
Commented [TR7]: This appears in some places but not in others Are we including it? • Participant Activity Readiness Questionnaire Commented [JK8R7]: It looks like we haveincluded it, so we might as well keep it! CardioCoach PRO User Manual | Page 103... - Page 105 Information other than what is requested is also greatly appreciated. Thank you in advance for your recommendations and support of this individual. __________________________________________________________________ __________________________________________________________________ Physician Signature____________________________________________________ Date___________________ Address_______________________________________________________ Phone_________________________ City and State___________________________________________________ Zip____________________ Please return Medical Clearance Form to: Fitness Center Address Phone CardioCoach PRO User Manual | Page 104...
- Page 106 SAMPLE MEDICAL RECORDS RELEASE AUTHORIZATION I give permission to release any medical information that may be beneficial for preparing an exercise program to the Fitness Center. Patient Signature: ______________________________________________ Date ___________________ Patient Name: _________________________________________________ CardioCoach PRO User Manual | Page 105...
- Page 107 I may be asked to see my doctor before participating. Date of Birth: ________________________ Age: _______________ Signature: ___________________________ Date: _______________ Print name: ___________________________ Witness Signature: _____________________________________ CardioCoach PRO User Manual | Page 106...
Need help?
Do you have a question about the CardioCoach PRO and is the answer not in the manual?
Questions and answers