Table of Contents
Advertisement
Advertisement
Table of Contents

Subscribe to Our Youtube Channel
Related Manuals for EKF Diagnostics Lactate Scout 4


Summary of Contents for EKF Diagnostics Lactate Scout 4
- Page 1 Lactate Scout Instruction manual...
- Page 3 SensLab GmbH SensLab GmbH Bautzner Str. 67, 04347 Leipzig Germany Part-No.: 7023-9014-0256 Version 1.1-11/2018 Sales and service: Lactate Scout 4 instruction manual EKF-diagnostic GmbH Ebendorfer Chaussee 3, 39179 Barleben Germany Service: +49 (0) 39 203 511 141 Email: support@ekf-diagnostic.de www.ekfdiagnostics.com...
-
Page 4: Table Of Contents
Contents Intended use, safety instructions and required accessories First steps Lactate Scout 4 measuring device Lactate Scout sensor Inserting the batteries Switching the device on and off Display Code setting for the sensors Performing a test Preparing for a test... - Page 5 3.1.4 Connecting to a heart rate monitor 3.1.5 Displaying information about the device Heart rate Functionality test Stopwatch Displaying stored values Battery level indicator Performing a step test Step test mode Heart rate during step tests Displaying the post-exertion period Data transfer Storage, cleaning and disposal Error messages and warning indicators...
-
Page 6: Intended Use, Safety Instructions And Required Accessories
0 Intended use, safety instructions and required accessories Intended use Safety instructions • The Lactate Scout 4 measuring system is PLEASE READ THE INSTRUCTION MANUAL designed to measure lactate concentration BEFORE USE AND KEEP IT IN A SAFE PLACE! in capillary blood in order to assess physical... - Page 7 - Cellulose cloths (paper tissues) - Clean water Make sure you only use the Lactate Scout 4 measuring system for the purpose specified in Please note that sterile lancets (we recom- the instruction manual.
-
Page 8: First Steps
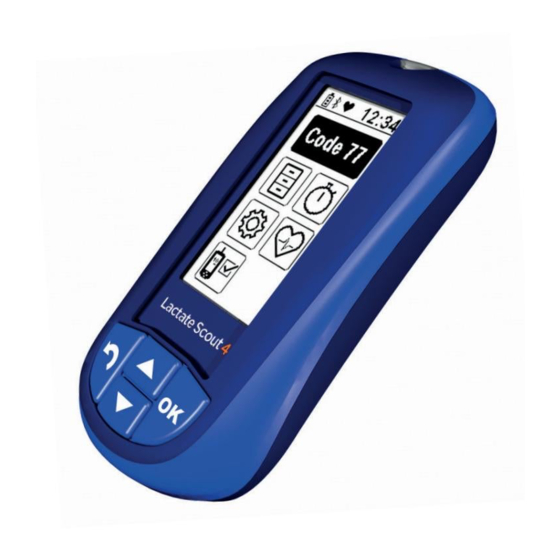
1 First steps 1.1 Lactate Scout 4 measuring device 1.2 Lactate Scout sensor Opening (1A) The sensor has an opening for the blood for inserting the sensor sample (2A). This opening is connected to Display (1B) for displaying when the device (2B) the measuring chamber. -
Page 9: Inserting The Batteries
1.3 Inserting the batteries The Lactate Scout 4 requires two CR2450 (3V lithium button cell) batteries. The device is supplied with batteries included. Firstly, remove both of the battery insulating strips The measuring device must be turned off to replace the batteries. Gently push the battery cover on the back outwards. -
Page 10: Switching The Device On And Off
1.4 Switching the device on and off 1.5 Display The Lactate Scout 4 has a configuration/ An information line will be displayed in both modes at the top of the display when the device display mode and a measuring mode, is switched on. -
Page 11: Code Setting For The Sensors
1.6 Code setting for the sensors A two-digit code must be entered when setting up the measuring device or when using sensors from a new sensor container; this code is printed on the label of the sensor container. Firstly, switch the configuration and display mode on. -
Page 12: Performing A Test
2 Performing a test 2.1 Preparing for a test The display will briefly show the code which is currently configured. A blinking drop Remove a sensor from the container. Make symbol will then be displayed to indicate sure you do not touch the opening for the that the measuring device is ready to take a blood sample . -
Page 13: Blood Collection And Test
Wipe away the first droplet of blood. Apply gentle pressure to the puncture site. The ATTENTION second droplet must be large enough to fill The sensor and the measuring device must the measurement chamber of the sensor be at the same temperature when performing in one go. - Page 14 ATTENTION The sensor must draw the blood in one go. The puncture site must therefore be kept steady when taking the sample. Failure to do so results in the risk of insufficient filling of the sensor. If performing lactate tests on third parties, move the measuring device with its inserted sensor to the droplet of blood on the fingertip or earlobe of the subject.
-
Page 15: Checking The Code Setting
2.3 Checking the code setting 2.4 Checking the ambient temperature The code is displayed briefly when you To ensure that equally reliable test results are switch measuring mode on . If more than achieved under different climatic conditions, 25 tests are performed with the same code, a the measuring device is equipped with a reminder to check the code will be displayed temperature sensor. -
Page 16: Settings, Functions And Displays
3 Settings, functions and displays Settings can be changed in configuration and Briefly press one of the two arrows to select display mode. In order to go to configuration a symbol. The selected symbol is displayed and display mode, there must not be a with a black background. -
Page 17: Device Settings
3.1 Device settings 3.1.1 Volume control If you choose the “Device settings” symbol If you choose the “Loudspeaker” symbol in the main menu and confirm your selection the “Device settings” menu and confirm your by pressing the OK button, you will be taken selection by pressing the OK button, you will to the device settings . -
Page 18: Date And Time Settings
3.1.2 Date and time settings If you choose the “Date and time settings” Once you have confirmed your selection, you symbol in the “Device settings” menu will then have the option to set the time. Set and confirm your selection by pressing the the hours and minutes using one of the two OK button, you will then have the option to arrow keys... -
Page 20: Switching The Bluetooth® Wireless Technology Function On And Off
You need to activate the Bluetooth® wireless technology function if you want to connect the Lactate Scout 4 to a heart rate monitor or if you want to transfer data to a PC, a tablet or a smartphone. When in the “Device settings”... -
Page 21: Connecting To A Heart Rate Monitor
3.1.4 Connecting to a heart rate monitor Activate the Bluetooth® wireless technology function. Each heart rate monitor (chest strap, armband, ear clip) must be registered in the measuring device: You will be taken to the sub-menu if you select the heart symbol in the “Device settings”... -
Page 22: Displaying Information About The Device
If the measuring device fails to find a heart rate monitor after a period of 10 seconds, an error message will appear Each time the Lactate Scout 4 is switched on, the measuring device will attempt to automatically connect to the registered heart rate monitor. -
Page 23: Heart Rate
3.2 Heart rate • Serial number of the measuring device • Firmware version of the measuring device If the measuring device is connected to a • MAC address of the Bluetooth® LE module heart rate monitor, the heart rate monitoring •... - Page 24 If you press any button, the heart rate display If an individual lactate test is performed while will be activated for another 10 seconds the heart rate is being recorded, or a lactate If the connection (temporarily) fails, then test is performed during a step test, then the the heart symbol will remain empty heart rate recorded in the minute prior to Heart rate values can be recorded for a...
-
Page 25: Functionality Test
3.3 Functionality test The functionality test is used to check the ATTENTION correct functioning of the Lactate Scout 4 measuring system. If there are any doubts Never bring the opening of the test regarding the accuracy of the test result or... - Page 26 Select the “Functionality test” sub-menu in configuration and display mode. Then select the concentration of your test solution . The measuring device will then ask you to insert a sensor . For testing purposes, the target value will be displayed with the measurement unit (mmol/L) in the symbol line.
- Page 27 Press out another droplet. Then move the measuring device with its inserted sensor to the droplet. Allow the droplet to fill the measurement chamber until the opening for the blood sample is immersed in the droplet. An acoustic signal will sound when this is successfully filled and the test will begin.
-
Page 28: Stopwatch
3.4 Stopwatch If you want to stop the stopwatch during the 10 minute interval, you can do so by briefly If you choose the “Stopwatch” symbol in the pressing the OK button. An acoustic signal will main menu by using one of the two arrow keys sound several times. -
Page 29: Displaying Stored Values
3.5 Displaying stored values 32B 32C If you choose the “Memory” symbol in the main menu by using one of the two arrow keys and confirm your selection by pressing the OK button, you will be taken to the stored values. The display will show the most recent lactate value (31A) -
Page 30: Battery Level Indicator
3.6 Battery level indicator If the batteries are fully discharged, the measuring device will no longer turn on. The battery level is monitored by the An error message will be displayed measuring device. The battery level is shown in the info line. There are three different display options available: - Batteries are full (33A) -
Page 31: Performing A Step Test
4 Performing a step test 4.1 Step test mode In addition to individual tests, the measuring device can also be used to perform step tests. In order to do so, all of the test results recorded during a step test will be stored in memory by the measuring device along with the relevant configured parameters. - Page 32 You can begin with any of the step test phases. However, you cannot change the order of the test step phases. As an example, pre-exertion cannot be selected after the exertion phase. The number of lactate values taken per step test phase corresponds to the number of measurements in that phase.
-
Page 33: Heart Rate During Step Tests
4.3 Displaying the post-exertion phase 4.2 Heart rate during step tests If a device is connected to an active heart During the post-exertion phase, the amount of rate monitor, the heart rate for each exertion time since the last test in the exertion phase is also displayed by the measuring device in level is displayed along with the lactate measuring mode... -
Page 34: Data Transfer
5 Data transfer The Lactate Scout 4 comes with a Bluetooth® LE module which can be used to wirelessly transfer the data stored on the measuring device. In order to retrieve the transferred data on your PC, you must have the “Lactate Scout Assistant”... -
Page 35: Storage, Cleaning And Disposal
6 Storage, cleaning and disposal The Lactate Scout 4 is an electronic measuring device and must be handled and WARNING stored with care. Used measuring devices carry a risk You must ensure the measuring device is of infection. protected against liquids, moisture, prolonged... -
Page 36: Error Messages And Warning Indicators
7 Error messages and warning indicators Display Description and potential causes Solution Sensor error Use a new sensor from a correctly stored container. Sensor damaged, improperly stored (outside of the container/in an open container, exposed to sunlight), or already used. Error when filling the sensor Repeat the test with a new sensor;... - Page 37 Change the batteries. The batteries are discharged or expired If the battery contacts are corroded, or there is possible corrosion of the please contact the Lactate Scout 4 battery contacts. service team. Test result too low Repeat the test with a new sensor.
- Page 38 Sensors were not stored correctly or have exceeded their expiry date. If the problem persists, please contact the Lactate Scout 4 service team. Electronic error Turn the device off and on again. inside the device.
- Page 39 Device fails to turn on, either in If the problem persists, please contact the configuration and display mode or in Lactate Scout 4 service team. standby mode. No droplet symbol displayed Measurement Insert sensor with the black contacts...
- Page 40 Intended puncture site was still wet Use the test solution to perform a after washing. functionality test. Please contact the Lactate Scout 4 service team if there is an error message.
- Page 41 Solution Slow update of the Slow update of the screen content screen content The Lactate Scout 4 uses an e-pa- per display. Please note that it may take some time for the display to update, depending on the ambient temperature. This is normal...
-
Page 42: Technical Specifications
8 Technical specifications Parameter Specification Type of device Lactate Scout 4 - hand-held device for measuring blood lactate Sample material Fresh capillary whole blood Sample volume 0.2 μL Measuring range 0.5 mmol/L - 25.0 mmol/L Hematocrit range (Hct) 20 - 70% Hct range 35 –... - Page 43 Parameter Specification Max. elevation for use up to 4,000 metres Data storage 500 lactate test values with date, time, heart rate and step test allocations, heart rate memory over 30 hours Data transfer via Bluetooth® LE v4.1 Power supply 2 x 3 V CR2450 (3V, lithium batteries, button cell batteries) Device dimensions 91 mm (L) x 46 mm (W) x 21 mm (H) Service life...
-
Page 44: Symbols
9 Symbols Labels on sensor containers, device labels, in accompanying documentation and on packaging Symbol Meaning In vitro diagnostic medical device Product meets the requirements of the applicable Directives Manufacturer Serial number Attention, consult accompanying documentation, observe safety instructions Biological risks Follow instructions for use Designed to be used once only Expiry date YYYY-MM... - Page 45 Symbol Meaning Sensor number Do not expose to direct solar radiation Protect against liquid Wireless data transfer with Bluetooth® wireless technology Device includes RF transmitter Direct current Used batteries must not be disposed of with household waste...
-
Page 46: Consumables And Accessories
10 Consumables and accessories The following accessories are available at EKF-diagnostic GmbH, at specialist retailers or online at www.ekfdiagnostics.com: Item Order No. BigPack 72+: 3 x 24 Lactate Scout Sensors in sensor containers 7023-3405-0846 BigPack 48+: 2 x 24 Lactate Scout Sensors in sensor containers 7023-3405-0727 BigPack 24+: 24 Lactate Scout Sensors in sensor container 7023-3405-1008... - Page 47 7023-7541-0195 PC Pack consists of: 7023-7542-0217 Dongle for PC for data transfer between Lactate Scout 4 and PC via Bluetooth® Low Energy functionality USB stick with “Lactate Scout Assistant” software for evaluation of lactate performance diagnostics (Windows 7 – 10)
- Page 48 7023-9014-0256 EN.1.1_LS4_Manual...
Need help?
Do you have a question about the Lactate Scout 4 and is the answer not in the manual?
Questions and answers