Advertisement
Quick Links
Advertisement

Related Manuals for Royal garden FWA19930

Summary of Contents for Royal garden FWA19930
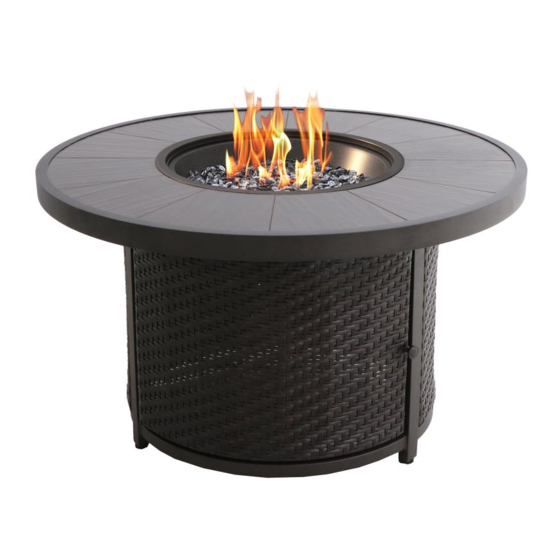
- Page 1 Assembly Instructions Product No. MLOFPT108 Model No. FWA19930 42” Tile Top Firepit Questions, problems, or missing parts? Before returning to the store, call Customer Service. 1-866-988-3300 8 a.m. - 5 p.m., PST Monday - Friday Retain this manual for future use.
-
Page 2: Table Of Contents
Contents Safety Instructions Parts List Assembly Cleaning & Maintenance Warranty IMPORTANT: RETAIN FOR FUTURE REFERENCE, AND READ CAREFULLY. MLOFPT108... -
Page 3: Safety Instructions
Safety Instructions BEFORE ASSEMBLY • Remove all parts and hardware from the box. Place all items on a carpeted or scratch-free work surface, as this will prevent damaging parts during assembly. • The shipping box provides an ideal work surface. •... - Page 4 Safety Instructions Model# FWA10155 Fire Pit Installer: Leave this manual with appliance. Consumer: Retain this manual for future reference. WARNING HOT! DO NOT TOUCH SEVERE BURNS MAY RESULT. CLOTHING IGNITION MAY RESULT. DANGER Glass and other surfaces are hot during operation and cool-down If you smell gas: •...
- Page 5 Safety Instructions Installer: Leave these instructions with consumer WARNING Consumer: Keep these instructions for future reference. Do NOT use this appliance if any part of it has This appliance is a Decorative Gas Appliance for OUTDOOR USE ONLY and MUST NOT be used been under water.
- Page 6 Gas Hookup & Information WARNING Fire Risk Explosion Risk. A. Fuel • Gas build-up during line purge may ignite. Before making gas connections, ensure the • Purge should be performed by qualified appliance being installed is compatible with the technician. available gas type.
- Page 7 Safety Instructions WARNING *Do not use this fire pit for cooking. *Do not burn any other materials than are supplied with and intended for use in this fire pit. *Do not pour water into fire pit. *The installation of this product must conform with local codes. *Do not use this fire pit if any part has been under water.
-
Page 8: Parts List
Parts List Table top - 1 M6x20φ24 Bolt & Washer - 3 Table base - 1 Wrench - 1 AAA Battery - 1 Cover - 1 Glass beads - 1 MLOFPT108... -
Page 9: Assembly
Assembly STEP 1 Requires: A, B, AA, BB Attach the Table Top (A) onto Table Base (B) by lining up the bolt holes. Insert M6x20 Bolts (AA) through the bolt holes on table base and into table top, loosely tighten the Bolts (AA) by hand. Fully tighten all bolts once they are in place. - Page 10 Assembly STEP 2 Requires: C, D 1) Place Glass Beads (D) into the burner. 2) Place Cover (C) onto burner. **KEEP GLASS BEADS away from Pilot Housing Screen.** **DO NOT place cover onto fire pit while hot.** Pilot Housing Burner Tube MLOFPT108...
- Page 11 Assembly STEP 3 1) Open access door. 2) Place LPG (Liquefied Petroleum Gas) tank into table base. 3) Secure table base to LPG tank by turning locking knob clockwise until it stops. MLOFPT108...
- Page 12 Assembly STEP 4 Connect Regulator Hose to LPG tank by turning knob clockwise until it stops. MLOFPT108...
- Page 13 Assembly STEP 5 Battery Assembly. Warning: Battery may contain mercury. Do not put battery into the fire or trash. Please treat battery as hazardous waste and recycle properly. MLOFPT108...
- Page 14 Assembly STEP 6 Open the LPG tank valve and turn on the control knob. Push and hold the ignitor to create spark with electrode. Turn the control knob to adjust flame to desired height. MLOFPT108...
- Page 15 Assembly STEP 7 Turn off control knob and close LPG tank valve when not in use. Once the unit cools down, place Cover (C) onto burner. MLOFPT108...
- Page 16 Safety Instructions FOR LIQUID PROPANE GAS UNITS *Do not attempt to disconnect the gas regulator or any gas fitting while your fire pit is in operation. *A dented or rusty liquid propane cylinder may be hazardous and should be checked by your gas supplier *Do not use a liquid propane cylinder with a damaged valve and any other worn out parts.
- Page 17 Safety Instructions 12. If igniter does not light burner : a. Wearing heat-resistant gloves, position a long lit match or long lit butane lighter near the pilot housing. Note: b. Push and turn control knob to on • Illustrations reflect typical installations and are c.
- Page 18 Troubleshooting Symptom Possible Causes Corrective Actions Check the LP (propane) tank. You may be No LP in tank. out of gas. Or check Natural Gas valve at main. Fire won’t light Check the burner orifice for stoppage. Plugged burner orifice. Remove stoppage.
- Page 19 Maintenance & Service Tasks Inspect Inspect Remove decorative glass and examine burner. Vacuum and wipeout as needed. Use caution when cleaning these areas. Inspect for warping and corrosion. Repair as necessary. Burner Assembly Check the hose connecting the LP gas cylinder to ensure it is not damaged. Replace as necessary.
-
Page 20: Cleaning & Maintenance
Cleaning & Maintenance • Dust often and use a vacuum cleaner crevice tool to clean between seams. • Keep furniture at least 60 cm / 2 ft from heat sources to avoid damage. • For best results, clean the frame with a damp cloth and dry thoroughly. This will help prevent mildew by removing dirt particles that may accumulate. -
Page 21: Warranty
Warranty Outdoor Furniture IMPORTANT If you have any problems with this product (missing or damaged parts, assembly issues, etc.), PLEASE DO NOT RETURN TO THE RETAILER/STORE from where you purchased the product. Please call our Toll-Free Customer Service Hotline at: 1-866-988-3300 To expedite any future warranty claims, please retain the instruction sheet, warranty card and receipt for future use. - Page 22 Warranty Outdoor Furniture 1-YEAR LIMITED WARRANTY PROGRAM For a period of one (1) year after date of purchase, the Manufacturer will either repair or replace defective components in accordance with this Limited Warranty. This warranty is between the Manufacturer and the original purchaser and is valid only when accompanied by the original purchaser’s sales receipt showing original date of purchase and location of purchase.
Need help?
Do you have a question about the FWA19930 and is the answer not in the manual?
Questions and answers