Table of Contents
Advertisement
Quick Links
Built-Under Freezer
Installation & User Instructions –
AB165
Please keep for future reference
Important
– Please read these instructions fully before installing or using
These instructions contain important information that will help you get the best from your
appliance, ensuring safe and correct installation, use and maintenance.
If you need help or have damaged or missing parts, call the Customer Helpline on 0845 600 4632
Issue 1 - 08/06/10
Advertisement
Table of Contents

Related Manuals for Bush AB165


Summary of Contents for Bush AB165
- Page 1 Built-Under Freezer Installation & User Instructions – AB165 Please keep for future reference Important – Please read these instructions fully before installing or using These instructions contain important information that will help you get the best from your appliance, ensuring safe and correct installation, use and maintenance.
-
Page 2: Table Of Contents
Installing the plinth Reversing the door User Instructions Recommendations Thermostat settings Display panel Food storage in the appliance Cleaning and maintenance General Defrosting the freezer Trouble Shooting Technical Specifi cations Tips for Saving Energy Product code AB165 Customer Helpline 0845 600 4632... -
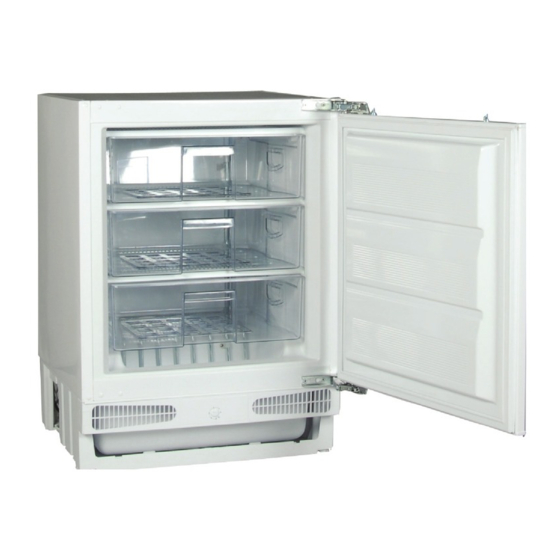
Page 3: Presentation And Description Of The Product
Presentation and Description of Product 1. Thermostat dial 2. Freezer drawers Customer Helpline 0845 600 4632... -
Page 4: Safety Information
Safety Information Important - Please read these instructions fully before installation IMPORTANT - Please read this booklet before WARNING - Do not connect the power supply installing and switching on this appliance. The with wet hands. manufacturer assumes no responsibility for WARNING - After installation, make sure that incorrect installation and usage as described in the power cable is not trapped underneath the... -
Page 5: Parts
Parts Please check you have all of the attaching parts listed below Installation kit contents A. Wood screw x17 B. Door hang C. Door Bottom Fixings x2 D. Hang cover E. Screw F. Top bracket Tools required Spirit level Screwdriver Setsquare Wrench Customer Helpline 0845 600 4632... -
Page 6: Installation
Installation Dimensions for installation Caution: 2 people are required to unpack and handle the freezer. It is recommended that gloves are worn. a: Carefully remove all packaging materials and dispose of correctly. b: Make sure that the space available for the freezer is large enough as per the dimensions (1). -
Page 7: Fitting The Door Gasket
Installation Fitting the door gasket a: Take out the gasket (G) located on the side panel, and remove the protective tape. b: Stick the gasket (G) on the freezer side panel, on the opposite side to the door hinges, as shown (3). -
Page 8: Position The Freezer
Installation Installation Installation Position the freezer Caution: The freezer may require 2 people Setsquare to handle it when pushing it into position. a: Check behind the freezer to make sure there are no tools or obstructions that may cause damage. b: Carefully slide the freezer into position until the hinge surface is aligned with the front surface of the kitchen unit. -
Page 9: Fitting The Cabinet Door
Installation Installation Installation Fitting the cabinet door a: Unscrew and remove the nuts and washers from the appliance door. b: Place door hang on the appliance door by inserting the holes to adjustment bolts. c: Dimension B= Measure from the underside surface of kitchen unit to the bottom of door hang.Dimension C= Measure from the underside surface of kitchen unit to the top of next unit... - Page 10 Installation h: Close the door and check the alignment with the other cabinet doors. i: Make the adjustment of the unit door by screwing or unscrewing the adjustment bolts for vertical adjustment and by the help of the slots on the door hang for other directions. j: Tighten the nuts to fi...
-
Page 11: Installing The Plinth
Installation Installation Installation m: Slide the hang cover (D) onto the door hang (B). Installing the plinth a: Position the plinth providing minimum 25 mm gap between the cabinet door and fi x it. Customer Helpline 0845 600 4632... -
Page 12: Reversing The Door
Installation Reversing the door a: Unscrew the screws on the front surface of the appliance door. Take the appliance door to a safe place. b: Move the hole plugs on the appliance door’s front surface, to the holes on the reverse side. c: Open the door upper hinge and door lower hinge, disassemble them. -
Page 13: User Instructions
User Instructions Recommendations Thermostat setting The freezer thermostat automatically regulates • Before switching on, place the appliance in an upright position and wait at least three the inside temperature of the compartments. By hours without moving the appliance. This will rotating the knob from positions 1 to 5, colder temperatures can be obtained. -
Page 14: Display Panel
User Instructions Display panel • After placing fresh food in the freezer, the 24 hours setting on the fast freeze function is Compressor Light: Lights orange when the generally suffi cient. After 24 hours, deactivate compressor is running. In SF mode, it will light the fast freeze function. -
Page 15: Cleaning And Maintenance
Cleaning and Maintenance General Defrosting the freezer After a period of time, frost will build up in certain • Do not pour water over the appliance. areas in the freezer compartment. The frost, • Clean the accessories separately with soap accumulated in the freezer, should be removed and water. -
Page 16: Trouble Shooting
Trouble Shooting If your freezer is not working properly there may be a minor problem, therefore check the Problem Possible Causes Possible Solutions The appliance does not operate There is a power failure The socket is defective. To check this, plug in a fully operable The mains plug is not properly appliance into the same socket plugged in,... -
Page 17: Technical Specifi Cations
Technical Specifi cations Model/Item AB165 Supplier’s name or trademark BUSH Supplier’s model AB170 Type of appliance BGSN1700DOD The energy effi ciency class Voltage 220-240V/50HZ Power 0,58A Energy consumption 0,41kwh/24h Net storage volume of fresh food 133 lt. Net storage volume of frozen food... -
Page 18: Tips For Saving Energy
Tips for Saving Energy 1. Install the appliance in a cool, well-ventilated room, but not in direct sunlight and not near a heat source (radiator, cooker etc.). Otherwise, use an insulating plate. 2. Allow food and drink to cool down outside of the appliance. - Page 19 Guarantee Product guarantee This product is guaranteed against manufacturing defects for a period of Year This product is guaranteed for twelve months from the date of original purchase. During this period, any defect that arises due to faulty materials or workmanship will be replaced, refunded or repaired free of charge where applicable by the dealer from whom the unit was purchased.
Need help?
Do you have a question about the AB165 and is the answer not in the manual?
Questions and answers