Table of Contents
Advertisement
Advertisement
Table of Contents

Related Manuals for Bush BIFF7030


Summary of Contents for Bush BIFF7030
- Page 1 B I F F 7 0 3 0...
-
Page 2: Table Of Contents
Contents Environmental note Important safety information 4 – 5 Specifications of your fridge freezer 6 - 9 Description of your fridge freezer Control panel Description of the product features Using your Viceroy combi fridge freezer 10-12 Before switching on During first use Switching on the appliance and setting the thermostat 11-12 Arranging and storing food in the fridge section 12-13... -
Page 3: Environmental Note
Environmental note Note : Before discarding an old appliance, switch off and disconnect it from the power supply. Cut off and render any plug useless. Cut the cable off directly behind the appliance to prevent misuse. This should be undertaken by a competent person. Disable the door lock to make sure that children cannot get stuck inside the appliance. -
Page 4: Important Safety Information
Important safety information Your safety is of the utmost importance to Viceroy. Please make sure that you re ad this instruction booklet before attempti ng to install or use the appli ance. If you are u nsure of any of th e information contained in this booklet, please contact the Viceroy Advice Line. - Page 5 Child safety o Packaging material should be kept away from children. o Children should not be allowed to touch the controls or play with the appliance. General safety o Do not pull on the power supply cable to rem ove the plug from your mains supply socket.
-
Page 6: Specifications Of Your Fridge Freezer
Specifications of your fridge freezer Dimensions of appliance Height: 1773 mm Width: 540 Depth: 544 Dimensions of aperture* Height: 1776 mm – 1782 mm Width: 560 Depth: 550 mm o Automatic defrost (fridge section only) o Adjustable thermostat o Egg rack o Butter compartment o Bottle rack o 3 General racks... -
Page 7: Description Of Your Fridge Freezer
IMPORTANT: When you install your appliance it is important to bear in mind its climatic rating. In order to find out the climatic rating of your appliance, you should check the rating plate. The rating plate is located on the front left edge of the inside of the fridge section. -
Page 8: Control Panel
Control panel A) Power indicator neon (green) B) Fridge thermostat dial C) Freezer temperature indicator (orange) D) Warning alarm neon (red) E) Warning alarm off button F) Super frost indicator neon (yellow) G) Super frost on/off button H) Freezer thermostat dial Power indicator neon (green) o This will light as s oon as the... -
Page 9: Description Of The Product Features
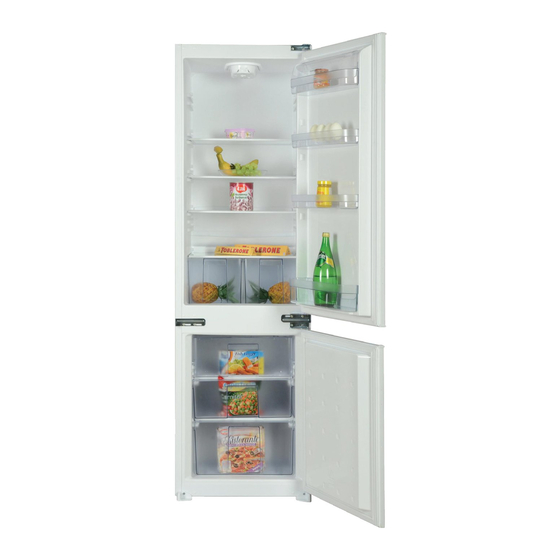
Description of the product features 1) Safety glass shelves o The shelves may be placed in an y of the guide sl ots within the interior of the appliance. They are protected from sliding out. o To remove a shelf : Take off all of the items that are stored on the shelf that you want to remove . -
Page 10: Using Your Viceroy Combi Fridge Freezer
Using your Viceroy combi fridge freezer Before switching on o Make sure that it has been installe d by a suitably qualified person, as per the information cont ained in Vic eroy’s installation instructions. o After delivery, wa it for ei ght hours before connecting the appliance to your mains supply. -
Page 11: Switching On The Appliance And Setting The Thermostat
Switching on the appliance and setting the thermostat You switc h on your applianc e by co nnecting it to your mains supply and setting the thermostat. The ther mostat dials are located on the control panel, which can be found at the top of the fridge freezer. o The ther mostat automatica lly regula tes the temperature inside the fridge freezer, dependi ng on which setting you have turned the thermostat control dials to. -
Page 12: Arranging And Storing Food In The Fridge Section
o If the thermostat dials are set to a higher se tting (shown o pposite), your fr idge and fr eezer sections will work harder to maintain a lowe r temperature. There is no need to run yo ur appliance on the higher settings and the dials should be set in the position shown on the previous page. -
Page 13: The Freezer Compartment
(Meat should only be stored in this manner for one or two days at the most). o Cold dishes/cooked food should be covered and can be placed on any shelf. o Fruit and vegetables should be cleaned thoroughly and placed in the salad drawers. -
Page 14: Freezing Fresh Food
Freezing fresh food o To freez e the maximum qu antity of fresh food specified on the rating pl ate, you should follow the “Freezing using the super frost setting” secti on on page 15, a few hours prior to freezing. o For smaller quantities of fres h food, you should follow the “Freezing using the super frost setting”... -
Page 15: Tips On Freezing
Tips on freezing o Freezer b ags, polythene wraps, al uminium foil (extra thick) and special ca ns for frozen foods ar e suitable packaging for storing frozen goods in. o Tape, rubber bands or pl astic clips are suitable for sealing bags and wrappings. o Before sealing a suitab le bag, you should compress the air out of it, as this will help the food to freeze more easily. -
Page 16: Warning Alarm
o Press the super frost on/off butt on a nd the freezer will start to run continuously at its maximum setting. o The yellow super frost indicator neon will light when the super frost on/off button has been switched on. o There is no need to adjust either of the thermostat dials. -
Page 17: Saving Energy When Using Your Fridge-Freezer
o If the recorded temperatur e in either section goes a bove the temperature that you have set on the ther mostat di als, th e warning alarm neon (red) will light. o There will also be an audible wa rning signal, to make you aware that the sensors have sensed a temperature rise. -
Page 18: Cleaning And Maintenance
o Do not set the thermostat too low. A change of just one degree can effect the energy consumption by 5%. Use a thermometer to check the temperature. o The freezer compartment should operate at -15 to -18 degrees Celsius. The refrigerator should operate at around 3 to 4 degrees Celsius. -
Page 19: The Defrost Drain Hole
o Clean the accessori es separately with soap and water. Do not clean them in a dishwasher. o Do not use abrasive products, detergents or soaps. o After washing the appliance, wipe ov er the area that y ou have cleaned with a damp cloth and then dry it thoroughly. - Page 20 o IMPORTANT: It is normal to get some ice droplets forming on the back wall of the appliance. The formation of ice droplets does not indicate an appliance fault. Defrosting the freezer compartment The frost in the freezer compartmen t should be removed periodically. You can use a plastic scrap er to keep down the amount of frost that builds.
- Page 21 o Your appl iance is fitted wit h a defrost drainage tube. T herefore you should pull out the bottom drawer ( A) and place it on the floor in front of the appliance. o The defrost draina ge tube ( B) is located on the back wall of the freezer.
-
Page 22: Replacing The Light Bulb
Replacing the light bulb WARNING: PLEASE ENSURE THAT YOUR APPLIANCE IS DISCONNECTED FROM YOUR MAINS SUPPLY BEFORE ATTEMPTING TO REPLACE THE LIGHT BULB. o There is an interior light in the top of the refrigerator section. o Remove t he bulb housing cover, by g ently pulling the clip away from its slot. -
Page 23: Installation
Installation IMPORTANT: Before installation and usage read all the instructions and make sure that the voltage (V) and the frequency (Hz) indicated on the rating plate are exactly the same as the voltage and frequency in your home. The rating plate can be found on the front left edge of the inside of the refrigerator. -
Page 24: Positioning
o When the connection is completed, no stray strands or cut wire should be present. The cord cl amp must be secured over the outer sheath. Positioning o It is advisable that your appliance is only installed in a location where the ambient temper ature of the room, corre sponds with the climate classification that is stated on the rating plate of your appliance. -
Page 25: Reversing The Doors Of Your Appliance
Reversing the doors of your appliance The doors of your fridge freezer can be set to open from the left or the right. If you want the doors to be hinged on the left hand side and opening from the right hand side, you will need to follow the door reversal process. - Page 26 Remove the hinge cover by lifting it off from the positi on shown in the photo opposite. Unscrew the two screws a nd then remove the top hinge. d) Remove the refrigerator door by lifting it upwards and away from the middle hinge.
- Page 27 e) Unscrew the two screws and remove the central hinge. f) Remove the freezer door by lifting it upwa rds and away from the lower hinge. g) Unscrew the two screws and remove the lowe hinge.
- Page 28 h) Refit the lower hinge on the opposite side. o IMPORTANT: The position of the hinge pin must be changed from the right hole to the left hole (correct position shown in the photograph opposite). i) Remove the screw cap by using the bladed screwdriver.
- Page 29 k) Refit the freezer door. o Reinstall the middle door hinge on the opposite side from its original position. o IMPORTANT: The hinge pin should be fixed in the position shown in the photograph opposite. l) Refit the refrigerator door and install the new door hinge bracket (part of the fixing kit).
- Page 30 m) Refit the upper support bracket. IMPORTANT: Check that both the upper and lower doors open and shut correctly, without fouling, after you have completed the door reversal process. After the door has been reversed, you should check the door seal of the fridge and freezer door. Neither seal should be creased or crushed;...
-
Page 31: Aperture Dimensions And Ventilation Requirements
o If either seal is not adhering to the cabinet properly, then you should either:- 1. Use a wa rm damp cloth and ma nipulate the seal until it does adhere to the cabinet properly, all the way around the door. 2. - Page 32 2) The heig ht of the aperture needs to be exactly 1780 o If necess ary, you should utilise extra filler shelves to fill any additional space that you have in the aperture. 3) IMPORTANT: The appliance aperture MUST have minimum of 200 cm²...
-
Page 33: Installing Your Fridge Freezer
Installing your fridge freezer a) Install the appliance towards the left hand side of the housing unit, leaving a gap of approximately 5 mm. b) Fix the appliance to the top shelf of the housing unit. o IMPORTANT: This will help to keep the appliance vertically parallel with the décor doors. - Page 34 f) Remove the screw caps and the screw. g) Fix the bracket that is suppli ed with the fixing kit into position. h) Fix the flat bracket that is supplied with the fixing kit, on the opposite side of the appliance.
- Page 35 i) The flat bracket can be inserted behind the central hinge without taking the hinge apart. o This can be done by loosening the middle screw, which can be found behind the screw cap. o Once the flat bracket has be en inserted behind the central hinge, the middle screw must be fully retightened.
-
Page 36: Troubleshooting
Troubleshooting IMPORTANT: If your fridge freezer appears not to be operating properly, before contacting the Viceroy Advice Line, please refer to the checklist below. fridge freezer does appear working/there is no power to my appliance. o Check that the plug is fully inserted into the power socket. o Check that there is power to yo ur mains supply (e.g. - Page 37 Ice has formed on the inner back wall of my fridge o Check that food has not been pu shed too far back inside the appliance, so that it is in contact with the inner back wall. o IMPORTANT: It is normal to get some ice droplets forming on the back wall of the appliance.
Need help?
Do you have a question about the BIFF7030 and is the answer not in the manual?
Questions and answers