Table of Contents
Advertisement
Available languages
Available languages
ANTIGUA 48
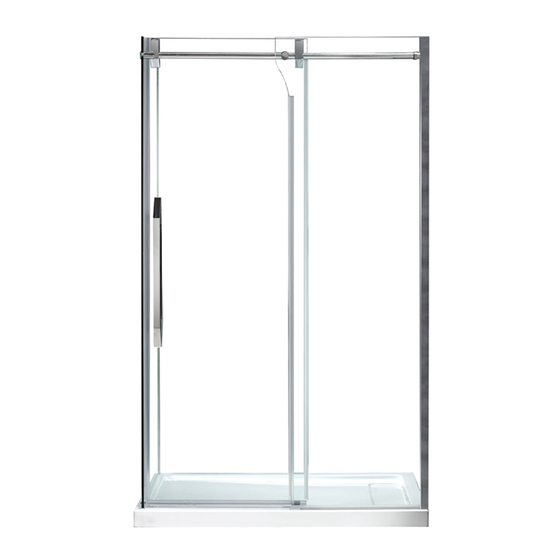
Measures: millimeter [inch]
Opening
470
[18 1/2]
2000
[78 3/4]
CSA Markings
Purchase date: _________________________
Product Tracking Reference: ________________________
Questions, problems, missing parts?
Before returning to your retailer, call our customer service department at
1-866-839-2888, 9 a.m. - 5 p.m., EST, Monday - Friday
2800 Etienne Lenoir, Laval
2015-05-18
1
Quebec H7R 0A3 Canada
Advertisement
Chapters
Table of Contents

Related Manuals for OVE ANTIGUA 48


Summary of Contents for OVE ANTIGUA 48
- Page 1 ANTIGUA 48 Measures: millimeter [inch] Opening [18 1/2] 2000 [78 3/4] CSA Markings Purchase date: _________________________ Product Tracking Reference: ________________________ Questions, problems, missing parts? Before returning to your retailer, call our customer service department at 1-866-839-2888, 9 a.m. - 5 p.m., EST, Monday - Friday...
-
Page 2: Table Of Contents
TABLE OF CONTENT PACKAGE CONTENT............................4 HARDWARE CONTENT............................5 TOOLS REQUIRED............................. 5 SAFETY INFORMATION............................. 6 PREPARATION..............................6 SHOWER REVERSIBILITY..........................7 WALL TO WALL MEASURES..........................7 BASE INSTALLATION GUIDELINES (OPTIONAL).................... 8 WALL TRACK INSTALLATION........................... 9 FIXED PANEL AND SUPPORT BAR INSTALLATION..................10 DOOR PANEL INSTALLATION......................... - Page 3 PACKAGE CONTENT...
-
Page 4: Package Content
PACKAGE CONTENT PART# DESCRIPTION CODE Wall track 99STR2020-WM Fixed panel 99SG10049-WM Support bar’s anchor 99SGC0038-WM Shower door stopper 99SDS0008-WM Support bar 99SGS0024-WM Fixed panel’s bracket 99SGC0039-WM Door roller 99SWE0021-WM Door panel 99SGD0034-WM Door handle 99SHA1034-WM Fixed panel’s bottom seal strip 99SRU0131 Door bottom seal strip 99SRU0132... -
Page 5: Hardware Content
HARDWARE CONTENT Wall Anchor Screw Screw Screw ø8x30mm ST5x30mm ST4x20mm ST4x12mm Screw Fitting ST5x40mm TOOLS REQUIRED Drill with ceramic tile bits Pencil Screwdriver Level ø3mm (1/8in) & ø8mm (5/16in) Measuring Tape Silicone Rubber mallet Cutter Allen key Safety glasses 2mm & 2.5mm & 4mm & 5mm 5mm Bit socket... -
Page 6: Safety Information
SAFETY INFORMATION Please read and understand this entire manual before attempting to assemble, operate or install the product. Handle the tempered glass with caution! Improperly handling the glass can cause it to break suddenly in small pieces (never in pointed fragments). Dot NOT put glass panels on hard surfaces, always work on clean and soft surface (e.g. -
Page 7: Shower Reversibility
SHOWER REVERSIBILITY • This instruction is drawn up for an opening from right to left (see illustration B). • For an installation from left to right (see illustration A), use the same instructions, but switch around the panels: mirror effect. Install the shower head on the door’s side! This will reduce the risk of leaking. -
Page 8: Base Installation Guidelines (Optional)
BASE INSTALLATION GUIDELINES (OPTIONAL) Studs Tile Wall Shower Base Drywall Cement Silicone Floor Shower Base Wood shim Flange Stud Drywall Silicone... -
Page 9: Wall Track Installation
WALL TRACK INSTALLATION 1. Ensure the base and wall are leveled. Place the metal track (B) approximately 24mm (15/16in) from the edge of the base to the center of the metal track. Ensure the metal track (B) is leveled, then mark the holes clearly on the wall. -
Page 10: Fixed Panel And Support Bar Installation
FIXED PANEL AND SUPPORT BAR INSTALLATION 1. Insert the fixed panel’s bottom seal strip (N) at the base of the fixed panel (C). With a cutter, cut the surplus to adequate size. 2. Insert the fixed panel (C) into the metal track (B). Do not fully tighten it as further adjustments may be required. Note: The wall track (B) allows you to adjust the position of the fixed panel (C). - Page 11 FIXED PANEL AND SUPPORT BAR INSTALLATION 1-2. Place the support bar (F) in order to align the bracket (G) in front of the the fixed panel’s hole. Position the support bar in so that distance A and B are the same. Mark the outline of the 2 support bar’s anchors (D) on the wall. 3-4.
- Page 12 FIXED PANEL AND SUPPORT BAR INSTALLATION 1. Place the 2 support bar’s anchors (D) back on their wall mark, then mark their center on the wall. 2-4. Drill a hole on the center marks with a ø8mm (5/16in) drill bit and insert the wall anchors (AA) using a rubber mallet.
-
Page 13: Door Panel Installation
DOOR PANEL INSTALLATION 1. Insert the door bottom seal strip (O) onto the door panel (J). 2-3. Install the door panel by its 2 rollers (H) on the support bar (F) and make sure to place the bottom of the door inside the guide (Q). - Page 14 DOOR PANEL INSTALLATION 1. Remove the cover of the rollers (H) and Loose the screws a little bit. 2. Adjust the level of the glass panel using the eccentric mechanism of the rollers. 3. Tighten the screws and install the cover of the rollers (H). 4-5.
-
Page 15: Handle Installation & Sealing
HANDLE INSTALLATION & SEALING 1. Install the door handle (M) on both sides using Allen keys. 2. Ensure that the door closes tightly and opens smoothly, and that there is a tight connection between the side glass panels and the frame as well as the support bar. Apply a clear silicone water sealant around the outside perimeter of any fixed shower components (horizontally between bottom of fixed side glass panel and base, as well as vertically between the wall, glass frames, and any side glass panel). -
Page 16: Care And Maintenance
CARE AND MAINTENANCE For the daily maintenance, use a wet cloth and a soft liquid cleaner. Never use abrasive cleaners containing some acetone, chlorine or strong bleach, scrapers, metallic brushes, nor other objects or the products which can graze or tarnish surfaces. Use a ratchet to strongly tighten any bolts used to support the fixed glass panels or doors panel (support bolts can withstand up to 250 lbf*in of torque). - Page 17 ANTIGUA 48 Mesures: millimètres [pouces] Ouverture [18 1/2] 2000 [78 3/4] Marques CSA Date de l’achat: _______________________ Numéro de référence du produit: ______________________ Questions, problèmes ou pièces manquantes? Avant de retourner le produit à votre détaillant, contactez notre service à la clientèle au 1-866-839-2888, du lundi au vendredi de 9h00 à...
- Page 18 TABLE DES MATIÈRES CONTENU DE L’EMBALLAGE ......................... 20 QUINCAILLERIE FOURNIE ..........................21 OUTILS REQUIS ............................... 21 INFORMATION SUR LA SÉCURITÉ ......................... 22 PRÉPARATION ..............................22 CETTE DOUCHE EST RÉVERSIBLE ....................... 23 MESURES MUR À MUR............................ 23 GUIDE D’INSTALLATION DE LA BASE (OPTIONNEL) ................. 24 INSTALLATION DES RAILS MURAUX ......................
- Page 19 CONTENU DE L’EMBALLAGE...
-
Page 20: Contenu De L'emballage
CONTENU DE L’EMBALLAGE DESCRIPTION CODE QUANTITÉ # DE PIÈCE Rail mural 99STR2020-WM Panneau fixe 99SG10049-WM Ancrages pour barre de support 99SGC0038-WM Buttées pour roues 99SDS0008-WM Barre de support 99SGS0024-WM Raccords pour panneau fixe 99SGC0039-WM Roues de la porte 99SWE0021-WM Panneau de la porte 99SGD0034-WM Poignée de la porte 99SHA1034-WM... -
Page 21: Quincaillerie Fournie
QUINCAILLERIE FOURNIE Ancrage mural ø8x30mm ST5x30mm ST4x20mm ST4x12mm Capuchon Raccords Capuchon ST5x40mm OUTILS REQUIS Perceuse avec foret à ceramique Crayon Tournevis Niveau ø3mm (1/8po) & ø8mm (5/16po) Ruban à mesurer Silicone Maillet en caoutchouc Exacto Clé Allen Clé à rochet Lunettes de Sécurité... -
Page 22: Information Sur La Sécurité
INFORMATION SUR LA SÉCURITÉ S.v.p. lire et comprendre complètement le manuel avant de tenter d’assembler, d’installer et d’utiliser le produit. Manipulez le verre trempé avec précaution sinon il pourrait se briser en petits morceaux (jamais en fragments pointus). Ne PAS poser les panneaux de verres sur des surfaces dures, toujours travailler sur des surfaces propres et souples (ex: tapis). -
Page 23: Cette Douche Est Réversible
CETTE DOUCHE EST RÉVERSIBLE • Utilisez ces instructions pour une ouverture de la porte de droite à gauche (illustration B). • Pour une installation de gauche à droite (illustration A), suivez ces mêmes instructions mais permutez l’emplacement des panneaux: effet miroir. Installez le pommeau de douche du côté... -
Page 24: Guide D'installation De La Base (Optionnel)
GUIDE D’INSTALLATION DE LA BASE (OPTIONNEL) Montant mural Mur de tuiles Base de douche Placoplâtre Ciment Silicone Plancher Base de douche Cale en bois Bride Montant mural Placoplâtre Silicone... -
Page 25: Installation Des Rails Muraux
INSTALLATION DU RAIL MURAL 1. S’assurer que la base et les murs soient à niveau. Placez le rail mural (B) approximativement à 24mm (15/16po) du bord de la base jusqu’au centre du rail. S’assurer que le rail mural (B) soit à niveau, ensuite marquez les trous clairement sur le mur. -
Page 26: Installation Du Panneau Fixe Et De La Barre De Soutien
INSTALLATION DU PANNEAU FIXE ET DE LA BARRE DE SOUTIEN 1. Insérez le joint d’étanchéité du panneau fixe (N) à la base du panneau fixe (C). Couper la partie en surplus à la grandeur adéquate avec un exacto. 2. Insérez le panneau fixe (C) dans le rail (B). Ne pas serrer trop fortement car vous pourriez apporter de futurs ajustements. - Page 27 INSTALLATION DU PANNEAU FIXE ET DE LA BARRE DE SOUTIEN 1-2. Assurez-vous que la position de A et B soient à la même distance. Marquez le contour des 2 ancrages (D) sur le mur. 3-4. Complètement retirer la barre de support (F) et le panneau fixe (C). 5.
- Page 28 INSTALLATION DU PANNEAU FIXE ET DE LA BARRE DE SOUTIEN 1. Placez les 2 ancrages (D) aux endroits marqués et marquez leur centre sur le mur. 2-4. Percez un trou à la marque du centre avec un foret ø8mm (5/16po). Insérez les ancrages (AA) avec un maillet. Fixez les ancrages (D) au mur avec les vis (GG).
-
Page 29: Installation De La Porte
INSTALLATION DE LA PORTE 1. Insérez le joint d’étanchéité (O) au bas de la porte (J). 2-3. Installez la porte et ses deux roues (H) sur la barre de soutien (F) et assurez-vous que le bas de la porte soit positionné à l’intérieur du guide (Q). 4-5. - Page 30 INSTALLATION DE LA PORTE 1. Enlevez la partie supérieure des roues (H) et desserrez légèrement les vis. 2. Ajustez le niveau du panneau de verre en utilisant le mécanisme des roulettes. 3. Serrez les vis et remettez la partie supérieure des roues (H). 4-5.
-
Page 31: Installation De La Poignée Et Scellage
INSTALLATION DE LA POIGNÉE ET SCELLAGE 1. Installer la poignée (M) en utilisant une clé Allen. 2. Assurez-vous que la porte se ferme hermétiquement et s’ouvre doucement, et que le châssis et la barre de support sont étroitement fixés aux panneaux de verre. Appliquez un scellant étanche à... -
Page 32: Traitement Et Entretien
TRAITEMENT ET ENTRETIEN Utilisez un chiffon mouillé et un nettoyant liquide doux pour l’entretien quotidien. N’utilisez jamais de nettoyants abrasifs contenant de l’acétone, du chlore ou du javellisant puissant, et évitez les grattoirs, les brosses métalliques et tout autre objet ou produit pouvant érafler ou ternir les surfaces. Utilisez la clé... - Page 33 ANTIGUA 48 Medidas: milímetros [pulgadas] Apertura [18 1/2] 2000 [78 3/4] Marca CSA Fecha de compra: ___________________ Seguimiento y referencia del producto:___________________ Preguntas, problemas, piezas faltantes? Antes de volver a la tienda, llame a nuestro departamento de servicio al cliente al 1-866-839-2888, 9 am.
- Page 34 TABLA DE CONTENIDOS CONTENIDO DEL PAQUETE..........................36 CONTENIDO DE HARDWARE.......................... 37 HERRAMIENTAS NECESARIAS........................37 INFORMACIÓN DE SEGURIDAD........................38 PREPARACIÓN..............................38 REVERSIBILIDAD DE LA DUCHA........................39 DE PARED A PARED MEDIDAS........................39 GUÍA PARA LA INSTALACIÓN LA BASE (OPCIONAL)................... 40 INSTALACIÓN DEL RIEL DE LA PARED......................41 INSTALACIÓN DEL PANEL FIJO Y LA BARRA DE SOPORTE..............
- Page 35 CONTENIDO DEL PAQUETE...
-
Page 36: Contenido Del Paquete
CONTENIDO DEL PAQUETE DESCRIPCIÓN CÓDIO PARTE# CANTIDAD Riel de aluminio 99STR2020-WM Panel fijo 99SG10049-WM Anclaje de la barra de soporte 99SGC0038-WM Retenedor de los rodillos 99SDS0008-WM Barra de soporte 99SGS0024-WM Abrazaderas fijas de panel 99SGC0039-WM Rodillos de la puerta 99SWE0021-WM Puerta de la ducha 99SGD0034-WM Manija de la puerta... -
Page 37: Contenido De Hardware
CONTENIDO DE HARDWARE Tarugo Tornillo Tornillo Tornillo ø8x30mm ST5x30mm ST4x20mm ST4x12mm Tornillo Capuchón Accesorio Capuchón ST5x40mm HERRAMIENTAS NECESARIAS Taladro con brocas para cerámica Lápiz Destornillador Nivel ø3mm (1/8pu) & ø8mm (5/16pu) Cinta medidora Silicona Mazo de goma Cuchilla Llave Allen Llave de trinquete Anteojos de seguridad 2mm &... -
Page 38: Información De Seguridad
INFORMACIÓN DE SEGURIDAD Lea y comprenda completamente este manual antes de intentar ensamblar, usar o instalar el producto. ¡Manipule el vidrio templado con precaución! Una manipulación inadecuada del vidrio puede ocasionar que se rompa. NO coloque los paneles sobre superficies duras; trabaje siempre una superficie limpia y blanda (por ejemplo, toallas). -
Page 39: Reversibilidad De La Ducha
REVERSIBILIDAD DE LA DUCHA • Estas instrucciones fueron elaboradas para una abertura de puerta de derecha a izquierda (ilustración B). • Para una abertura de izquierda a derecha (ilustración A), siga estas mismas instrucciones, pero cambie el lugar para la ubicación del riel: efecto espejo. ¡Instale la cabeza de la ducha hacia el lado de la puerta! Esto reducirá... -
Page 40: Guía Para La Instalación La Base (Opcional)
PAUTAS PARA LA INSTALACIÓN BASE (OPCIONAL) Soportes Pared de Plato de ducha Baldosas Tablaroca Cemento Silicona Piso Plato de ducha Madera cuñas Brida Soportes Tablaroca Silicona... -
Page 41: Instalación Del Riel De La Pared
INSTALACIÓN DEL RIEL DE LA PARED 1. Asegúrese de que la base y las paredes estén niveladas. Coloque el riel metálico (B) a aproximadamente 24mm (15/16pu) desde borde de la base hasta el centro del riel metálico. Asegúrese de que el riel metálico (B) esté... -
Page 42: Instalación Del Panel Fijo Y La Barra De Soporte
INSTALACIÓN DEL PANEL FIJO Y LA BARRA DE SOPORTE 1. Inserte la tira de sellado inferior (N) del panel fijo en la base del panel fijo (C). Corte la parte sobrante con una cuchilla a la longitud adecuada. 2. Inserte el panel fijo (C) en el riel metálico (B). No lo apriete completamente ya que se puede necesitar más ajustes. Nota: Los riel murales (B) le permiten ajustar la posición de los panel fijo (C). - Page 43 INSTALACIÓN DEL PANEL FIJO Y LA BARRA DE SOPORTE 1-2. Asegúrese de que la distancia A y B de las 2 posiciones sea la misma. Marque el contorno de los 2 anclajes (D) de la barra de soporte en la pared. 3-4.
- Page 44 INSTALACIÓN DEL PANEL FIJO Y LA BARRA DE SOPORTE 1. Vuelva a colocar los 2 anclajes (D) de la barra de soporte sobre su marca en la pared, luego marque su centro en la pared. 2-4. Perfore un agujero en las marcas centrales con una broca ø8mm (5/16pu). Inserte los tacos (AA) utilizando un mazo de caucho.
-
Page 45: Instalación Del Panel De La Puerta
INSTALACIÓN DEL PANEL DE LA PUERTA 1. Inserte la tira de sellado inferior (O) de la puerta ten el panel de vidrio de la puerta (J). 2-3. Instale el panel de la puerta con sus 2 rodillos (H) en la barra de soporte (F) y asegúrese de colocar la parte inferior de la puerta dentro de la (Q). - Page 46 INSTALACIÓN DEL PANEL DE LA PUERTA 1. Retire la pata de los rodillos (H) y suelte los tornillos un poco. 2. Ajuste el nivel del panel de vidrio utilizando el mecanismo excéntrico de los rodillos. 3. Apriete los tornillos e instale la tapa de los rodillos (H). 4-5.
-
Page 47: Instalación De La Manija Y Sellado
INSTALACIÓN DE LA MANIJA Y SELLADO 1. Instale la manija (M) de la puerta utilizando la llave Allen. 2. Asegúrese de que la puerta cierre firmemente y abra suavemente y que haya una conexión apretada entre el panel de vidrio y el riel al igual que con la barra se soporte Aplique silicona transparente resistente al agua alrededor del perímetro interno y externo de todos los componentes de la ducha (horizontalmente entre la parte inferior del panel de vidrio y la base, al igual que verticalmente (entre la pared, el riel y el panel de vidrio). -
Page 48: Cuidado Y Mantenimiento
MANTENIMIENTO Para mantenimiento diario, utilice un paño húmedo y un limpiador líquido suave. Nunca utilice abrasivos olimpiadores que contenga acetona, cloro o blanqueadores fuertes, espátulas o cepillos de cerdas metálicas, ni objetos o productos que puedan raspar o deslucir las superficies. Utilice un trinquete para apretar firmemente a cualquier pernos utilizados para soportar los paneles de vidrio fijos o panel de puertas (pernos de soporte pueden soportar hasta 250 lbf * in de torque).
Need help?
Do you have a question about the ANTIGUA 48 and is the answer not in the manual?
Questions and answers